
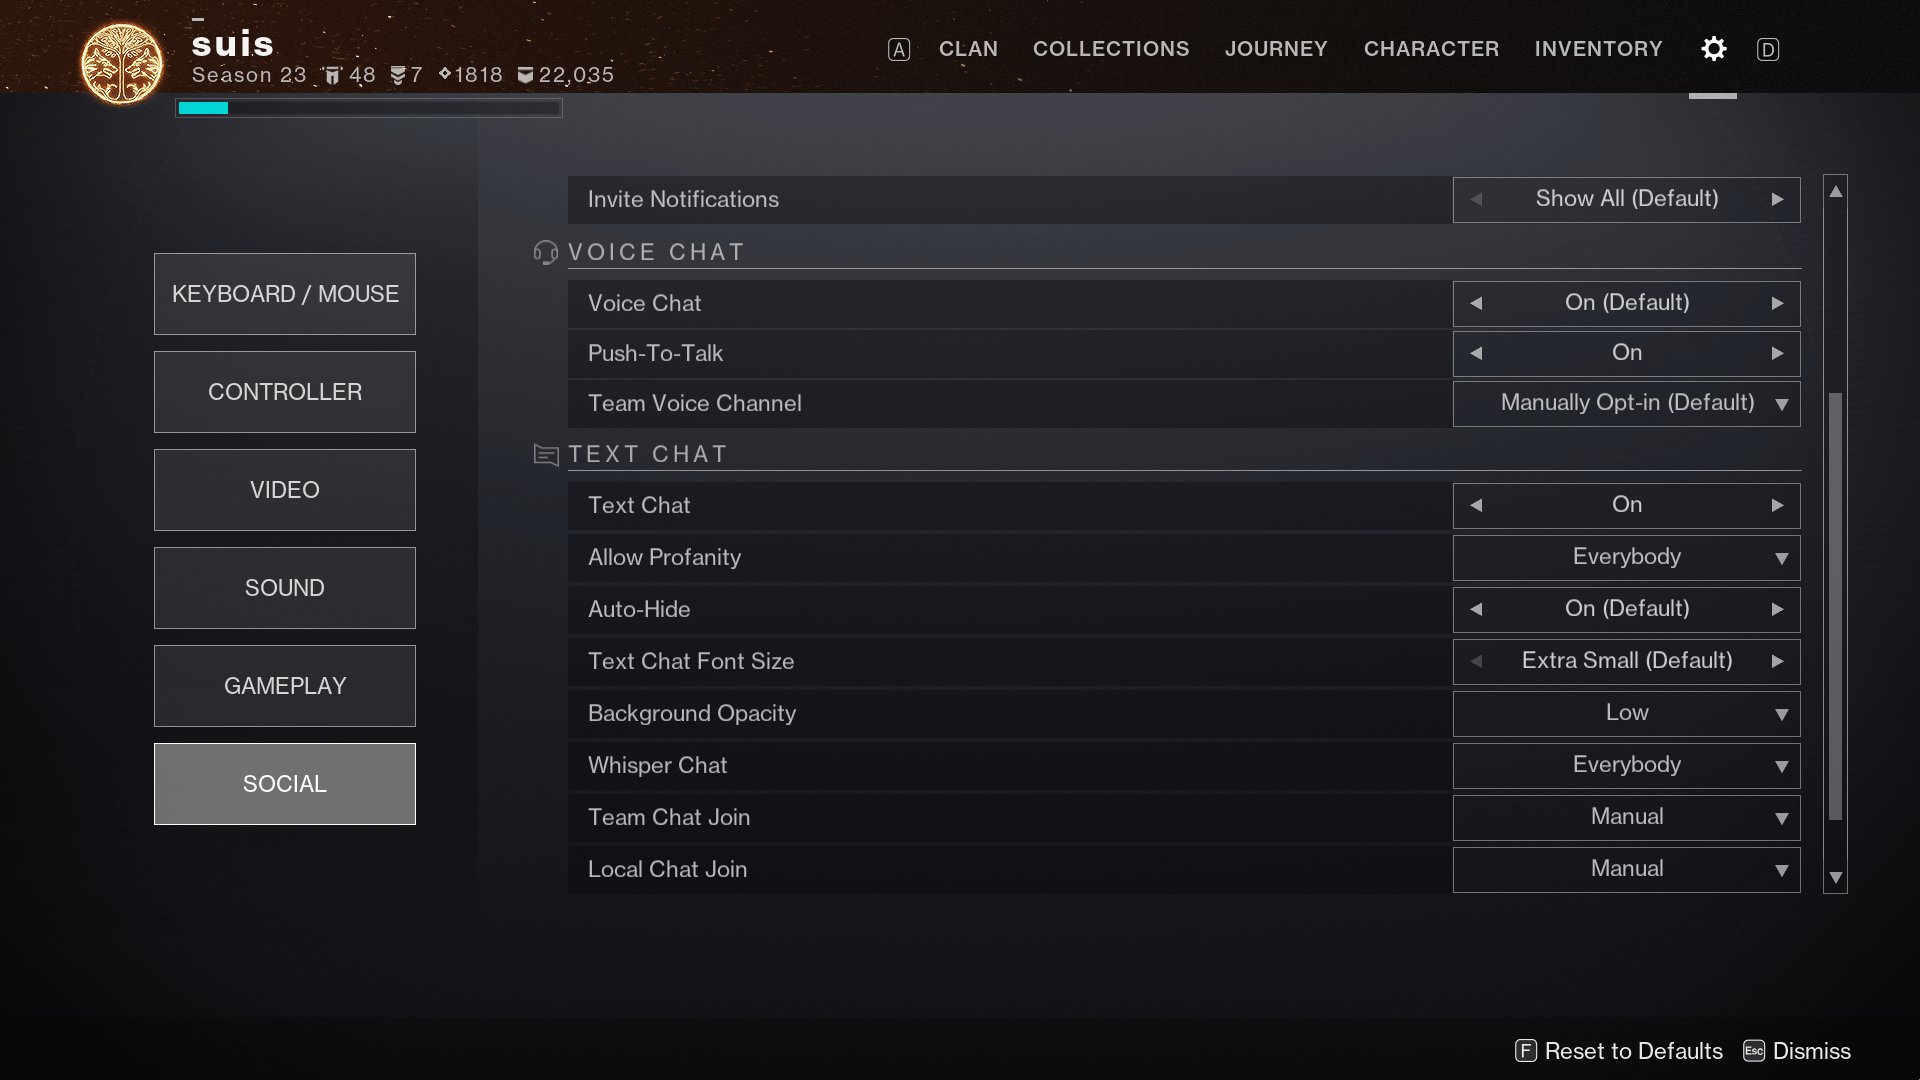
Try checking your in-game audio settings, verifying your microphone input is correctly selected, and ensure your PC’s sound output is set to your desired device. These steps often fix when you can’t hear game chat in Destiny 2 on PC.
Have you ever been in a crucial Destiny 2 strike, only to realize you can’t hear your fireteam? It’s frustrating when you can’t hear game chat destiny 2 pc. You’re not alone, this is an issue many players face.
This article will guide you through quick fixes. We will help you get back to coordinating with your squad instead of guessing what they’re saying, without wasting any more of your valuable game time.

Can’t Hear Game Chat Destiny 2 PC? Let’s Fix It!
So, you’re trying to team up with your buddies in Destiny 2 on your PC, but you can’t hear them talking? That’s super frustrating! It’s like trying to play soccer without being able to hear your teammates yell for the ball. Don’t worry; this is a pretty common problem, and we can figure out how to get your chat working again. We will explore all the common reasons why you might not hear your fireteam and provide easy-to-follow steps to get back into the action with crystal-clear communication.
Why Can’t I Hear Anyone in Destiny 2 Chat?
There are many reasons why your in-game voice chat isn’t working in Destiny 2. Think of it like a detective case; we need to check all the possibilities! It’s not always just one thing; sometimes, a couple of little issues combine to cause the problem. Here are the main suspects:
- Incorrect Audio Input/Output Settings: Your computer might be using the wrong microphone or speakers. It’s like trying to talk through a toy phone when you actually have a real one right there.
- In-Game Chat Settings: Destiny 2 has its own chat settings that you might need to tweak. Sometimes, it’s as simple as accidentally turning chat off!
- Windows Privacy Settings: Windows has privacy controls that might block games from using your microphone. Think of it like a gate that’s closed to keep things private, but in this case, it’s keeping you from talking to your friends.
- Outdated Audio Drivers: Old drivers for your sound card can cause problems. It’s like trying to drive a super fast car with really old tires – it just won’t work right.
- Hardware Issues: A bad microphone or headset can be the culprit. Sometimes, the equipment itself is the problem.
- Network Problems: Sometimes, it’s not your computer but your internet connection acting up. Think of it like bad phone reception; you can hear static or nothing at all.
Checking Your Basic Audio Settings
Before diving deep, let’s check the simple stuff first. This is like making sure your shoes are tied before you try to run a race.
Verify Your Default Audio Devices
Your computer needs to know which devices to use for sound. Let’s make sure it’s using the correct microphone and speakers (or headset).
- Right-click on the speaker icon in your system tray (usually in the bottom-right corner of your screen).
- Click on “Open Sound settings”.
- In the “Sound” window, you’ll see “Output” (speakers) and “Input” (microphone).
- Under “Output”, make sure your headset or speakers are selected. Click on it to choose it.
- Under “Input”, make sure your microphone is selected. Click on it to choose it.
- Test your microphone by speaking into it. You should see the input level bar move. If you don’t see any movement, make sure your microphone is properly plugged in and the settings are set right for your microphone.
Test Your Microphone
Now that you’ve picked your microphone, let’s make sure it’s actually working correctly. There’s a test feature built right into Windows.
- Go back to the “Sound” window.
- Scroll down to “Input” and make sure your microphone is still selected
- Look for “Test your microphone” and start the test. Speak into your microphone.
- If you can hear yourself clearly when the test plays back, your microphone is working. If you can’t hear yourself, go back to verifying your default device settings to ensure you picked the correct microphone.
Check Volume Levels
Sometimes, the volume on your microphone or speakers is just turned down too low. Make sure they are at a good level.
- In the “Sound” window, under “Input” and “Output” settings, ensure the volume sliders are at reasonable levels. Don’t have them on 0. If volume is too high, the sound can be distorted or you might get echo, reduce the volume for that situation.
- Also check if you have any hardware volume control on your headphones and make sure that isn’t turned down.
Delving into Destiny 2’s Chat Settings
Destiny 2 has its own set of voice chat settings. Let’s take a look at those to make sure everything is configured correctly.
Accessing In-Game Chat Settings
First, we need to get into the game settings. Here’s how:
- Launch Destiny 2.
- Go to the main menu.
- Click on “Settings” or “Options”.
- Go to the “Audio” section.
Adjusting Chat Preferences
Now, let’s get those chat settings right!
- Voice Chat Mode: Make sure it’s set to “On” or “Auto”. If it’s on “Off,” you won’t be able to hear anyone.
- Voice Chat Input Device: Double check if you see your microphone name in the drop-down. If it’s incorrect, choose the right microphone.
- Voice Chat Output Device: Confirm that your selected speakers or headset are shown here. Change it if it is incorrect.
- Voice Chat Volume: Adjust the volume slider to a comfortable level.
- Voice Chat Activation Mode: It should be set to “Open Mic” or “Push-to-Talk.” If you chose “Push-to-Talk,” make sure you know the key for activating your microphone. If you choose to use “Open Mic,” you might want to turn down your microphone input volume a little so that you don’t hear yourself so loud.
Testing Your Settings: After you adjust your settings, you can test your mic in your fireteam. Make sure you and your teammates can hear each other clearly.
Windows Privacy Settings and Microphone Access
Sometimes, Windows blocks apps from using your microphone for privacy. Let’s make sure Destiny 2 has permission to use your microphone. This is like giving your game the key to the microphone gate.
Allowing Microphone Access
Here’s how to grant Destiny 2 access:
- Press the Windows key, type “Microphone Privacy Settings” and press enter.
- Make sure “Microphone access for this device” is turned “On.”
- Scroll down until you find “Allow apps to access your microphone.” Make sure this is also set to “On.”
- Look for Destiny 2 in the list of apps, and make sure its microphone access is set to “On.” If you don’t see it in the list, it might not have requested access yet. Start Destiny 2, check microphone settings in game, and then come back to check privacy settings if needed.
After you complete this step, restart Destiny 2 to see if the changes have helped with your voice chat issue.
Updating Your Audio Drivers
Outdated audio drivers can cause all sorts of problems. Let’s make sure yours are up-to-date. It’s like making sure your car has the most current software updates.
How to Update Audio Drivers
Here are a few ways to update your audio drivers:
- Using Device Manager:
- Press the Windows key, type “Device Manager” and press enter.
- Find “Sound, video and game controllers” and click on the arrow to expand.
- Right-click on your sound card and select “Update driver”.
- Choose “Search automatically for drivers.” Windows will search for the latest drivers and install them for you.
- Downloading From the Manufacturer’s Website:
- Find out the brand and model number of your sound card.
- Go to the manufacturer’s website.
- Find the download section for drivers and choose your sound card model.
- Download the latest driver and install it.
After updating drivers, restart your computer. This ensures all the changes take effect. Then try playing the game and check the chat feature.
Troubleshooting Hardware Issues
Sometimes, the problem might be with your hardware itself. Let’s investigate that possibility.
Testing Your Microphone with Other Applications
Try using your microphone with other programs to check if it works correctly. Here are a few options:
- Discord or Other Voice Chat Apps: Use a voice chat app to test your microphone outside of Destiny 2. If it doesn’t work here either, the microphone might be the problem.
- Windows Voice Recorder: You can use the Windows Voice Recorder to record yourself. Listen to the recording to check the microphone’s audio quality. If you can’t record yourself, or the quality is bad, try a new microphone.
Testing a Different Microphone or Headset
If possible, try using a different microphone or headset with your computer. This helps determine if the problem is with your current hardware. If a different mic works, that means the problem lies with your current mic or headset.
Checking for Physical Damage
Take a close look at your microphone and headset. Check the cable for any frays or bends. Make sure everything is plugged in correctly and there isn’t anything loose.
Investigating Network Issues
Sometimes, the problem isn’t your computer; it’s your network connection. A weak or unstable connection can affect the voice chat feature in Destiny 2.
Checking Internet Connection
Make sure your internet is working correctly. Here’s how:
- Use an online speed test to check your download and upload speeds. If the speeds are much lower than you’re paying for, it may be causing issues.
- Restart your router and modem. Unplug them from the power for about 30 seconds, then plug them back in.
- Try a wired connection if you are using WiFi. A wired Ethernet connection is often more reliable than Wi-Fi.
Checking for Firewall or Antivirus Interference
Sometimes, firewalls or antivirus software can block game traffic, which can affect voice chat. Here’s how to check:
- Temporarily disable your firewall or antivirus software to see if this is the reason. If your voice chat starts working, add an exception for Destiny 2 to your firewall or antivirus settings.
Restarting Destiny 2 and Your Computer
Sometimes, simply restarting everything can solve the problem. Close Destiny 2 and restart your computer, after this try again to play the game and check the chat function.
Other possible fixes
There are still some things we can check that haven’t yet been mentioned.
- Make sure that the game is fully updated.
- Try to reinstall the game.
- Check if there are any pending Windows updates.
By checking and trying these steps, you should be able to find the source of your Destiny 2 voice chat problems and get back to communicating with your fireteam!
How to fix Destiny 2 voice chat on PC
Final Thoughts
Troubleshooting audio issues can feel frustrating. Several factors might cause “cant hear game chat destiny 2 pc,” like incorrect settings or driver problems. Checking your audio output device and Destiny 2’s audio configurations is essential.
Ensure voice chat is enabled and the correct microphone is selected within the game. External programs interfering with audio can also be a problem, so close them if possible.
Remember to update audio drivers, as outdated software frequently leads to sound issues. If you still “cant hear game chat destiny 2 pc”, examine hardware components and your network connection.

