Adding DS games to a modded 3DS requires converting your DS game ROM files into .nds files and then placing them onto your 3DS SD card using a file explorer on your PC, ensuring you have a compatible emulator installed on your system such as Twilight Menu++.
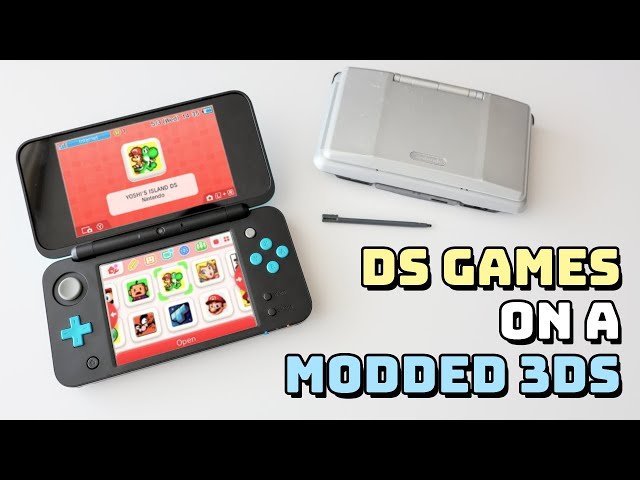
Want to play your favorite DS games on your modded 3DS? It’s easier than you might think. The process involves transferring game files to your handheld after some prep work, so let’s get into how to add ds games to modded 3ds.
First you need the right emulator on your 3DS, a tool like Twilight Menu++ does the trick. Then you’ll need your legally obtained DS game ROMs, which you’ll convert to .nds format and place onto your 3DS SD card.

How to Add DS Games to Modded 3DS
So, you’ve got your 3DS all modded up, which is super cool! Now you’re probably wondering, “How do I get those awesome Nintendo DS games running on it?” It’s a great question, and thankfully, it’s not too hard. This guide will walk you through everything you need to know to play your favorite DS titles on your modded 3DS. Think of it like building with LEGOs – one step at a time, and you’ll have a great gaming setup.
Understanding the Basics
Before we jump into the how-to, it’s good to understand a few things. First off, your modded 3DS is already set up to do this, thanks to the custom firmware (CFW) you installed. This CFW makes it possible to run apps and files that Nintendo didn’t originally intend. One of those great things is playing DS games. The system uses special tools to run these games. We will be focusing on using TWiLight Menu++ which is a popular method to accomplish this.
What is TWiLight Menu++?
Think of TWiLight Menu++ like a special menu that lives on your 3DS. It’s a homebrew application that lets you play DS games from your 3DS’s SD card, and even has some cool extra features. It’s pretty much the go-to choice for playing DS games on a modded 3DS because it’s reliable and easy to use.
Getting Ready: Required Files and SD Card Setup
To get started, you’ll need a few things. Don’t worry, it’s like preparing ingredients for a recipe. You will need:
- A Modded 3DS: This is the most crucial requirement. You can’t do this without a 3DS that has custom firmware (like Luma3DS) already installed.
- A Computer: You need a computer to move files around.
- An SD Card: You’ll need an SD card with enough space for your DS games. 32GB or bigger is recommended.
- TWiLight Menu++: We need the TWiLight Menu++ files, which we’ll download below.
- DS Game ROMs: You will need the game files for the DS games you want to play. These need to be in .nds format. Remember, only use games you own.
Downloading TWiLight Menu++
First things first, let’s grab TWiLight Menu++. Here’s how to get the necessary files:
- Go to the official TWiLight Menu++ GitHub page using your computer’s web browser. You can easily find it by searching “TWiLight Menu++ GitHub.”
- Find the latest release. Look for the most recent version number and click on it.
- Scroll down the page until you see the “Assets” section. You need to download the .7z file (it might have “3DS” in the name). It’s a compressed file, like a zipped folder.
You’ll also need a program to open .7z files, like 7-Zip if you do not already have one.
Preparing Your SD Card
Now we get our SD card ready.
- Connect Your SD Card: Take the SD card out of your 3DS and plug it into your computer using a card reader.
- Extract TWiLight Menu++: Open the .7z file you downloaded. Drag and drop the _nds folder and BOOT.NDS file from inside this folder to the root of your SD card. The root is the main level of the card, not in any subfolders.
- Create a “roms” Folder: Inside the root of your SD card, create a new folder called “roms”. This is where you’ll put all your DS game files. If a folder with this name already exists, skip this step.
- Create a “nds” Folder: Inside the newly created or already existing “roms” folder, create another folder named “nds”. This is where all your .nds files will live.
- Add Your DS Game ROMs: Find your legally obtained .nds game files and put them inside the “roms/nds” folder on your SD card.
Launching TWiLight Menu++ on Your 3DS
With everything set up on your SD card, it’s time to see it working on your 3DS.
- Safely Eject Your SD Card: On your computer, safely eject the SD card. This prevents data loss.
- Insert the SD Card: Put the SD card back into your 3DS.
- Start the Homebrew Launcher: Turn on your 3DS, and then navigate to the Homebrew Launcher. You’ll usually find this on the home menu after you modded your system, it looks like an icon with a little house.
- Find and Run TWiLight Menu++: Once in the Homebrew Launcher, use your stylus to find the TWiLight Menu++ icon. Tap it to start the app.
When TWiLight Menu++ opens for the first time, it might take a moment to load, and then you should see a new menu, or a message saying something about needing to make configurations. You can select the default config and it will do it automatically.
Navigating and Playing DS Games
Here’s how to use the TWiLight Menu to play your games:
- Browse Your Games: TWiLight Menu++ will automatically find the .nds files you put in the “roms/nds” folder. You should see them listed on the screen.
- Select a Game: Use the stylus or the D-pad to select the game you want to play. Tap the screen or press the A button to start it.
- Enjoy Playing: Your chosen game will start!
Important Things to Remember
Playing your games is just the start; here are a few tips to keep in mind to have the best experience:
- Game Compatibility: Most DS games should work just fine in TWiLight Menu++, but some might have minor problems. Don’t worry though, the vast majority of them work perfectly!
- Saving Games: TWiLight Menu++ saves your game progress just like on a real Nintendo DS. It uses a save file, so don’t worry about losing your progress.
- Updating TWiLight Menu++: Keep an eye out for updates to TWiLight Menu++ on the GitHub page. New versions usually fix bugs and improve how well things run. Just follow the steps for downloading and adding the new file over the old one.
- Game Files and Legality: Remember, it’s important to only play games you own. Getting game files from unofficial sources can lead to legal issues. Please use only legally obtained files.
Advanced TWiLight Menu++ Features
TWiLight Menu++ has many cool features you can use to customize your experience, like:
Cheats
You can apply cheats to your games using TWiLight Menu++. You need to add cheat files to your SD card, and can find them on the internet. Once you load them, you can select which cheats you want active before starting the game.
Themes
If you feel like it, you can add themes to your TWiLight Menu++. You can download themes from the internet and place them in a specific folder for the app to find them.
Custom Game Art
You can also add custom game art for each game, so that your game list looks visually appealing.
DSi Features
If you own a DSi or a DSi XL, TWiLight Menu++ can also let you play a small handful of games that require access to DSi camera features.
Troubleshooting Common Issues
Sometimes, things may not go exactly as planned. Here are some common issues and how to fix them:
Game Not Loading
If your game doesn’t load, first make sure the game file is actually in the right folder. Double check it is in “/roms/nds”. Sometimes, the .nds file might be corrupt. Trying a different game file can help you confirm the problem.
Black Screen on Startup
If you get a black screen when you try to open the game, this might be because of bad TWiLight Menu++ files. Try downloading TWiLight Menu++ again from the official Github page and replacing your current files.
Save File Errors
If your game isn’t saving correctly, make sure there is enough space on your SD card, if there isn’t you will not be able to save the game. If there is enough space on your SD card, try a new save file. If the problem persists, it might mean that a game file is corrupt. Consider downloading a new one.
Keeping Everything Up-to-Date
Like a good mechanic keeps their tools in top shape, it’s important to keep your 3DS mod setup up-to-date. Updates to Luma3DS, TWiLight Menu++, and other homebrew tools can improve stability, fix bugs, and make everything work better. It’s also important to have the latest system firmware from the Nintendo Eshop if you want to keep playing new games. If you have a problem with it, consider doing a fresh start by redoing the steps in the guide.
A Final Word
Adding DS games to your modded 3DS is a fun way to play those classic titles. Once you have the process down, it becomes a breeze to add more games. Just remember to be responsible with your game files, and you will have countless hours of fun.
How to Play DS Games on 3DS Homebrew
Final Thoughts
To add DS games to your modded 3DS, you must first install TWiLight Menu++. Then, acquire your DS ROM files and place them onto your SD card, in the folder designated for DS games.
Finally, launch TWiLight Menu++ and navigate to the DS ROMs folder. You will now see your games ready for play, this explains how to add ds games to modded 3ds simply. Enjoy your games!

