
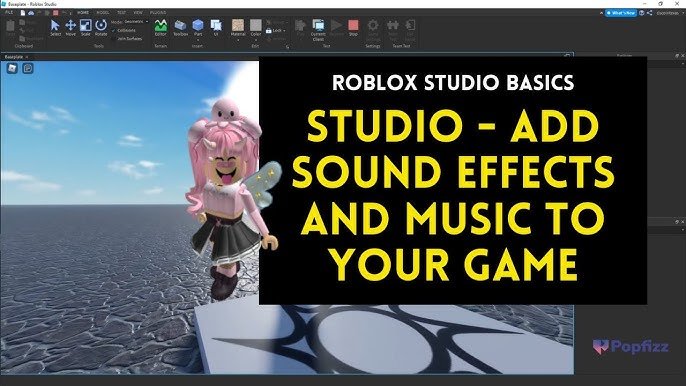
Adding music and sound effects to your Roblox game involves using the Studio’s toolbox to import audio assets and then scripting to trigger playback at desired moments.
Want to create a more immersive experience for your players? Well, learning how to add music and sound effects to your Roblox game is key to achieving that.
The right audio can make a big difference, really bringing your game to life. Let’s jump into the basics so you can start enhancing your game today.

How to Add Music and Sound Effects to Your Roblox Game
Ever played a game that felt a bit…empty? Maybe it was super fun, but something was missing. That “something” is often awesome music and sound effects! They can really make a game come alive and make players feel more immersed. This guide will show you how to add music and sound effects to your Roblox game, making it more engaging and exciting!
Why Music and Sound Effects Matter
Think about your favorite movies or shows. They use music to build excitement, make you feel sad, or even scare you! Sound effects do the same thing, adding pops, bangs, and whooshes to make actions feel real. It’s the same for video games. Music creates an atmosphere and sets the tone, while sound effects let you know what’s happening in the game. These audio elements greatly enhance the player experience.
Creating Immersion
A good soundscape makes a game feel less like a collection of blocks and more like a real world. When you hear the swoosh of a sword or the crunch of leaves under your feet, you feel more connected to the action. This is called immersion. Proper sound design makes a huge difference in game feel.
Setting the Tone
Music is great at setting the mood. A happy, upbeat tune can make a player excited. A spooky melody can make them feel anxious. The right music tells players how they should feel in a certain area of your game, this helps the experience feel more coherent.
Providing Feedback
Sound effects provide feedback to players. When you jump, you hear a little “boing” sound. When you collect a coin, you hear a “ding.” These sounds confirm actions and make the game more satisfying to play.
Getting Started with Sounds in Roblox Studio
Okay, let’s get to the fun part: adding sounds! Roblox Studio has some neat tools to make this pretty easy. First, you’ll need to find the “Explorer” window in Roblox Studio. This is where all your game’s parts, scripts, and sounds live.
The Sound Object
To add a sound, you need a “Sound” object. You can find it by right-clicking on a part in the “Explorer” and selecting “Insert Object” then “Sound”. It’s also a good practice to add a “Sound” object to your Workspace if you want a sound to be heard throughout the entire game.
Uploading Audio Assets
You can use sounds that Roblox provides, or you can upload your own. To upload your own, you need to make sure your audio is in .mp3 or .ogg format and is less than 5MB. You can go to “View” and click “Asset Manager” to get the “Asset Manager” window, where you can upload audio from your device to Roblox.
Important Audio Rules
Keep in mind that there are copyright rules with audio. If you did not create the audio or do not have the rights to use the audio it can not be uploaded to Roblox. Only upload audio that you are allowed to use.
- Make sure it’s in the right format (.mp3 or .ogg).
- The file size needs to be smaller than 5MB.
- You must own the audio or have permission to use it.
Locating Roblox’s Sound Library
Roblox also has its own library of free sounds. You can find many sound effects and songs that you’re able to freely use. Head to “Toolbox” and then the “Audio” tab to search for something. You can find the “Toolbox” in the “View” tab.
Adding Sounds to Your Game
Now that you have your sound, let’s add it to your game! There are a couple of ways to do this, and you can pick which method is best for each situation.
Using the SoundId Property
You’ll see the “Sound” object in the “Explorer”. If you selected your sound from your “Asset Manager” or the “Toolbox”, you can copy the audio asset id and paste it into the “SoundId” property of the “Sound” object in the “Properties” window. This is the simplest method to add audio to your game.
Positioning Sounds
Where you place the “Sound” object matters! If it’s inside a part, the sound will seem to come from that part. If it’s inside Workspace, the sound will be heard throughout the game. This effect depends on other properties that will be explained below. Make sure you consider how sounds and music will come through to players.
Sound Object Properties: Customizing Your Audio
The “Sound” object has some really useful properties that allow you to fine-tune your audio experience. Here are some important properties to know:
SoundId
We discussed this before. The “SoundId” property is where you add the audio asset ID. It tells Roblox what sound to play.
Volume
The “Volume” property lets you adjust how loud the sound is. A value of 1 is full volume, and 0 is no sound. Anything in-between will adjust the sound accordingly. This is important to make sure your music or sound effects are not overwhelming.
Play
The “Play” property determines if the sound is currently playing. Setting it to ‘true’ starts the audio. Setting it to ‘false’ will stop playing the audio.
Looped
The “Looped” property makes the sound play over and over again. This is useful for background music or continuous effects. When turned to ‘true’, the sound will endlessly repeat itself.
PlaybackSpeed
The “PlaybackSpeed” property changes how fast or slow the sound plays. A value of 1 is normal speed. 2 is twice as fast, and 0.5 is half as fast. This property can give a different feel for your sounds or make a sound effect have a unique feel.
RollOffMaxDistance
This property determines how far away you can hear the sound. If the player is further than the defined distance the sound will no longer be heard. This property is useful for sounds that you only want to be heard in certain areas of the map.
RollOffMinDistance
This property determines how close you need to be to a sound for it to play at its loudest. If a player is within this distance of the sound’s location, then the sound will play at its set volume. This is useful for setting how loud a sound is when a player is next to the sound source.
RollOffMode
This property sets what formula is used to determine how volume changes based on distance. “Inverse” is the most common, setting sound volume to decrease as the player moves further away from the sound source, but there are others that can be useful. Check them out if you are curious!
Using Scripts to Control Sounds
While some sounds can just play all the time, you might need more control. You can do so with Lua scripts! Scripts let you start and stop sounds based on events in your game.
Playing Sound on Interaction
Imagine you want a sound to play when a player clicks on something. Here’s how to do it with a script:
 local part = script.Parent -- get the part this script is attached to
 local sound = part:WaitForChild("Sound") -- get the "Sound" object inside the part

 part.ClickDetector.MouseClick:Connect(function() -- connect to the ClickDetector's mouse click event
  sound:Play() -- play the sound when clicked
 end)
This script will play the sound when a player clicks on the part. You will need a click detector in the part for this to work. The script gets the sound object in the part, then uses the ‘:Play()’ method on the sound object to play when the part is clicked on.
Playing Sound on a Trigger
You can also play a sound when a player enters a specific area. This is done by adding a part to your scene, and adding a script to the part, like the example below:
 local part = script.Parent -- get the part this script is attached to
 local sound = part:WaitForChild("Sound") -- get the "Sound" object inside the part
 local debounce = false -- sets a variable for a debounce

 part.Touched:Connect(function(hit) -- connects to the Touched Event of the part
  if debounce then return end -- if debounce is true then return
  debounce = true -- set debounce to true
  if hit.Parent:FindFirstChild("Humanoid") then -- check if the hit part has a humaniod
   sound:Play() -- play the sound
   wait(1) -- wait 1 second
  debounce = false -- set debounce to false after a second
  end
 end)
This script will play the sound effect when a player touches the part. It checks to make sure a character touched the part, then plays the sound. Debounces are useful to make sure the script doesn’t play the sound effect multiple times when a player touches the part, it instead delays the next sound effect for one second in the example.
Controlling Music with Scripts
Sometimes you want to control music based on different events in your game. Here’s a quick example of how to do it:
 local function playMusic() -- function for playing music
  local music = game.Workspace.Music -- get the "Sound" object from Workspace
  music:Play() -- plays the music
  music.Looped = true -- sets looped to true
 end

 local function stopMusic() -- function for stopping music
  local music = game.Workspace.Music -- get the "Sound" object from Workspace
  music:Stop() -- stops the music
 end

 playMusic() -- plays the music when the game starts
 -- You can call the stopMusic() to turn off music at certain times
This script creates two functions to play and stop the music. You can call these functions at different times in your game based on your own logic. These kinds of methods are useful for changing background music.
Tips for Effective Sound Design
Adding sound is great, but using it effectively is key. Here are some best practices:
Balance Your Sounds
Make sure some sounds aren’t too loud or too quiet. The volume should be balanced, so players can hear everything clearly without feeling overwhelmed or straining to hear important noises.
Choose Sounds Wisely
Not every sound works everywhere. Pick sounds that fit the action in your game. A silly sound might not make sense in a serious scene. Make sure that your sounds are consistent with the atmosphere you are trying to create.
Less is Often More
Don’t add sound effects for everything. Sometimes too many sounds can be chaotic. Only include the sounds that are important to the experience. Too many sound effects can feel overwhelming to the player.
Use Different Audio Styles
Varying your music and sounds creates a richer and more engaging experience. Use subtle ambient noises, impactful sound effects, and well-paced music to keep things interesting. It will prevent the audio in your game from feeling repetitive and uninteresting.
Test Your Audio
Always test the audio in your game. Make sure it sounds good, isn’t too loud, and fits the game’s overall feel. Testing audio in game development is extremely important, so that you don’t have a faulty sound experience when your game is live.
Troubleshooting Common Issues
Sometimes you might run into problems. Here are some common issues and how to solve them:
Sound Not Playing
If your sound isn’t playing, check these things: the “SoundId” is correct, the “Volume” isn’t set to 0, and if “Play” is set to true. Also, make sure that the sound is not on loop, and that you are playing the sound. You might need to check your script to make sure it’s being called properly too.
Sounds Overlapping
If sounds are overlapping, make sure you’re not accidentally playing them multiple times. Check your scripts, and use a debounce if necessary, as explained earlier. These will help prevent issues when you have sounds that are meant to be played once when an event occurs.
Incorrect Volume
If the volume is too high or too low, check the “Volume” property of the sound object. You may need to adjust the distance of the “RollOffMaxDistance” property as well if sounds are hard to hear at a distance. These settings allow you to control how sound is projected to the player.
Import Errors
If you get an error when importing, make sure your audio is in the correct format, is less than 5MB, and that you have the right to use the audio. If you are still getting errors check to see if Roblox’s servers are up. Sometimes errors may be because of issues on Roblox’s end.
Adding music and sound effects can seriously improve your Roblox game. By understanding how to add sounds, customize their settings, and control them with scripts, you can create a richer and more engaging experience for your players. So, try adding sound to your next game and make your game more fun!
How To Add Music & Sound Effects to Roblox Game – Complete Guide
Final Thoughts
To summarize, you add music using the Sound object, placing it in your game’s workspace and setting its properties. Sound effects follow the same steps; simply use a different sound file.
Proper implementation and understanding of the Sound object are crucial. Thus, you now understand how to add music and sound effects to your roblox game.

