
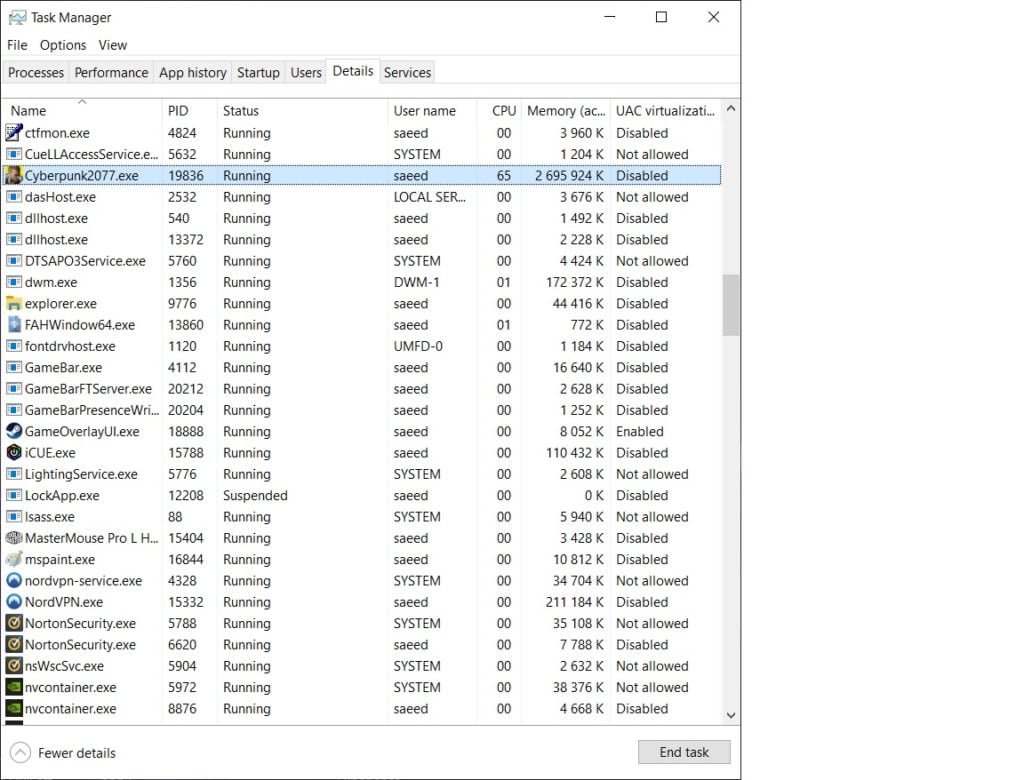
You cannot directly allocate more RAM to a specific game. Instead, you can close unnecessary programs to free up RAM, ensuring the game has more available memory to use.
Experiencing frustrating lag while gaming? It often stems from your computer struggling with insufficient memory. This might lead you to wonder how to allocate more ram to a game directly. The truth is, you can’t manually force more RAM to a game like you might adjust graphics settings.
Instead, managing your computer’s resources is the key. This means closing background applications which consume valuable RAM. This gives your game a better chance to run smoothly, taking advantage of the available system memory.

How to Allocate More RAM to a Game
Have you ever been playing your favorite game and it starts to get really slow and choppy? It’s like trying to run through mud! This often happens because your computer doesn’t have enough RAM (Random Access Memory) available for the game. Think of RAM like your desk space while you’re working on a project. If you have a small desk, you can only have a few things out at once. But with a big desk, you can have everything you need right there, making your work much faster. The same goes for RAM and your games. This article will help you understand how to give your games more of that valuable “desk space”.
Understanding RAM and Its Importance for Gaming
Before we jump into how to allocate more RAM, let’s talk a bit about what RAM actually is and why it matters so much for gaming. RAM is your computer’s short-term memory. It’s where your computer stores the data it’s actively using. When you start a game, parts of it get loaded into RAM. The more RAM you have, the more information your computer can hold readily available, making things run smoother and faster.
Imagine you are reading a book. If you put all the pages you need on the table, you can easily flip through them to find your answer. If you don’t have a big enough table (RAM), you’ll have to get up and look for the pages every time. This takes a lot of time. For games, needing to retrieve data from your hard drive every time it needs something makes it slow and laggy. With enough RAM, your game can quickly access the information it needs, which is why it’s so crucial for a good gaming experience. So, giving your game more RAM means it can run faster and with less stutters.
Why Games Need Enough RAM
Games, especially modern ones with detailed graphics and complex gameplay, need a lot of RAM. When a game doesn’t have enough RAM, the computer has to swap data back and forth between the RAM and the slower hard drive (or SSD). This process, called “paging” or “swapping,” slows everything down. You might experience:
- Lag: Delayed responses to your actions.
- Stuttering: Choppy, inconsistent frame rates.
- Freezing: The game completely stops responding for a moment.
- Crashes: The game closes unexpectedly.
Ensuring your game has sufficient RAM available is an important step to fix these issues. But remember, that doesn’t mean you can make more RAM out of thin air. It means you need to make the best use of what you have and free up the RAM that other programs may be using unnecessarily.
Checking Your Current RAM Usage
Before we get into the technical stuff, we need to see how much RAM your computer has and how much is currently being used. This is like checking how much space you have on your desk before starting your project. Here’s how you do it on Windows and macOS:
Checking RAM Usage on Windows
Windows offers an easy way to see your computer’s RAM usage. Follow these steps:
- Press Ctrl + Shift + Esc: This will open the Task Manager. You can also right-click on the taskbar and select “Task Manager”.
- Click on “Performance”: In the Task Manager window, click on the “Performance” tab.
- Look for “Memory”: On the left side, click on “Memory.” Here, you’ll see a graph showing how much RAM you’re using and how much you have total. You’ll also see information like the speed of your RAM and its form factor. The “In use” section shows how much RAM is currently being used, and “Available” shows what’s free.
Look at the details below the graph to understand how much total RAM you have installed in your system. Pay attention to the “In Use” percentage to gauge if your system is under heavy load.
Checking RAM Usage on macOS
If you have a Mac, follow these steps to check your RAM usage:
- Click the Apple icon: Click the Apple icon in the top-left corner of your screen.
- Select “About This Mac”: In the menu that appears, click “About This Mac.”
- Click “System Report”: In the “About This Mac” window, click “System Report…”
- Select “Memory”: In the sidebar of the “System Report” window, click on “Memory.” Here, you’ll see information about your RAM, including how much is installed, its speed and type.
- Use Activity Monitor: To see RAM usage in real time, open the Activity Monitor app by going to “Applications” > “Utilities” and double-clicking Activity Monitor. In the Activity Monitor, click on the “Memory” tab to see how much RAM is being used.
Take note of how much RAM you have available and how much you are currently using when running your game. This information will help determine if you have enough RAM or if you need to make adjustments to improve gaming performance.
Methods to Increase Available RAM for Gaming
Now that you know how to check your RAM usage, let’s look at ways to make more RAM available for your games. We’ll explore a mix of simple and more advanced techniques. Remember, you cannot actually make more physical RAM; you can only manage the existing RAM better.
Closing Unnecessary Programs
The most straightforward way to free up RAM is to close programs you’re not using. Think of it like clearing off your desk. Here’s how to do it:
- Windows: Open the Task Manager (Ctrl + Shift + Esc), click on the “Processes” tab, and look at the “Memory” column to see which programs are using the most RAM. Close the programs you don’t need by selecting them and clicking “End Task”. Be careful not to close important system processes that are crucial for your computer’s operation.
- macOS: Open Activity Monitor (Applications > Utilities). In the “Memory” tab, look at the programs using the most memory. Close the unnecessary apps by selecting them and clicking the “X” button at the top-left of the window.
Closing web browsers with multiple tabs, document editors, music players, and other applications before launching your game can make a noticeable difference.
Disabling Startup Programs
Many programs automatically start when you turn on your computer. These programs can take up RAM in the background even when you’re not actively using them. You can disable these startup programs to free up RAM.
- Windows:
- Open Task Manager (Ctrl + Shift + Esc).
- Click on the “Startup” tab.
- Look at the “Startup impact” column. This shows how much impact each startup program has on your system.
- Disable unnecessary startup programs by selecting them and clicking “Disable”.
- macOS:
- Click the Apple icon and go to “System Preferences.”
- Click “Users & Groups.”
- Select your username in the left sidebar.
- Click the “Login Items” tab.
- Remove unnecessary startup programs by selecting them and clicking the minus (-) button.
After disabling startup programs, restart your computer to see the impact on RAM usage.
Adjusting Virtual Memory (Page File)
Virtual memory (also called page file on Windows) acts as an extension of your RAM. When your RAM is full, your computer moves some data to the hard drive/SSD to make space. While it’s not as fast as RAM, it can help prevent crashes and allow your game to function when physical RAM is exhausted. Adjusting your virtual memory settings can sometimes help improve gaming performance.
Adjusting Page File on Windows
Follow these steps to adjust your Windows page file:
- Search for “System” in the Start Menu: Type “System” in the search bar and click on “System”.
- Click on “Advanced system settings”: On the left panel, click on “Advanced system settings”.
- Click “Settings” in the “Performance” section: In the “System Properties” window, click the “Settings” button in the “Performance” section.
- Go to “Advanced” Tab: In “Performance Options” window, click the “Advanced” tab.
- Click “Change” under “Virtual memory”: In the “Virtual memory” section, click the “Change” button.
- Uncheck “Automatically manage paging file size for all drives”: This will allow you to customize settings.
- Select “Custom size”: Select the drive where your operating system is installed. Click on the “Custom size” radio button.
- Enter Initial and Maximum Sizes: In the “Initial size (MB)” and “Maximum size (MB)” boxes, enter values. A good rule is to set the initial size to 1.5 times the amount of your RAM, and the maximum size to 3 times the amount of RAM. For example, if you have 8 GB of RAM, set the initial size to 12288 MB (1.5 x 8192 MB), and the maximum to 24576 MB (3 x 8192 MB).
- Click “Set”: After entering the values, click “Set”.
- Click “OK” in all windows: Click “OK” in all the open windows, and restart your computer to apply the changes.
Adjusting Swap Space on macOS
macOS automatically manages swap space, so typically you do not need to adjust it manually. However, you can use Terminal to check the size of the swap file. Here is how you can check it:
- Open Terminal: Open the Terminal application (Applications > Utilities).
- Enter the following command: type
vm_statand press Enter. - Check “Pages swapped out”: Look for the field “Pages swapped out”. This indicates how much data has been moved from RAM to swap space. A small value is generally okay, but if this number is very high, you might need to explore ways to reduce the RAM load or think about upgrading the RAM if the problem is consistent.
While you cannot directly change swap file size, understanding your RAM and swap usage helps determine if there’s an issue that requires action, like upgrading RAM.
Optimizing Game Settings
Sometimes, your game settings can be demanding too much RAM and making your gaming experience lag. Reducing the graphics and other demanding settings can reduce the load on your system. This can lead to better frame rates and overall improvement, by reducing the RAM requirements for playing the game.
- Lower graphics quality: Reduce the quality of textures, shadows, and other visual effects.
- Adjust resolution: Lowering the game’s resolution can significantly free up system resources.
- Disable unnecessary features: Disable options like antialiasing and motion blur.
Experiment with different settings to find a balance between visual quality and performance. Lowering the settings means the game requires less RAM, which can improve speed and performance. Check the game’s graphics settings or visit online forums for tips specific to the game you are playing.
Using Game Boosters or Optimizers
Game boosters are applications that can help optimize your computer for gaming by automatically closing unnecessary background processes, adjusting system settings, and freeing up RAM. While not magical, they can be helpful for novice users. Here are some common game boosters:
- Razer Cortex: This is a popular game booster that automatically closes unnecessary processes to free up RAM before you launch a game.
- MSI Afterburner: Primarily used for overclocking graphics cards, it also has monitoring features that can help you identify and fix performance issues.
- Game Fire: This application helps optimize system resources and provide a smooth gaming experience.
Experiment with these types of programs to see which ones work best with your particular game and computer setup. Remember that they are not perfect, and sometimes the simple steps above are enough to boost your gaming experience. Make sure that you install the game booster only from official sites or reliable sources.
Upgrading Your RAM (If Necessary)
If you’ve tried all the methods above and you still find yourself constantly battling performance issues due to low RAM, it might be time to consider upgrading your RAM. Upgrading RAM is like getting a bigger desk for your project, giving you much more space to manage your tasks.
How to Choose RAM
Before you buy more RAM, there are a few important things to consider:
- Compatibility: Make sure the RAM you buy is compatible with your motherboard. Check your motherboard’s manual or the manufacturer’s website for specific RAM requirements. The RAM needs to be compatible with your computer, so make sure it is the correct DDR version and speed that is suitable for your system.
- Type: There are different types of RAM (DDR3, DDR4, DDR5, etc.). Make sure you buy the type that your motherboard supports.
- Speed: RAM comes with different speeds (measured in MHz). Faster RAM can improve performance, but make sure your motherboard supports the speeds you’re considering.
- Amount: Consider how much RAM you need for your games and tasks. 8GB of RAM is considered the minimum for modern gaming, but 16GB or more is preferable for the latest games and more intense tasks.
Research different RAM options carefully. Check your system’s current RAM specs (as shown before in the article). Find the correct RAM modules on reputable e-commerce sites or shops and see the specifications. Consider reading reviews before making a purchasing decision.
Installing New RAM
Installing RAM is not difficult but it does need care and attention. The basic steps include:
- Turn off your computer and unplug all cables: Make sure you shut down your computer completely and disconnect all cables.
- Open the computer case: Carefully open your computer case.
- Find RAM slots: Locate the RAM slots on your motherboard.
- Remove old RAM (if applicable): If you’re replacing existing RAM, carefully release the clips holding the old modules in place and remove them.
- Insert the new RAM: Insert the new RAM modules firmly into the slots. Make sure the notches align correctly. You’ll hear a click as they lock into place.
- Close computer case and restart: Close the computer case and plug in all the cables again. Turn on your computer.
If you’re not comfortable doing this yourself, consider seeking assistance from a computer professional. Check the motherboard manual for detailed step-by-step instructions, as different motherboards can vary a bit. After installation, check your computer settings to ensure the new RAM amount is recognized.
Improving your gaming performance by allocating more RAM to your game involves understanding how your computer uses RAM, identifying how much RAM is available, and implementing strategies to make the most of it. By closing unnecessary programs, disabling startup programs, adjusting virtual memory, optimizing game settings, and sometimes upgrading your RAM, you can significantly enhance your gaming experience. Remember to always check your system’s specifications to make sure you are choosing the best options. With these methods, you’ll have a smoother and enjoyable gaming journey.
How To Allocate More RAM To Specific Programs/Games On Windows! [2024]
Final Thoughts
In short, you can often improve game performance by closing unnecessary background applications that consume RAM. Manually allocating RAM directly isn’t generally possible; the operating system handles memory management.
Tweaking virtual memory settings might help, but this acts like an overflow rather than a true allocation. The key takeaway is to understand that directly choosing ‘how to allocate more ram to a game’ isn’t a feature in most cases.
Therefore, focus on system optimization and closing unnecessary processes to free up existing memory.

