Here’s how to be a good medic and revive safely in Battlefield 6: Prioritize situational awareness. Throw smoke grenades to provide cover, check for immediate threats, and use cover yourself while reviving downed teammates.
Want to rack up points and support your squad in Battlefield 6? Then you need to learn how to be a good medic and revive safely in Battlefield 6. It’s more than just running in and hitting a button.
Good medics understand the battlefield dynamics. A safe revive is a successful revive, and a successful revive can turn the tide of battle.
We’ll walk through some key tactics that will not only keep you alive but also ensure your revived teammates get back into the fight, ready to contribute.

How to Be a Good Medic and Revive Safely in Battlefield 6
Being an effective medic in Battlefield 6 goes beyond just healing and reviving. It’s about understanding the flow of battle, prioritizing targets, and mitigating risks. This guide will provide you with essential tips and strategies to excel as a medic and safely bring your teammates back into the fight.
Understanding Your Role as a Medic
The medic class is crucial for sustaining your team on the battlefield. Your primary responsibility is to keep your squad alive and pushing forward.
This involves a combination of healing injured teammates and reviving those who have fallen. Prioritizing these actions effectively can drastically change the outcome of a firefight.
Essential Medic Loadout Considerations
Choosing the right loadout is paramount to your success as a medic. Selecting weapons and gadgets that complement your healing and reviving capabilities is important.
Consider these vital components when assembling your medic loadout.
Primary Weapon Selection
Submachine guns (SMGs) are a popular choice for medics due to their high rate of fire and effectiveness in close to medium-range combat. This allows you to quickly engage enemies while staying close to your teammates.
Assault rifles can also be viable, providing a bit more range and versatility. Experiment to find a weapon that suits your play style and the map you’re playing on.
Gadget Choices: The Medic’s Arsenal
Medics have access to a variety of gadgets that enhance their healing and reviving abilities. These gadgets can be lifesavers, both for you and your squad.
Medical Crate: Provides sustained healing to nearby teammates. Place it in strategic locations for prolonged support.
Medical Pouch: Offers quick burst healing to a single target. Use it to rapidly top off a teammate’s health in a critical situation.
Smoke Grenades: A vital tool for safely reviving teammates in dangerous areas. Deploy smoke to obscure enemy vision and provide cover.
Specializations and Combat Roles
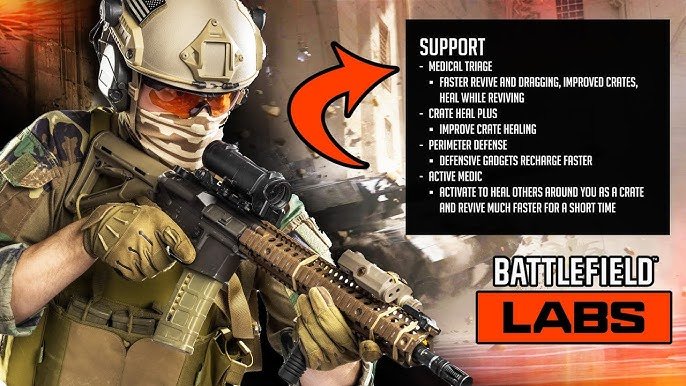
Battlefield 6 will likely feature specializations or combat roles that further define your medic’s capabilities. Consider how these roles impact your playstyle.
These specializations might grant you perks like faster healing speed or increased revive range. Choosing the right specialization is crucial for maximizing your effectiveness.
Safe Reviving Techniques
Reviving a teammate in the heat of battle can be risky. Understanding how to revive safely is paramount to keeping both you and your teammate alive.
Never rush into a revive without assessing the situation. Taking a moment to clear the immediate area and create cover can make all the difference.
Assessing the Situation Before Reviving
Before rushing to revive a fallen teammate, take a moment to survey the surroundings. Look for any enemies in the immediate area that could pose a threat.
Use your radar or listen for audio cues to pinpoint enemy locations. Prioritizing your own safety is key to being an effective medic.
Using Smoke for Cover
Smoke grenades are your best friend when it comes to safe revives. Deploying smoke before reviving can create a temporary screen, obscuring you and your teammate from enemy fire.
Always aim to place the smoke between you and the most likely enemy positions. This will provide the best possible cover during the revive process.
Utilizing Cover Effectively
Natural cover, such as walls, rocks, and vehicles, can provide essential protection during revives. Position yourself strategically to minimize your exposure to enemy fire.
Crouch or go prone behind cover while reviving to further reduce your profile. Communication with your teammates is crucial. Let them know you’re coming for the revive, and ask them to provide covering fire.
Prioritizing Revive Targets
Not every revive is worth the risk. Sometimes, it’s better to let a teammate go and focus on securing the area or healing other teammates.
Prioritize revives based on the tactical situation. Consider the proximity of enemies, the importance of the downed teammate, and the availability of cover.
Squad Leaders: Always prioritize reviving your squad leader. Their ability to call in reinforcements and set objectives is invaluable.
Teammates Near Objectives: Reviving teammates near objectives can help to secure or defend the area. These revives are crucial for maintaining momentum.
High-Value Targets: Revive teammates who are particularly skilled or equipped, such as snipers or tank drivers. Their contributions can greatly impact the battle.
Healing Strategies for Battlefield 6
Healing is just as important as reviving in Battlefield 6. Keeping your teammates topped off with health is essential for maintaining their combat effectiveness.
Utilizing your medical crate and pouches effectively can significantly improve your team’s survivability.
Medical Crate Placement Strategies
Strategic placement of your medical crate can provide sustained healing to multiple teammates. Consider placing it in areas with heavy foot traffic or near objectives.
Chokepoints: Placing a medical crate near chokepoints can provide valuable healing to teammates as they push through the area.
Objective Defenses: Use crates to support teammates defending objectives. This will help them withstand enemy attacks and hold the line.
Behind Cover: Ensure the crate is placed behind cover to protect it from enemy fire. This will prolong its lifespan and maximize its effectiveness.
Effective Use of Medical Pouches
Medical pouches provide quick burst healing to a single target. Use them to rapidly top off a teammate’s health in a critical situation.
Priority Targets: Focus on healing teammates who are actively engaged in combat or taking heavy fire. Their survival is paramount.
Aggressive Healing: Use pouches to keep teammates alive during aggressive pushes. This will allow them to maintain pressure on the enemy.
Self-Healing: Don’t forget to use medical pouches on yourself when needed. Your own survival is crucial for continuing to support your team.
Communication is Key
Effective communication is vital for any successful medic. Use the in-game voice chat or text chat to coordinate with your teammates and provide crucial information.
Let your teammates know when you’re coming for a revive, and ask them to provide covering fire. Communicate the location of enemies and potential threats.
Revive Requests: Respond to revive requests quickly and efficiently. Let the downed teammate know that you’re on your way.
Healing Needs: Encourage teammates to request healing when they need it. This will help you to prioritize your healing efforts.
Enemy Sightings: Communicate the location of enemies to your teammates. This will help them to avoid ambushes and coordinate their attacks.
Advanced Medic Tactics
Mastering these advanced techniques will set you apart as a top-tier medic. It’s all about maximizing your efficiency.
Anticipating enemy movements and strategically positioning yourself for revives is essential. Learning the map layouts and identifying key chokepoints will give you a significant advantage.
Anticipating Enemy Movements
By predicting where enemies are likely to be, you can position yourself for safe revives and healing opportunities. Pay attention to the flow of battle and the locations of objectives.
Flanking Routes: Be aware of common flanking routes used by the enemy. These areas are often vulnerable and require extra attention.
Objective Approach: Anticipate enemy attacks on objectives. Position yourself to provide support and healing to defenders.
Chokepoint Awareness: Be aware of chokepoints where enemies are likely to push through. These areas are prime locations for ambushes and require careful monitoring.
Mastering Map Knowledge
A thorough understanding of the map layouts is crucial for success as a medic. Knowing the locations of cover, chokepoints, and objectives will give you a significant advantage.
Cover Locations: Identify key cover locations that can be used for safe revives and healing. These areas will provide essential protection from enemy fire.
Chokepoints: Learn the locations of chokepoints where enemies are likely to concentrate their attacks. These areas require careful monitoring and strategic positioning.
Objective Layouts: Understand the layouts of objectives to effectively provide support and healing to defenders. This will help your team to secure and defend the area.
Staying Alive: Self-Preservation
Remember, you can’t help your team if you’re dead. Prioritizing your own safety is crucial for maintaining your effectiveness as a medic.
Avoid unnecessary risks, and always be aware of your surroundings. Utilize cover and concealment to minimize your exposure to enemy fire.
Prioritize Cover: Always move between cover to avoid being caught in the open. This will significantly reduce your vulnerability to enemy fire.
Awareness: Pay attention to your surroundings and listen for audio cues that indicate enemy presence. This will help you to avoid ambushes and react quickly to threats.
Self-Healing: Don’t hesitate to use medical pouches on yourself when needed. Your own survival is crucial for continuing to support your team.
By mastering these strategies, you’ll become a valuable asset to your team in Battlefield 6. Remember, being a good medic is about more than just healing and reviving; it’s about understanding the flow of battle, prioritizing targets, and mitigating risks.
Battlefield 6 Beta – Ultimate Beginners Guide, Tips and Tricks
Final Thoughts
How to be a good medic and revive safely in Battlefield 6 involves careful observation and quick thinking. Prioritize assessing the immediate area for threats before rushing in. Smoke grenades are your best friend; use them liberally to provide cover during revives.
You must always remember to stay aware of enemy positions. Use cover effectively and avoid open spaces. Timing is crucial, so don’t hesitate if the opportunity arises, but never sacrifice yourself unnecessarily.
Ultimately, how to be a good medic and revive safely in Battlefield 6 requires a balance of speed, awareness, and tactical decision-making. Prioritize safety and get your teammates back in the fight.