
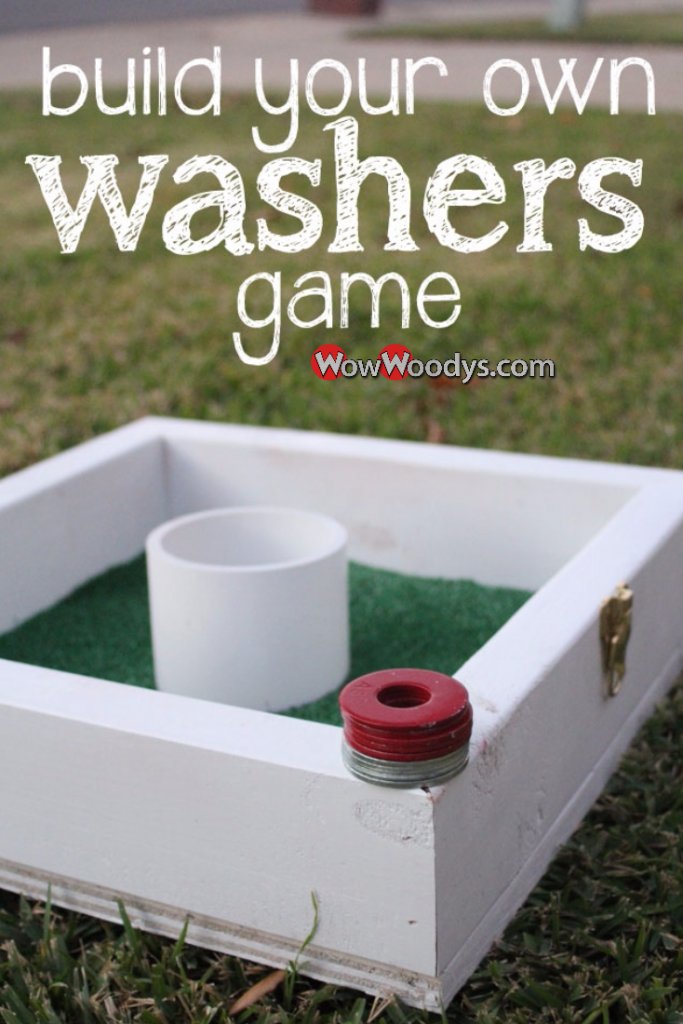
Building a washers game requires constructing two wooden boxes with holes, usually using plywood and 2x4s, then acquiring washers for tossing.
Have you ever wanted a fun outdoor game for gatherings? It’s surprisingly simple to learn how to build washers game. This activity offers entertainment for everyone, and you can even personalize the design.
Creating your own washers game is a great DIY project. The basic construction involves simple woodworking techniques and easily available materials. Let’s get started on making this enjoyable game.

How to Build a Washers Game: A Step-by-Step Guide
Building your own washers game is a fantastic project! It’s a fun outdoor game that’s easy to learn and can be enjoyed by people of all ages. Plus, making it yourself gives you a great sense of accomplishment. This guide will walk you through each step of how to build a washers game, from gathering your materials to playing your first round. So, let’s get started and learn how to build a washers game!
Gathering Your Materials
Before you start building, you need to gather all your supplies. Having everything ready will make the building process go much smoother. Here’s what you’ll need:
For the Game Boxes:
- Plywood: You’ll need two pieces of plywood, each about 24 inches by 24 inches. Half-inch thick plywood works well, but you can use thicker material too. This will form the base of your washer game boards.
- Lumber for the Sides: You will need 1×4 or 2×4 lumber, cut into 8 pieces, each 24 inches long. This lumber will make up the sides of the boxes.
- Wood Screws: About 2-3 inches long. These will securely fasten the sides to the plywood base.
- Wood Glue: To strengthen the joints between the wood.
- Measuring Tape: Essential for accurate measurements.
- Pencil: For marking your cut lines.
- Saw: A hand saw, circular saw, or jigsaw will work to cut the wood. Be very careful when using any kind of saw! Ask a grown-up for help if you need it.
- Drill: For pre-drilling holes for the screws. This makes the screws go in easier and prevents the wood from splitting.
- Sandpaper: To smooth out any rough edges or splinters. A medium grit sandpaper is ideal.
For the Washers:
- Metal Washers: You’ll need at least 6-8 metal washers, each about 2.5 to 3 inches in diameter. These are the “washers” you will throw in the game.
- Spray Paint (Optional): If you want to paint the washers different colors, get some spray paint. This is a fun way to make teams or just make them look cooler!
Other Helpful Tools:
- Safety Glasses: Always wear safety glasses when working with tools.
- Work Gloves: Gloves can protect your hands from splinters.
- Clamps: Clamps can hold wood together while you glue and screw it.
Building the Game Boxes
Now that you have all your materials, let’s start building the game boxes. This is where your washer game really begins to take shape!
Step 1: Assembling the Frame
Take one of the pieces of plywood and lay it flat on a work surface. This is the bottom of one of your washer game boxes. Now, take four of your 24-inch lumber pieces. These will make the four sides of the box. Apply a thin line of wood glue to one edge of the plywood, then place one of the 24-inch lumber pieces along the edge. The long side of lumber should be flush with plywood edge. Take a drill and pre-drill two or three holes through the lumber into the plywood. Secure lumber with wood screws. Repeat for all four sides until you have a complete rectangle box on top of the plywood base. Make sure each corner meets nicely at a 90-degree angle. If you have clamps, use them to hold the wood together while you screw.
Repeat this step to build your second game box.
Step 2: Ensuring Stability
Once you have the frame assembled, it’s important to make sure it’s stable and strong. Check that all the screws are in place and secure. Use sandpaper to smooth any rough edges or splinters on the sides of the box, making the game both safer and more comfortable to handle. If you have gaps or see that the box isn’t entirely square, you can reinforce the corners with small wooden corner brackets screwed in at each corner. These can be added to both the inside or outside for extra strength.
Step 3: Sanding and Smoothing
Now it is time to focus on the finish work! You want your game to feel nice and be safe to use, so sanding is important. Using your sandpaper, go over all the surfaces of the game box, including the edges, sides and even the base. Focus on the spots where you cut or screwed to remove any splinters or sharp edges. Make sure the wood is nice and smooth to the touch. If you plan to paint or stain your game, sanding is important because it helps the finish adhere better to the wood. So make sure you have a smooth surface before painting or staining.
Preparing the Washers
With the game boxes completed, let’s prepare your washers, and these are very easy steps!
Step 1: Painting the Washers (Optional)
If you want to personalize your washers or make them team colors, this is the time to do it. Lay your washers out on some newspaper or a drop cloth, and make sure that you do this step in a well-ventilated area. Shake your spray paint can well, and then apply the paint in light, even coats. You may need to do two or three coats to get full coverage. Let the paint dry completely between coats to avoid smudging and allow it to dry completely for few hours. You can use different color for each teams. If you want to have plain washers, then you can also skip this step.
Step 2: Checking the Washers
Once the paint is completely dry (if you decided to paint them), check that the washers are free of paint drips or rough spots. Make sure they are smooth and ready for throwing. This helps ensure that the washers will fly smoothly through the air and land properly in the game.
Setting Up the Game
Before you start playing, you need to know how to set up the game.
Step 1: Positioning the Game Boxes
Place the two game boxes on a flat surface, such as grass or concrete. The standard distance between the boxes is 20 feet. If you have smaller children playing, you might want to move the boxes closer together so that they can throw more easily. If you are playing in a backyard, it is ideal if you can put them on a grass area, however if you don’t have access to a lawn, any flat surface will work.
Step 2: Marking the Throwing Line
Mark a throwing line behind each box, a few feet away. You can use chalk, tape, or even a stick to draw a line in the dirt. The throwing line is where you will stand when you throw your washers at the opposite box. This helps keep the game fair and prevents anyone from getting too close to the box.
Playing the Game
Now that you have built your washer game, painted the washers, and set up the playing area, the most interesting part begins, its time to play! Here are the basic rules of playing a washer game. You should agree with other players about any further rules you want to follow.
Understanding the Basics
- Teams: Washers game is typically played by two players or two teams. If you have more than four players, you can rotate and team up.
- Turns: Each player or team takes turns throwing their washers.
- Scoring: Points are scored based on where the washers land inside or on the box. A washer that falls in the cup is usually worth 3 points and a washer that lands inside the box (not in the cup) is worth 1 point.
- Winning: The first player or team to reach a predetermined score (typically 21) wins the game.
The Rules of Play
- Starting the Game: Choose who goes first. Often, people flip a coin or use other methods of selection.
- Throwing the Washers: Stand behind the throwing line. Players throw one washer at a time trying to land the washer in the opposite box.
- Taking Turns: Once each player has thrown all their washers, the other player takes their turn.
- Scoring Points: After all washers have been thrown, calculate the score. Add up points for each team. A washer that lands in the center cup usually scores 3 points, and a washer landing anywhere inside the box (but not in the cup) scores 1 point.
- Clearing the Washers: After scoring, remove all the washers from the game box to prepare for the next round.
- Continue Playing: The team that wins the previous round throws first in the new round. Continue playing until one team reaches the target score of 21.
Game Variations
There are many ways you can tweak the basic rules of the game:
- Cancellation scoring: You can use cancellation scoring where the points of one team cancel out the points of the other team in each round. For example, if Team A scores 5 points and Team B scores 3 points, team A’s score will be two points after canceling 3 points from each team.
- Distance modification: You can increase the distance between the boxes for more of a challenge.
- Bonus points: Create different zones within the box for various bonus points. For example, a washer landing closest to the center cup can earn extra points.
Customizing Your Washers Game
One of the greatest things about making your own washers game is that you can customize it to your heart’s content! Here are some ideas:
Adding Paint and Designs
After constructing your game boards, painting and adding designs is a fun way to personalize your creation. You can paint the box different colors or add stripes. You can use stencils to create patterns or even put your name or a team name on the boxes. Painting not only adds an element of fun and personalization, but also protects the wood from the weather. Using waterproof paint can make your game last longer. You can also create teams based on your family members or friend groups.
Adding Handles or Carrying Straps
If you want to make your washer game more portable, you can add handles to the sides or carrying straps on the sides. This can be particularly helpful for carrying the boxes to parks, family gatherings, or anyplace you decide to play. You can use rope or strong fabric for the straps, and use screws and washers to attach handles to the side. Handles or straps should be strong enough to bear the weight of the box and washers.
Creating a Scoreboard
To keep track of your score during the game, you can build a simple scoreboard to attach to one of your boxes. This can be done by using a piece of plywood or a whiteboard and using pegs to keep a running total of scores. This will make sure you will be able to keep track of your score without using your mind to keep the score.
Adding a Cup to the Center
While some washer games use a hole, you can also add a cup to the center of the board. By adding a small, round cup to the center of the box, you make the gameplay a little more exciting by having one center target to aim for. The cup can be attached with glue and screws for additional stability. You can also choose a decorative cup to add more style to your game. You should be careful that the cup you attach is well attached and doesn’t come loose in gameplay.
Building a washer game is an enjoyable project that results in hours of fun for friends and family. By following this step-by-step guide, you will create your game by your own, plus make something that will last for a long time. From gathering your materials to setting up the game, every step is straightforward and provides opportunities for customization. You’re ready to make lots of happy memories and laughter by creating this classic outdoor game! Remember to always prioritize safety when working with tools, and don’t hesitate to ask a grown-up for assistance when needed. Now go have fun and play your washers game!
How to Build a Washer Toss Game
Final Thoughts
Building a washers game involves crafting two wooden boxes and drilling holes in the top. You’ll need washers, of course. Ensure the boxes are sturdy enough to withstand tossing.
Next, space the holes appropriately for challenging gameplay. Paint the boxes for personalization. Finally, the key is to enjoy learning how to build washers game with friends.

