
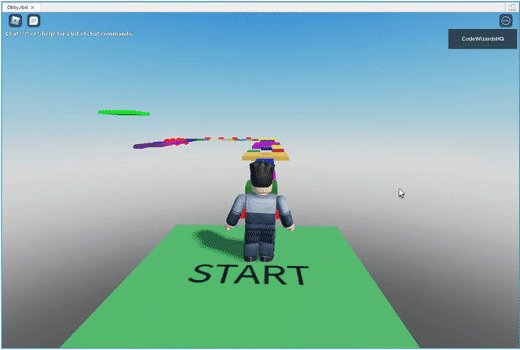
Creating a simple Roblox game involves using Roblox Studio to build a world, add objects, and implement basic game logic through scripts.
Ever dreamt of making your own game? Well, you can learn how to create a simple Roblox game easily. It’s an exciting way to learn game design while having lots of fun. We will guide you through the basics so you can start creating your first experience.

How to Create a Simple Roblox Game
Want to make your own game on Roblox? It’s actually easier than you might think! This guide will walk you through the basics of creating a simple Roblox game, step by step. You don’t need to be a super coder, just have a little patience and a lot of creativity.
Getting Started with Roblox Studio
First things first, you need Roblox Studio. It’s free to download and use. Think of it as your game-making workshop. You can find the download link on the Roblox website. It’s available for Windows and Mac computers. Make sure you have it installed before moving on.
Understanding the Roblox Studio Interface
Once you open Roblox Studio, you’ll see a lot of buttons and windows. Don’t worry, it’s not as complicated as it looks! On the top, you have the main menu. It has things like “File,” “Edit,” and “View.” These let you manage your project and change the way you see things. Then on the left side, you’ll find the “Explorer” window. Think of it as a file system for your game. This is where you’ll see all the parts, scripts, and other elements that make up your game. The properties window is on the right. When you select something, the Properties window lets you change its appearance, behavior, or size.
At the center of your screen is the main work area. This is where you’ll build your game world. You can move the camera around using the WASD keys and your mouse. Get familiar with moving around, as this is crucial for building your game.
Creating a New Place
The first thing you’ll want to do is create a new “place.” This is the term Roblox uses for your game world. Click on “File” in the top menu, then select “New.” Choose the “Baseplate” template for a simple flat world. This will make starting easier. It is a blank canvas, ready for your creative touch. We can build anything with the Baseplate.
Adding and Manipulating Objects
Now that you have a basic world, it’s time to add some objects. These are the building blocks of your game. Click on the “Home” tab in the top menu. Look for the “Part” button in the ribbon. Select the “Block” option to insert a simple cube. You’ll see the block appear in the middle of your Baseplate. You can now manipulate it using the different tools.
Using the Move Tool
The “Move” tool lets you change the block’s position. Click on the “Move” button on the top menu, just under the Home tab. When you click on the block, you’ll see arrows pop up. Click and drag these arrows to move the block in different directions. You can move them forwards, backwards, left, right, up, and down.
Using the Scale Tool
The “Scale” tool lets you change the size of the block. Click the “Scale” button to activate it. You will see different colored spheres when selecting the block. Click and drag these spheres to make the block bigger or smaller. Scale the block as big or small as you want.
Using the Rotate Tool
The “Rotate” tool lets you spin the block around. Click on the “Rotate” button. Circles will appear on the block. Click and drag these circles to rotate the block along any axis. Change the angle to your liking.
Changing Part Properties
Now that you can move, scale, and rotate, let’s change its looks. Select the block. In the “Properties” window on the right, you will see the property options. Look for “Color” and click the color block to change it. Then, you can select a new color. To change the Material of the block, simply look for material, and select your desired material from the drop-down. You can make the block look like wood, metal, grass or many more materials.
Creating a Simple Obstacle Course
Let’s use what we’ve learned to make a simple obstacle course. The players will have to jump over it. We can make a series of different blocks with some distance between them. Use the “Part” button, add some blocks, and then move, scale, and rotate them. Make sure the blocks are placed far enough apart so that a player has to jump between them. Try to vary the height and distance. This makes the obstacle more fun.
Adding a Starting Point
Now we need a place for players to start. Add another block at the beginning of your course. You can make it a different color to mark the starting point. This makes it easier for players to know where to begin.
Adding a Finish Line
Next, add a finish point for your obstacle course. You can use another block and change its color. This time pick a different color, something very bright. This clearly marks the end of the course. Make sure it is visible for the player.
Making Parts Non-Collidable
Sometimes you might want parts that players can walk through. For example, you might want a goal line that players don’t stop against. Select the parts that you want to make non-collidable. In the Properties window, find “CanCollide.” Uncheck this box. Now players will pass right through these parts.
Adding a Character to your Game
Every game needs a player character. Roblox usually does this automatically, so you don’t need to worry about it now. When you play the game, your avatar will be placed at the starting point we created. This way, players can start playing instantly.
Testing Your Game
Now for the fun part, testing your game! Click the “Play” button at the top of Roblox Studio. Your character will appear in your game. Try to complete the obstacle course. This will help you see what the player experience will be.
Making Adjustments
You might find that some parts are too hard or too easy. Close the game and make some changes in Roblox Studio. Adjust the blocks, scale and rotate them, making the game more interesting and fun. The more you test and adjust, the better your game becomes.
Saving and Publishing Your Game
It’s very important to save your work often. To save your game, click on “File,” then “Save to Roblox As…”. Give your game a name and click save. After you’ve saved your game, you can publish it. Publishing means making your game available for others to play. Click on “File,” then “Publish to Roblox.” The world can now see your masterpiece.
Sharing Your Game
To share your game with friends, go to the Roblox website. Go to your profile. Find the game you just published. Then, copy the link and send it to your friends or anyone you want to share with. Now they can test your work too!
Adding Simple Scripts (Optional)
If you want to make your game a little more complex, you can try adding simple scripts. Scripts are lines of code that tell the game what to do. It’s not required to build a simple game. But it can be a fun way to add interactive elements. Don’t worry if you are not a coder. We’ll try simple example so you get the basic idea.
Adding a Simple Teleporter
Let’s add a teleporter. First, add two blocks in your game. Call them “TeleporterStart” and “TeleporterEnd.” Make the “TeleporterStart” block the place you want the player to step into. The “TeleporterEnd” block will be where the player appears after teleporting.
Now, add a script to the “TeleporterStart” block. Right-click on “TeleporterStart” in the Explorer window. Select “Insert Object” and then “Script.” Double-click the script to open it. Copy the code provided below into the script. This code will teleport the player to the other block when they touch the block. Remember to change the “TeleporterEnd” part in the code to the actual name of your target part.
Here’s the code for the script:
                local part = script.Parent

                part.Touched:Connect(function(hit)
                    local player = game.Players:GetPlayerFromCharacter(hit.Parent)
                    if player then
                        local destination = workspace:FindFirstChild("TeleporterEnd")
                        if destination then
                            local char = player.Character
                            char:MoveTo(destination.Position + Vector3.new(0,3,0))
                        end
                    end
                end)
Expanding Your Game
This is just a basic game, and there’s so much more you can do. You can add more complex obstacles, power-ups, and different kinds of interactive elements. Think about what you want to add to the game. Always experiment and try different things to improve it. Use this to become a better creator.
Adding Sound Effects
Adding sound effects can make your game more exciting. You can find sounds in the Roblox Toolbox. Search for the sound you like. Add it to your game. Experiment with different types of sounds. This will help to improve the gaming experience.
Adding Simple Visuals
Make your game look more exciting by adding different visuals. Use different colors and materials for your blocks. Try different shapes to add variation in your game world. You can add simple details that make a big difference to the game.
Important Concepts to Remember
Creating your own game is a journey. Sometimes things might not go as you plan, and that’s okay. Keep practicing. There are lot of free resources and tutorials online. Learn a little bit every day. This will help you grow as a game developer. Also, don’t forget to have fun with it.
- Practice: The more you practice, the better you’ll get. Try different techniques and see what works best.
- Experiment: Don’t be afraid to try new things. There is no right or wrong in creativity.
- Patience: Building games takes time. Be patient and don’t get discouraged if things don’t work right away.
- Learn: Learn from other creators, and watch their games. This is a way to find new ideas.
- Have Fun: The most important thing is to enjoy the process. Making games should be fun!
Making your first game on Roblox is a very exciting experience. With a little practice, anyone can become a creator! You have learned some basic concepts and tools in Roblox Studio. You can create simple games and publish them for others to enjoy. Keep working on your ideas, and remember to have fun. You will become a great developer in no time!
The ULTIMATE Beginner Guide to Roblox Studio.. (Start BUILDING Now!)
Final Thoughts
So, to create a simple Roblox game, start with Studio. Then, add basic parts like a baseplate and some blocks. Next, use simple scripts to make things happen.
Remember, experimenting is key. Now you have grasp on how to create a simple Roblox game. Begin with simple project and slowly expand.

