Manually assigning more RAM to a specific game isn’t directly possible; instead, close unnecessary programs and background processes to free up RAM, ensuring the game uses more of the available system memory.
Is your favorite game struggling with stuttering or slow loading times? Often, a lack of available RAM is the culprit. Many gamers wonder how to dedicate more RAM to a game, hoping for a smoother experience.
While you cannot directly assign RAM specifically to one game, you can definitely optimize your system. We will guide you through steps to prioritize your gaming performance.

How to Dedicate More RAM to a Game
Ever been in the middle of an awesome game, only to have it slow down or even freeze? It’s super frustrating, right? Often, this happens because your computer doesn’t have enough RAM (Random Access Memory) dedicated to the game. Think of RAM as your computer’s short-term memory. The more RAM available, the faster your game can load and run smoothly. So, how do you give your game more of this precious resource? Let’s dive in and learn how you can help your games perform at their best.
Understanding RAM and Its Importance for Gaming
Before we jump into the how-to, it’s important to understand what RAM is and why it matters for games. Your computer uses RAM to store data that it needs to access quickly, like game assets, character positions, and sound effects. When you start a game, it loads a lot of this data into RAM. If you don’t have enough RAM, your computer will start using the hard drive, which is much slower. This leads to those annoying lags and freezes we all hate. The more complex a game is, the more RAM it generally needs.
Imagine your computer is like a student working on a big project. RAM is like the student’s desk space. If the desk is small, the student has to keep putting things away and taking them out, which slows them down. But if the desk is big enough, all the important materials can stay out and be easily accessible, which makes the student work much faster. So, more RAM equals faster and smoother gaming.
What Happens When You Don’t Have Enough RAM?
When your computer doesn’t have enough RAM, it resorts to something called “paging” or using the “page file” (also known as swap file). This is basically using your hard drive as extra RAM. This is extremely slow compared to actual RAM, like trying to run a race with weights on your feet. Here’s what you might experience:
- Lag: The game will seem to freeze or skip frames, making it difficult to play.
- Stuttering: The game will have jerky movement, not smooth and consistent.
- Long loading times: Starting the game or changing between levels will take a very long time.
- Crashes: The game might suddenly close down without any warning.
- Low frame rates (FPS): The game will have a low number of frames per second, making it appear choppy.
Checking Your Computer’s Current RAM
Before you start making changes, it’s good to know how much RAM your computer currently has. Here’s how you can check:
On Windows:
- Right-click on the Windows Start button.
- Select “System” from the menu.
- In the “System” window, you will find “Installed RAM”.
On macOS:
- Click on the Apple menu in the top-left corner.
- Select “About This Mac”.
- Click on “System Report”.
- Select “Memory” in the left sidebar.
- You’ll find your RAM details there.
Keep a note of this number. This will help you figure out if you need more RAM or if something else might be causing your game’s problems.
Methods to Increase Available RAM for Games
While you can’t magically create more physical RAM, you can manage how your computer uses it and free up more for your games. Here are several techniques:
Closing Unnecessary Programs
This is the easiest and most effective first step. Every program you have open uses some RAM. Closing programs you’re not using will make that RAM available for your game. Here’s how to do it:
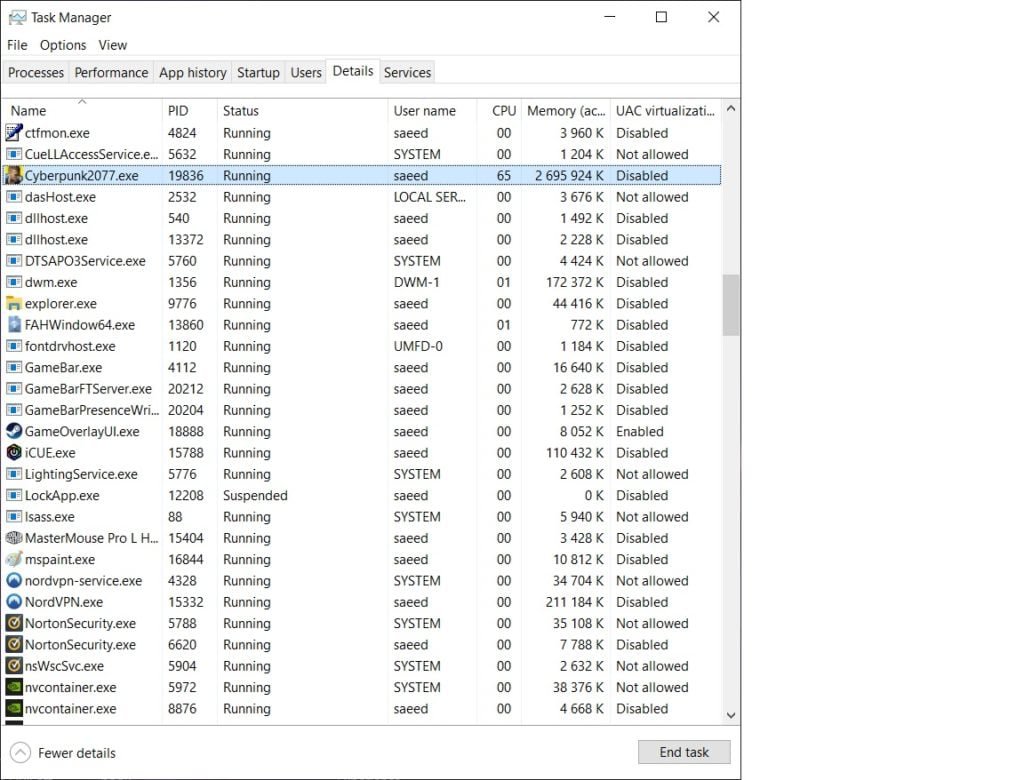
- Windows: Press Ctrl + Shift + Esc to open Task Manager. Go to the “Processes” tab. You’ll see a list of all running programs and how much RAM they’re using. Click on the “Memory” column to sort by usage. Close any programs you don’t need by selecting them and clicking “End Task”.
- macOS: Press Command + Space, then type “Activity Monitor” and press Enter. Go to the “Memory” tab. You’ll see all running programs and their RAM usage. Close any you don’t need by selecting them and clicking the “X” button.
Be careful not to close important system processes though.
Disabling Startup Programs
Many programs automatically start when you turn on your computer. These programs use RAM in the background, even if you’re not actively using them. Disabling unnecessary startup programs can free up a lot of RAM.
- Windows: In Task Manager, go to the “Startup” tab. You’ll see a list of programs that start automatically. Disable the ones you don’t need by selecting them and clicking “Disable.”
- macOS: Go to System Preferences -> Users & Groups -> Login Items. You’ll see a list of programs that start at login. Uncheck the ones you don’t want to start.
Adjusting Virtual Memory (Page File)
As we discussed, virtual memory uses your hard drive as extra RAM when you run out. While this isn’t as fast as actual RAM, adjusting its settings can help your computer handle memory shortages better. Generally, Windows manages this well, but sometimes increasing the size can be helpful. Here is how:
- Windows:
- Type “Advanced System Settings” in the Windows search bar and press Enter.
- In the “System Properties” window, go to the “Advanced” tab.
- Under “Performance,” click “Settings.”
- Go to the “Advanced” tab again, then under “Virtual memory,” click “Change”.
- Uncheck “Automatically manage paging file size for all drives.”
- Select “Custom size”.
- Set the “Initial size” and “Maximum size.” As a general rule, set the initial size to 1.5 times your RAM and the maximum to 3 times your RAM. For example, if you have 8 GB (8192 MB) of RAM, set the initial size to 12288 MB and the maximum size to 24576 MB.
- Click “Set” and then “OK”. You might need to restart your computer for the changes to take effect.
Caution: Messing with virtual memory incorrectly can cause system instability. Be careful to follow the directions.
Using Game Boosters or Optimizers
There are software programs specifically designed to optimize your computer for gaming by freeing up RAM and other resources. These programs often temporarily disable unnecessary services and programs while you are gaming and restore them afterward. Examples include Razer Cortex, Game Fire, and WTFast. Keep in mind that some of these programs might not always work as advertised, and some may include other unneeded features. Choose them wisely.
Note: It is always good to do research before downloading any third-party application.
Updating Graphics Drivers
While outdated graphics drivers don’t directly reduce the amount of available RAM, they can cause games to perform poorly. This can lead to higher RAM usage because the system has to compensate for graphics issues. Keep your drivers updated for optimum performance. Here is how you do this:
- Windows:
- Right-click on the Windows Start button.
- Select “Device Manager”.
- Expand “Display adapters”.
- Right-click on your graphics card and select “Update driver”.
- Choose “Search automatically for drivers.”
- macOS: Graphics drivers are usually updated through system updates. To check for updates, go to System Preferences -> Software Update.
Closing Background Processes
Sometimes, processes run in the background that you may not be aware of. These processes consume RAM and processing power. Using Task Manager or Activity Monitor, you can identify and close these processes, which can improve your computer performance. Pay close attention to things that are using a lot of system resources, and research them online before closing them. This is very similar to the ‘closing unnecessary programs’ method, but focuses more on background processes.
Adjusting Game Settings
Lowering the graphics settings in your games can reduce the amount of RAM needed. Lowering the texture quality, shadow details, and resolution often significantly impacts RAM usage. This can be an effective method if you are having trouble with performance, as it lets your game use less memory and processing power. Here is how you do this:
- Go to the settings menu in your game.
- Look for options related to graphics and resolution.
- Lower the graphics options one at a time, testing the game between each change.
- Adjust these settings until you reach a good balance between visual quality and smooth performance.
Hardware Upgrades
If none of the above methods solve the problem, it may be time to consider upgrading your hardware. Adding more RAM is a good option, however it might be expensive and require some technical knowledge to install it correctly. Adding a solid-state drive (SSD) is also an option, as it will help your game load faster. This will help the game to load information at faster speeds.
Here are some benefits of these options:
| Hardware Option | Benefit |
|---|---|
| Additional RAM | More RAM means more memory available for your game, reducing lag and improving overall performance. |
| SSD | SSDs are much faster than traditional hard drives, which results in much faster loading times for your game and quicker overall computer performance. |
Before upgrading, research the components that are compatible with your computer to ensure your computer can support them. You will need to check your computer’s motherboard specifications.
Regular Computer Maintenance
Performing regular computer maintenance can help keep things running smoothly. This includes things like clearing your temporary files, running disk cleanup, and scanning for malware. These things can slow down your computer, increase RAM usage, and negatively impact gaming performance. Maintenance can be achieved by using programs such as Windows Disk Cleanup and built-in anti-virus programs.
By using the various methods described above, you can increase the amount of RAM available for your games and get them running smoothly and efficiently. Try out different things to see what works best for your computer and the specific games you want to play.
Remember, increasing available RAM is often about managing what you have effectively, not just about adding more hardware. This can often make a huge difference in gaming performance, especially on older systems.
It’s all about making sure your computer has the space and resources to let your games perform their best, so you can experience all the excitement they offer. With a bit of tweaking and understanding, you can transform your gaming experience for the better.
How To Allocate More RAM To Specific Programs/Games On Windows! [2024]
Final Thoughts
You can increase RAM allocation for a game through Windows settings, modifying shortcut properties, or using third-party tools, however game developers usually handle memory automatically. While directly forcing extra RAM might not always yield performance gains if the game isn’t designed to use it, understanding these methods is helpful.
Remember, the game itself must need more memory to benefit from any adjustments you make. Knowing how to dedicate more ram to a game provides control, but game design also impacts usage.

