
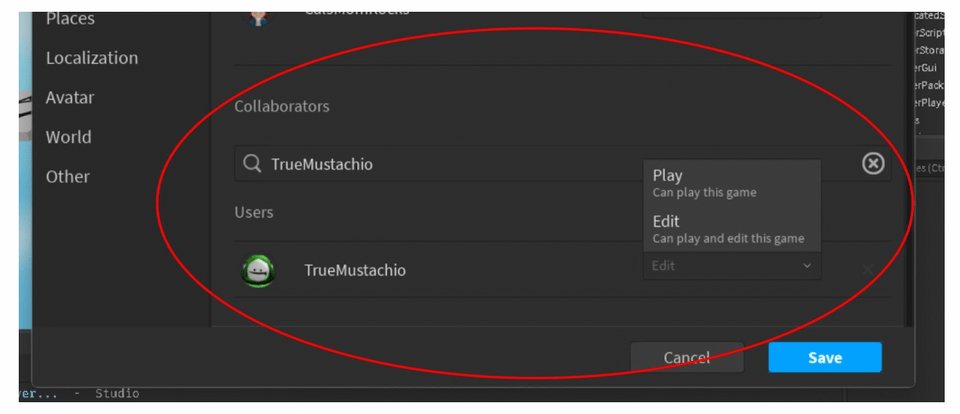
To edit your game in Roblox, you use Roblox Studio, a free software provided by Roblox. You open your game project within the studio, then you can use its tools to change scripts, add or remove objects, or alter the game’s environment.
Have you ever wondered about making adjustments to your creation on Roblox? It’s a common thought for many creators. Learning how to edit your game in Roblox isn’t difficult, and it opens doors to endless possibilities.
With the right tools and a little patience, you can add that perfect feature or correct a pesky bug. It is a very rewarding process to change and improve your game.

How to Edit Your Game in Roblox
Ready to make your Roblox game awesome? Editing your game is where the real magic happens! It’s like being a builder, artist, and programmer all at once. Don’t worry, it might seem tricky at first, but we’ll go step-by-step. Think of it like building with LEGOs, but instead of plastic bricks, you’re using virtual ones. Let’s jump in and explore all the ways you can shape your Roblox world!
Understanding Roblox Studio
Before we start moving things around, let’s talk about the tool we’ll use: Roblox Studio. It’s the place where all the editing happens. Imagine it as your game-making workshop. You need to download Roblox Studio first. It’s free and available for computers. Once you have it installed, open it up and let’s get familiar with the layout.
Navigating the Roblox Studio Interface
Roblox Studio might look a bit complicated when you first open it, but it’s really organized into different sections. Let’s break it down:
- The Menu Bar: Located at the very top, this is where you find commands like saving, opening, and publishing your game. It’s like the control panel for your studio.
- The Explorer: Usually on the right side, this panel shows everything in your game – all the parts, scripts, and folders. Think of it like a list of all the things in your toy box.
- The Properties Window: Just below the Explorer, this window lets you change how things look and act. Want to change the color of a block? This is where you do it! You can also adjust the size, position, and material here.
- The Toolbox: Often on the left side, this is your library of free models, images, sounds, and other things you can add to your game. It’s like a free toy store for your game!
- The Viewport: This is the big main area in the middle. This is where you see and interact with your game world. It’s like looking through the window into your game.
Don’t feel like you need to memorize everything right away. Just knowing where these parts are will help you get comfortable. Now, let’s move on to some actual editing!
Adding and Manipulating Objects
One of the first things you’ll want to do is add stuff to your game! Let’s see how you can add basic objects, like blocks and spheres, and move them around.
Inserting Parts
Roblox calls basic shapes “parts”. To add a part, follow these easy steps:
- Click the “Home” tab at the top of the screen.
- In the “Part” section, you’ll see different shapes like a block, a sphere, a wedge, and a cylinder. Choose the one you want.
- Click on your chosen part. It will appear in your game’s viewport.
Moving, Rotating, and Resizing Objects
Once you have some parts in your game, you need to know how to change them. Roblox Studio gives you tools for moving, rotating, and changing size:
- Move Tool: Click on the “Move” tool in the “Home” tab. Then, click on the part you want to move. You’ll see colorful arrows pop up. Drag these arrows to move your part along different directions.
- Rotate Tool: Click on the “Rotate” tool. Click on your part. Circular arrows will appear. Drag these arrows to rotate the part.
- Scale Tool: Click on the “Scale” tool. Click on your part. Colored squares appear. Drag these squares to make the part bigger or smaller.
Practice moving, rotating, and resizing different parts. Getting good at this is very important when making complex structures or a whole game world! It’s like practicing your handwriting before writing a story.
Using the Properties Window
The Properties window gives you more control. Click on a part and then look at the Properties window. You will see a list of things you can change like:
- Color: Click the color box to change the color of the part.
- Material: Choose different materials like wood, metal, or glass. This changes how the part looks.
- Size: Type in specific numbers to change the size of the part with precision.
- Position: Type in specific coordinates to place the part exactly where you want.
The Properties window is useful for making sure every part is perfect! You can make sure that all parts are same size or color. It’s good practice to use this tool and makes the process of editing parts more effective.
Working with Free Models
Sometimes, you want to add something more complex than just a single part. That’s where free models come in. Free models are objects made by other Roblox users, and you can use them in your game!
Finding and Adding Free Models
The Toolbox is your best friend for adding free models. Here’s how:
- Click the “Toolbox” tab on the left side.
- Click on “Models”.
- Type what you’re looking for in the search bar. For example, type “house” if you want a house model.
- Browse through the results. When you find something you like, click on it to add it to your game.
Adjusting Free Models
Just like with parts, you can move, rotate, and scale free models. You can also change their properties. Be careful when using free models. Sometimes, they may have unwanted scripts. Before using them it’s good practice to test them first.
Scripting Basics
Scripts are like instructions for your game. They tell parts what to do. Scripting makes the game more fun. Think of scripts as the brains behind your game, making things move, change, and respond to players.
Adding a Simple Script
Let’s add a simple script to change the color of a part:
- In the Explorer, find the part you want to change.
- Right-click on the part.
- Select “Insert Object” then click “Script.”
A script will appear inside your part. Now, let’s write a little code. Double-click the script to open the script editor.
Writing Basic Code
Inside the script editor, you will see some default text. Delete that and type this:
script.Parent.Color = Color3.new(1, 0, 0)
This line tells the part to turn red. The “script.Parent” means “the part this script is in.” “Color3.new(1, 0, 0)” means “make the color red.”
Testing Your Script
To see if your script works, click the “Play” button at the top. Your part should turn red! If not, check for typos and try again.
More Scripting Ideas
Here are some basic scripting examples to try:
- Making Parts Disappear:
script.Parent.Transparency = 1will make the part invisible. - Making Parts Move:
script.Parent.Position = Vector3.new(10, 5, 0)will move the part. - Making Parts Change Colors:
script.Parent.Color = Color3.new(0, 1, 0)will make the part green.
These are just simple examples. There’s a lot you can do with scripting! It can be challenging, but very rewarding when you see your game come to life!
Terrain Editing
Sometimes, you need more than just parts for making your game world. That’s where terrain comes in. Terrain is what makes natural-looking landscapes, like hills, mountains, and water. Let’s explore how to edit it.
Using the Terrain Tools
Roblox Studio has some helpful terrain tools:
- Region: Use this to select areas to change.
- Add: This tool makes terrain, like raising ground or adding water.
- Subtract: This tool takes away terrain, like digging holes or making rivers.
- Smooth: This tool makes the terrain less bumpy, giving a more natural look.
- Flatten: This tool makes terrain flat and level.
- Paint: This tool lets you paint different terrain materials like grass, sand, or rock.
Creating Landscapes
Let’s create a small hill. Follow these steps:
- Click the “Editor” tab at the top.
- Click the “Terrain Editor” tool.
- Choose the “Add” tool.
- Select the type of material, like grass or sand.
- Click and drag on the game world to make a hill shape.
Practice using these different terrain tools. You can make mountains, valleys, beaches, and anything else you can imagine! Editing terrain can take some time to get used to but will make your game world more fun to explore.
Advanced Techniques
Now that you’ve got the hang of the basics, let’s try out some more advanced techniques.
Using Constraints
Constraints are like magical links that can hold parts together. They can also make parts move in a special way.
Types of Constraints
There are different types of constraints. Here are a few useful ones:
- WeldConstraint: This constraint joins two parts together so they move as one.
- HingeConstraint: This lets parts swing around a point, like a door hinge.
- PrismaticConstraint: This makes parts slide in a straight line, like a drawer.
- BallSocketConstraint: This lets parts rotate in all directions, like a joint.
Adding and Using Constraints
To add a constraint, follow these steps:
- In the “Home” tab, click on “Constraints.”
- Select the constraint you want to use.
- Select two parts in your game.
Play around with different constraints. They can make your game more interactive and fun. For example, you can create a door that swings open or a platform that moves up and down.
Utilizing the Asset Manager
The Asset Manager is where you store your assets, such as custom images, sounds, and meshes. Assets are the building blocks of your game. You might need to add custom images to decorate your game or music for background ambiance.
Importing Assets
To import assets, follow these steps:
- Click the “View” tab at the top.
- Click on “Asset Manager.”
- Click the “Bulk Import” button.
- Choose the files you want to upload.
After uploading, you can drag and drop assets from the Asset Manager into your game. It’s like having your own custom library of resources for your game!
Testing and Iterating
The key to making a good game is testing and changing things. As you build your game, it’s important to play it often and make adjustments.
Playing Your Game
Click the “Play” button at the top to test your game. Try out all the features that you are adding. Check if everything works as you planned.
Making Changes
When you test, you may find things you want to change. Maybe a part is in the wrong place, or a script isn’t working correctly. Don’t be afraid to experiment and make changes. It’s part of the fun of game making!
Editing your game in Roblox is a process that you improve over time. Don’t give up if you face challenges! With practice, you’ll become an awesome Roblox game maker. Each time you create something new, you learn more and more. Remember to explore, experiment, and most of all, have fun. It’s like building a magnificent castle, one brick at a time. Keep going and soon you will see your creation take on life!
HOW TO CHANGE YOUR ROBLOX GAME ICON IN 2024
Final Thoughts
To edit your game in Roblox, open Roblox Studio. Then, select the game you wish to modify. Use the tools in Studio to add, remove, or change game elements.
Remember to save your work frequently, and testing your game will help identify any issues. It is key to experiment and learn the different functions of the studio to make your vision come to life.
Therefore, understanding how to edit your game in roblox involves using its studio interface, experimenting with tools, and saving progress often.

