
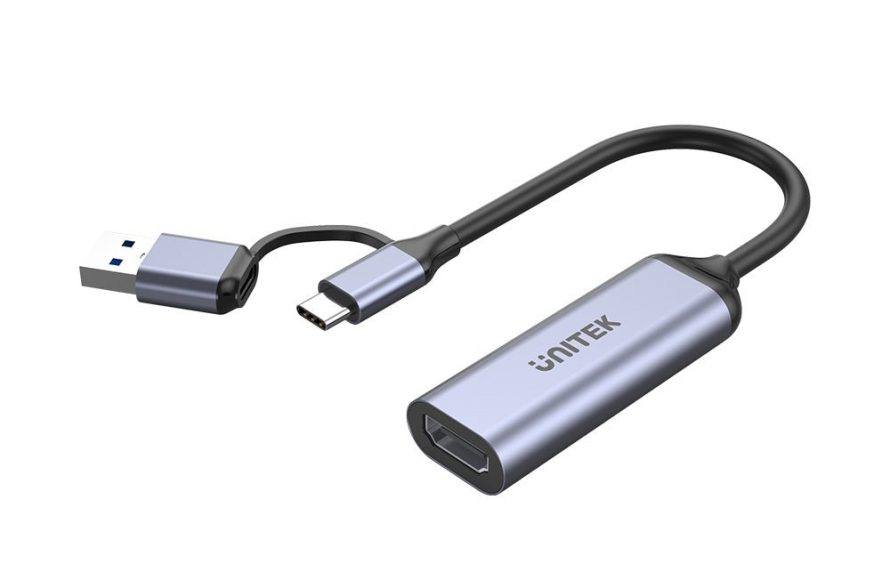
To game capture with HDMI to USB Type-C, you connect your console or device’s HDMI output to a capture card, then plug the capture card’s USB Type-C end into your computer. This lets the computer record or display the video signal.
Want to share your epic gaming moments? You can easily do it, and many gamers wonder how to game capture with HDMI to USB type-c. It’s a common goal but the path isn’t always obvious.
We’ll break down the process simply. We will cover what you need and how to connect everything. This setup allows you to record and share your gameplay footage on a computer.

How to Game Capture with HDMI to USB Type-C
So, you want to share your awesome gaming skills with the world, or maybe just record them for yourself? That’s fantastic! Using an HDMI to USB Type-C connection to capture your gameplay is a great way to do it, and it’s easier than you might think. We’re going to walk through everything you need to know to get started, from figuring out what gear you need to making your first awesome recording.
Understanding the Basics: HDMI and USB Type-C
Before we jump into the how-to, let’s talk quickly about what these two important connectors do. HDMI, or High-Definition Multimedia Interface, is what sends video and audio from your game console or computer to your monitor or TV. It’s like a super-fast mail carrier for pictures and sounds. USB Type-C, on the other hand, is a type of USB port. It’s a small, oval-shaped connector that’s used for all sorts of things, from charging your phone to transferring data. In our case, it acts like a highway for your game footage to get from your console to your computer.
Why Use HDMI to USB Type-C for Game Capture?
You might be asking, why not just use a regular HDMI cable or some other method? Well, here are a few big reasons why HDMI to USB Type-C is becoming so popular for game capture:
- Simplicity: It’s pretty straightforward. You plug one end into your gaming device (like your PlayStation, Xbox, Nintendo Switch, or even your gaming PC) and the other end into your computer. No confusing setup, just plug and play!
- Portability: These devices are often small and light, making them easy to carry around. If you travel and want to record your gaming on the go, they are super helpful.
- Good Quality: You can capture high-definition video (often even 4K!) without much hassle, keeping your recordings looking crisp and clear.
- Low Latency: This means there’s only a tiny delay between when you play and when it shows up on your recording. This is really important for a good gaming experience.
The Gear You’ll Need
Okay, now that we know why using HDMI to USB Type-C is a good idea, let’s talk about the tools you’ll need. Here’s a checklist:
- Game Console or PC: Obviously, you’ll need something to play games on. This could be anything from an Xbox Series X or PlayStation 5 to a Nintendo Switch or your personal gaming computer.
- HDMI Cable: You likely already have one of these. It’s the cable that connects your game console to your TV.
- HDMI to USB Type-C Capture Card: This is the main piece of hardware that makes this all possible. It’s a small device that takes the HDMI signal from your console and sends it to your computer using a USB Type-C connection. We’ll discuss different options more in depth soon.
- USB Type-C Cable: You’ll use this to connect the capture card to your computer. Some capture cards come with one, but it’s always good to make sure you have one handy.
- Computer: You need a laptop or desktop computer with a USB Type-C port to record the footage. It’s best to use a computer that has a decent amount of power, especially if you plan on recording higher resolutions and framerates.
- Recording Software: You’ll need a software program to capture the video from the capture card. Some popular options include OBS Studio (free), Streamlabs Desktop (free), XSplit (paid), and other video editing programs may be able to record with proper capture card integration.
Choosing the Right HDMI to USB Type-C Capture Card
This is where things can get a little tricky because there are tons of options out there. It’s a good idea to spend some time looking at reviews before you buy. Here are some things to think about when choosing a capture card:
Resolution and Frame Rate
Do you want to capture games in 1080p at 60 frames per second (fps), or are you looking for 4K at 60 fps, or maybe even 120 fps? The higher the resolution and frame rate, the better the video quality, but also the more expensive the capture card might be. Also, keep in mind that to capture at the highest settings, your computer must be capable of processing that video. Make sure the capture card you choose supports the resolution and frame rate you want. Most capture cards nowadays support 1080p 60fps, which is a great option for starters.
Pass-Through
Some capture cards have HDMI pass-through, which means you can connect your game console to the capture card, and then the capture card to your monitor or TV. This allows you to play the game on your screen without any delay while recording on your computer. It is ideal for those looking for the most authentic experience, as there are no added delays in your gaming session. Make sure the device has the pass-through feature if you want this, as it is not a guarantee.
Software Compatibility
Does the capture card work with the recording software you want to use? Most popular capture cards are compatible with OBS Studio and other common programs, but it is always best to double check. Some brands may also offer their own software that you can use, as well.
Price
Capture cards can range in price from fairly affordable to quite expensive. Think about how much you want to spend and what features are most important to you. It is not always better to get the most expensive one, especially if you do not need all the features it provides.
Brand
There are several brands that provide capture cards, such as Elgato, Avermedia, Razer, and more generic brands. It may help to research the most popular brands to see which capture card suits your needs. It is recommended to look at review videos on YouTube and other sites.
Setting Up Your Game Capture
Alright, you have your gear, so let’s get down to setting things up! Here’s a step-by-step guide on how to connect everything.
Connecting the Hardware
- Turn everything off: Make sure your game console, computer, and monitor/TV are turned off before you start connecting cables.
- Connect your console to the capture card: Plug one end of your HDMI cable into your game console’s HDMI output port. Plug the other end of the HDMI cable into the “HDMI In” port on your capture card.
- Connect the capture card to your computer: Use a USB Type-C cable to connect the USB Type-C port on the capture card to the USB Type-C port on your computer.
- (Optional) Connect the capture card to your TV/monitor: If your capture card supports pass-through, you can use another HDMI cable to connect the “HDMI Out” port of your capture card to the HDMI port of your monitor or TV.
- Turn everything on: Start by turning on your monitor/TV, then your computer, and then your game console.
Configuring Your Recording Software
Now that everything is hooked up, you need to set up the software on your computer. We will be using OBS Studio for this example, since it is free and a very commonly used software, but this general idea applies to most other recording software.
- Download and install OBS Studio: You can download it for free from the official OBS Project website.
- Add a Video Capture Device: Open OBS Studio and find the ‘Sources’ panel, usually located on the bottom left side. Click the ‘+’ button and select “Video Capture Device.” This adds your capture card as a source.
- Select your capture card: Give the new capture device a name (like “Game Capture”) and choose your capture card from the ‘Device’ dropdown menu.
- Configure Resolution/Frame Rate: You may have to adjust resolution and fps settings to match your monitor and your preferences for the recording, so play around with these settings to see what suits you best.
- Test your setup: Start a game on your console and make sure the game footage shows up in the OBS preview window. Make sure it isn’t choppy, and that the audio is coming through. If the game footage is a black screen, double check all your connections and that your monitor is receiving a signal.
- Adjust audio settings: Make sure the audio from your game is being captured. In OBS, you can check in the ‘Audio Mixer’ window. If you don’t see any audio, check your capture card settings and your Windows audio settings. You can adjust volume from this panel, and add additional audio sources like a microphone.
- Start Recording! Once you’re happy with all your settings, click the “Start Recording” button to begin capturing your game footage. When you’re done recording, click the “Stop Recording” button.
Keep in mind that each capture card may have slightly different options, so it may be worthwhile to consult your device’s instruction manual. And of course, you can always search the web if you need extra help.
Troubleshooting Common Issues
Even when you follow all the steps, sometimes things just don’t work right. Here are a few common problems and how to fix them:
No Signal
If you’re not seeing any video in OBS, the first thing to check is your connections. Make sure the HDMI cables are plugged in securely and that the capture card is properly connected to your computer. Also, ensure that the correct HDMI input source is selected on your monitor. Restarting all the devices can also help.
Choppy or Lagging Video
This can be caused by several things. First, ensure that your computer meets the minimum requirements for recording. It may help to close out any applications you are not using in the background. You may also have to lower the resolution or frame rate in your capture card settings to see if that helps. You should also make sure that the cable you are using is capable of handling the resolution you are trying to record, as some older cables may be too slow. Another option is to try a different USB port on your computer.
No Audio
If you don’t hear any audio, make sure that the correct audio input device is selected in your recording software. You should also check the audio settings on your game console and on your computer. Ensure that your capture card is also set to be an audio source. You may also have to test your speakers/headphones to make sure that the output source is properly set as well.
Driver Issues
Sometimes, the drivers for your capture card can cause problems. Go to the manufacturer’s website and download the latest drivers for your capture card. Usually, you can find these drivers from the support section of the website.
Software Issues
Sometimes, the issue can be with the recording software itself. Make sure that you are using the latest version of your software, and that the device is compatible with it. Sometimes a quick restart of your software can help as well. If all else fails, you can also try uninstalling and reinstalling it.
With a little practice, you’ll get the hang of game capturing with your HDMI to USB Type-C setup. Don’t be afraid to experiment with different settings to see what works best for you. Remember to have fun and share your awesome gameplay with the world!
How To Setup A Capture Card| Cheap 4k Capture Card
Final Thoughts
In conclusion, capturing game footage using HDMI to USB Type-C is straightforward. Connect your console’s HDMI output to the capture card. Then, link the card’s USB Type-C to your computer. You’ll need capture software to record.
Once setup, choose your source, and start recording. This method allows for convenient how to game capture with hdmi to usbtype c, suitable for many gamers. It provides good quality capture directly to your PC.

