To get a game pass on Roblox, you must create a game within Roblox Studio, then use the game’s configure page to create the pass, setting its price and details.
Have you ever wondered how to gain access to those cool, extra features in your favorite Roblox games? It all comes down to game passes, and understanding how to get a game pass on roblox is key. These passes give players special abilities, items, or content not available to everyone else. Learning to acquire them is simpler than you think.
So, whether you want a boost in a game or want to support your favorite creators, game passes are a vital aspect of the Roblox experience. This article guides you on the necessary steps.

How to Get a Game Pass on Roblox
Alright, budding game developers and eager players! You’ve probably seen those cool game passes in your favorite Roblox games, offering special abilities, items, or just extra fun. You might be wondering, “How can I get my own game pass?” Well, you’ve come to the right place! Getting a game pass isn’t just for the big-time creators; anyone can make them and offer them in their experiences. Let’s dive into the simple steps, so you can start selling your own passes and give your players even more to enjoy!
Understanding Game Passes
Before we get into the ‘how’, let’s make sure we’re all on the same page about what a game pass actually is. Think of it as a special ticket or a VIP pass that players can buy in your Roblox experience. When a player buys a game pass, it can give them access to some extra content or perks that they wouldn’t normally have. These can be cosmetic items, special weapons, access to new areas, or anything else you dream up! It’s a great way to support your favorite experiences, and for creators, it’s a good way to earn some Robux. Now let’s look into why creators use the game pass.
Why Creators Make Game Passes
Creators use game passes for many reasons. It is a way for creators to get paid for their hard work that goes into creating experiences. Creators can use game passes to:
- Monetize their creations: Game passes let creators earn Robux, which can then be exchanged for real-world money through the Developer Exchange (DevEx) program. It is a great way to get rewards for the hard work.
- Offer additional content: Creators can offer extra things or benefits that enhance the overall experience, so it gives players something extra to buy.
- Provide customizable options: Game passes can allow players to customize their character or their gameplay experience, giving them a chance to stand out.
- Create a win-win: It can benefit both the player, who gets more content, and the creator, who is rewarded financially. When the players have more fun, creators also get motivation to create more amazing experiences.
Game passes are a simple and fun way for creators and players to have a better experience. Now that we understand why creators use the game pass, lets look how you can make one!
Creating Your Own Game Pass
Okay, it’s time to get our hands dirty and create a game pass. Don’t worry, it’s easier than you might think! You don’t need to be a coding expert. Here are the steps to create your first game pass:
Step 1: Access the Roblox Creator Dashboard
First, you will need to head over to the Roblox website and log into your account. Then, look for the “Create” tab at the top of your screen. This will take you to the Creator Dashboard (or Creator Hub). This is where all the magic happens! This is where you will be able to create experiences, game passes, and many other things. Here you can manage your creations and start the process of creating a new game pass.
Step 2: Select Your Experience
Once you are in the Creator Dashboard, you will see a list of your experiences. Find the experience where you want to add the game pass. Click on the name or icon of that experience. This is important, as the game pass will only be available in that particular experience. Don’t worry, you can create a new game pass for other experiences later on. Now that you selected your game, you need to move to next step to create game pass.
Step 3: Navigate to the Associated Items Section
After selecting your experience, you will be directed to the experience’s page. On the left-hand side, look for “Associated Items.” Click on that, and you will see three options: Badges, Passes, and Developer Products. Now we will be working with passes, so choose that option.
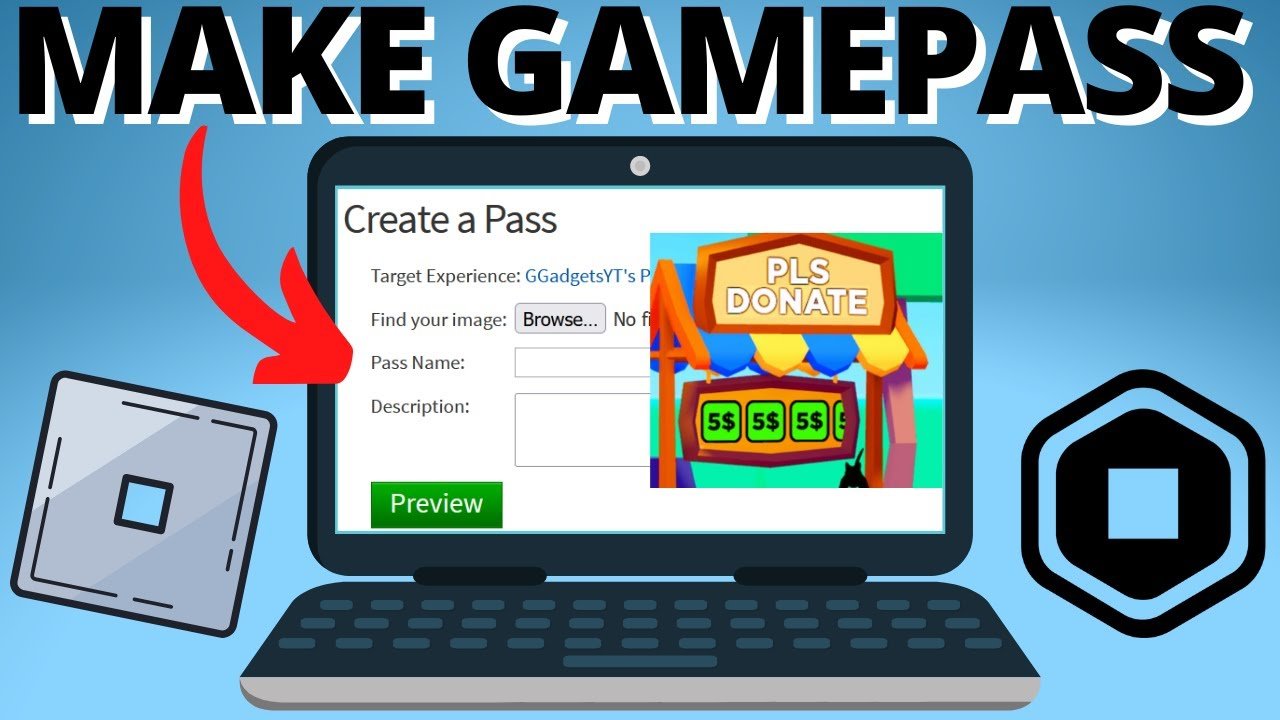
Step 4: Create a Pass
Next, in the “Passes” section, you will see a blue button that says “Create a Pass.” Click this button. You will be taken to a new page, where you will design your game pass. Here is where you upload an image, add name, and write description.
Step 5: Adding an Image
Now it’s time to make your game pass look good. Click the “Upload Image” button to upload an image. Choose an image that you think fits well with the game pass that you are creating. It could be an icon related to the item or ability that the pass provides. Make sure it is good image and fits well, as it’s the first thing players will see when they are thinking to buy the game pass. Try to upload a high-quality image so players know you are serious about your experience. Remember to follow the Roblox image guidelines, so that your image is approved by them.
Step 6: Name and Describe Your Game Pass
Next, give your game pass a name. Make it something catchy and easy to understand. If your game pass is for a special sword, you can name it “Legendary Sword” or something similar. In the description box, write a short explanation of what the game pass does. For example, “Buy this pass to get a special sword, which gives you 5 extra speed.” The name and description helps players decide if they want to buy the game pass or not. Players will not buy if they don’t understand what they are buying, so make it clear.
Step 7: Finalize your game pass
After uploading the image, naming the game pass, and describing it, click the “Create Pass” button. Now, you will be taken to the page where you see your newly created game pass! But hold on, before it is available for players, you need to configure it further.
Configuring Your Game Pass
Now that you’ve created your game pass, it’s time to configure it. This is where you set the price and make it available for purchase. Let’s go through the steps:
Step 1: Finding Your Newly Created Pass
Go back to the “Associated Items” section of your experience and choose “Passes”. You’ll see the game pass you just made. Click on it to go to the configuration page. Here, you can manage your game pass.
Step 2: Set the Price for Your Game Pass
On the game pass page, click on the “Sales” tab. Here, you will see the option to set the price. You need to click the button that says, “Item for Sale”, and toggle it so it is active. Then, set a price in Robux that you feel is fair for the value it provides. Think about how powerful it is and how much it benefits the player. If it’s just for something cosmetic, make it cheaper; if it’s a powerful upgrade or unique feature, it can be priced higher. You have to be fair to the players as well, if you set a price too high, no one will buy it! But you also need to make it worth the effort to develop the experience, so consider everything and set the right price for your pass.
Step 3: Save Your Changes
After setting your price, be sure to click “Save Changes” at the bottom of the page. That’s very important! If you don’t click the save button, all your effort will go in vain and you need to do it again. So, double-check and click the save button. Now, your game pass is officially available for players to purchase in your experience.
Implementing Game Pass Functionality in Your Experience
Creating the game pass is only the first half of the task. Now you need to make it work in your experience. You will need to implement a script that detects when a player has purchased your pass and then give them the benefits. This will require some basic scripting knowledge using Lua in Roblox Studio. We will give a basic overview here. But, if you are stuck, there are plenty of resources online that will help you with specific scenarios.
Basic Scripting Overview
Here’s a simple example of how you can check if a player owns a game pass when they join the experience. Please note that this is a simplified version, and you might need to adjust it based on your specific needs:
-- Place this script in ServerScriptService

local MarketplaceService = game:GetService("MarketplaceService")
local gamePassId = 123456789 -- Replace with your actual game pass ID

local function onPlayerAdded(player)
  local success, hasPass = pcall(function()
    return MarketplaceService:UserOwnsGamePassAsync(player.UserId, gamePassId)
  end)

    if success and hasPass then
        -- Player has the game pass, give them the benefits
        print(player.Name .. " owns the game pass!")
        -- Add logic to give the benefits, like giving an item
        local sword = game.ServerStorage.LegendarySword:Clone() --Replace with your desired item
        sword.Parent = player.Backpack
    else
        print(player.Name .. " does not own the game pass.")
        --Player does not have the game pass, then do something
        -- For example, send a message to the player to buy the game pass
    end
end

game.Players.PlayerAdded:Connect(onPlayerAdded)
Explanation:
MarketplaceService: This is a service that handles all transactions in Roblox.gamePassId: Replace123456789with the actual ID of your game pass. You can find this ID in the URL of your game pass page.onPlayerAddedfunction: This function runs every time a player joins the experience.MarketplaceService:UserOwnsGamePassAsync: This function checks if the player owns the game pass.- Conditional logic (
if hasPass then ... else ... end): This part determines what to do based on if the player owns the pass or not.
Important Points for Implementation:
- Game Pass ID: You need to put the exact ID of your game pass in the script for it to work correctly.
- Server-Side Scripts: Place the script in
ServerScriptServiceto make sure it runs on the server and is secure. - More Features: There are many other features you can use using game pass, like you can also implement logic to give permanent perks, new areas, in-game currency. There are various things you can do.
- Error Handling: Make sure to use
pcallto handle any errors that may occur while checking if a player owns the pass. - Benefits: You need to add code to give players their benefits from game pass. Use the Roblox Studio tools to create these benefits and use the script to grant players those perks.
This is just the starting point. You can explore more advanced features of the MarketplaceService to create sophisticated game pass logic.
Tips for Success with Game Passes
Creating game passes is a great start, but there are some tips that can increase the chances of your game passes being popular and successful. Here are some things to keep in mind:
- Offer Genuine Value: Make sure your game passes provide something worth buying. Players are not going to buy them if they have no real impact. A game pass for a new powerful weapon, is much more likely to sell than a game pass for something useless.
- Clear Descriptions: Clearly explain what players get with each game pass. Confusing descriptions will make them think twice before buying. They need to know exactly what they will be getting.
- Fair Pricing: Don’t overprice your game passes. Consider what is standard practice in the platform. If you set a price too high, players will not buy it, so be reasonable.
- Visually Appealing: Use attractive images and names for your game passes, so that they look great. A great-looking image is more likely to get a player to click on your game pass, and hopefully, buy it.
- Promote Your Passes: Let players know about your game passes through in-game messages, social media, or other communication channels.
- Test Thoroughly: Test the functionality of your game passes and the scripts that are implemented to give benefit, so that there are no issues after the game pass is sold. This ensures that the game pass is working as expected and there are no bugs.
- Listen to Feedback: Pay attention to what your players say about your game passes and adapt your game passes according to the feedback. Players will tell you if your prices are too high or if there are any issues with your game passes.
- Regularly Update: Update your game passes to offer players new content and keep the experience fresh. Keep the player engaged so that they want to buy more game passes.
Remember that good quality experience is the main thing. If your experience is good, players will be happy to buy your game pass and support you. So make sure that you keep your experiences fun and enjoyable!
Creating game passes in Roblox is easy and a great way to add value to your experiences. By offering extra perks, players have a better time while playing your game. Remember to use descriptive names, good images, fair prices, and a well-tested system. You’re now on your way to creating some exciting game passes and making your games even better for everyone! Have fun and good luck!
How to Make a Gamepass in Roblox
Final Thoughts
To get a game pass on Roblox, go to the game’s page and find the “Store” section. Then, you will see available passes.
Click on the game pass you want, and follow the purchase prompts. Remember, you need Robux to buy these passes.
Now you have learned how to get a game pass on Roblox! Enjoy the additional content and features that these passes provide.

