
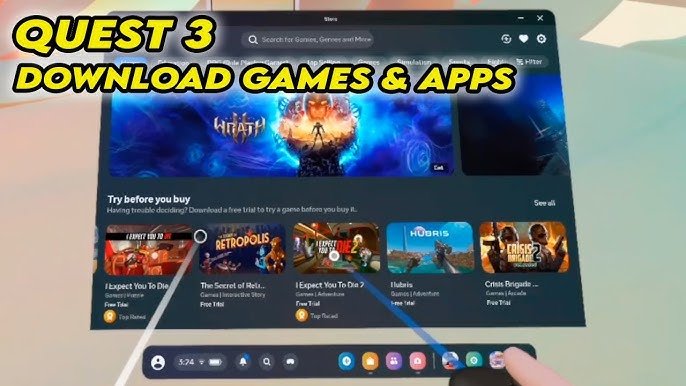
Getting custom games on Meta Quest 3 primarily involves using SideQuest or a similar platform to sideload APK files.
Want to go beyond the official store? Many users are asking how to get custom games on meta quest 3 and the answer is quite straightforward. You will need to use specific software. This opens up a world of experiences not available through the standard Meta Quest store.
SideQuest is the go-to platform. It allows you to install these unique applications onto your headset. Remember to enable developer mode. It’s a simple process allowing you to play more games.

How to Get Custom Games on Meta Quest 3
Alright, you’ve got your shiny new Meta Quest 3, and you’re having a blast exploring virtual worlds. But what if you want something different? Something that’s not on the official store? That’s where custom games come in! These are games made by independent developers and hobbyists, offering fresh experiences and unique gameplay that you just won’t find anywhere else. This guide will show you how you can play these awesome custom games on your Meta Quest 3. It’s a little different from just downloading apps from the store, but don’t worry, we’ll walk you through every step.
Understanding Sideloading
Before we jump in, let’s talk about sideloading. Think of the Meta Quest store like a big, official playground. Sideloading is like using a secret entrance to bring your own toys into the playground. The Meta Quest is designed to only install apps from its store by default, sideloading lets you install apps (like those custom games!) from outside that store. It’s a bit technical, but perfectly safe when you follow the right steps.
Getting Ready: What You’ll Need
To start playing custom games, you’ll need a few things ready. Don’t worry, most of these are easy to get:
A Meta Quest 3 Headset: Obviously, you’ll need the device itself. Make sure it’s charged and ready to go.
A Computer: You will need a computer running Windows, macOS or Linux. This is needed to move the games to your headset.
A USB-C Cable: The cable that came with your Meta Quest 3 will work just fine.
SideQuest: This is the main app that lets you sideload the games onto your Meta Quest 3. We’ll go through installing this below.
Developer Account: You’ll need a free developer account from Meta. This lets you enable developer mode on your headset.
Setting Up Your Meta Developer Account
First, let’s get that developer account set up. It’s free and easy:
1. Go to the Meta Developer Website: Open your internet browser and go to the official Meta developer website.
2. Log in: If you are already logged in with your facebook/Meta account , you can proceed to the next step. If not, then log in with the Meta account you use with your headset.
3. Create a Developer Account: Follow the prompts to make a developer account. You’ll have to accept their terms and may need to verify your account with your phone number.
4. Create an Organization: Meta will ask you to create an “organization.” Just give it a name (you can use anything, like “My Custom Games”). You don’t need to be a real company, this is just a way for Meta to organize things.
Enabling Developer Mode on Your Meta Quest 3
Now that you have a developer account, let’s enable developer mode on your Meta Quest 3:
1. Open the Meta Mobile App: Grab your phone, open the Meta app, and connect to your Meta Quest 3 if you aren’t connected already.
2. Go to Settings: Tap on the “Menu” option (usually at the bottom right), then choose “Devices.” Select your Meta Quest 3 from the list.
3. Find Developer Mode: Scroll down until you see “Developer Mode” and tap it.
4. Turn on the Switch: Slide the toggle to turn developer mode “on.” Your Meta Quest 3 might restart.
5. Confirm: A confirmation message will pop up confirming developer mode is enabled, tap “Confirm”.
Installing SideQuest on Your Computer
Next, you’ll need SideQuest on your computer. Here’s how to get it:
1. Go to the SideQuest Website: Use your computer to go to the official SideQuest website.
2. Download the Installer: Choose the installer that matches your operating system (Windows, macOS or Linux).
3. Run the Installer: Once downloaded, open the installer and follow the instructions to install SideQuest.
4. Open SideQuest: Once installed, open the SideQuest application from your computer.
Connecting Your Meta Quest 3 to Your Computer
Now that SideQuest is on your computer, let’s connect your headset:
1. Connect Your Headset: Use your USB-C cable to connect your Meta Quest 3 to your computer. Make sure the cable is plugged in correctly.
2. Put on your Meta Quest 3: Now, put your Meta Quest 3 on and go to the home environment.
3. Allow USB debugging: A message will pop up inside your headset asking to “Allow USB debugging.” Tick the box saying “Always allow from this computer” and tap on “Allow”. This is very important so your computer can talk to your headset.
4. Check SideQuest: On your computer, SideQuest will automatically connect with your Meta Quest 3 . If everything is working fine, you will see a green dot on the top right hand corner of SideQuest, along with the model and serial number of your Meta Quest 3.
Finding Custom Games to Play
Now, for the fun part! There are several places where you can find custom games for your Meta Quest 3:
SideQuest Website: SideQuest has its own app library on its website, where you can search and find tons of great custom games that have been tested and validated.
Itch.io: This website is a treasure trove of independent games. Look for games with the Android logo (which means they are made to run on Android devices like your Meta Quest 3).
Discord Communities: There are many communities online that are built around custom made games. These communities can often have direct links to custom games, and will also be able to help with troubleshooting.
When you’re browsing, pay attention to the game description. Make sure it’s compatible with the Meta Quest 3 and that the developer has shared the game files. Generally, these game files will end with a .apk extension. This is what you need to sideload with SideQuest.
Sideloading Your Custom Games with SideQuest
Alright, you’ve found a game. Now let’s get it onto your headset:
1. Download the APK File: On your computer, download the .apk file to a place that is easy to access like your desktop or downloads folder.
2. Open SideQuest: If not already open, open the SideQuest app on your computer. Make sure your Meta Quest 3 is connected and that SideQuest has the green dot at the top.
3. Sideload the APK: Simply drag and drop the game’s .apk file from your computer into the SideQuest window.
4. Install: SideQuest will begin the install process. You’ll see a progress bar, and when it’s complete, the game is on your Meta Quest 3!
Sometimes, SideQuest might not be able to sideload a .apk file. This could be due to a myriad of reasons, and may take a bit of tinkering to fix. If this is the case, follow the steps below to sideload the .apk file using Android Debug Bridge.
Sideloading Using Android Debug Bridge (ADB)
If drag and drop method does not work, you can try using Android Debug Bridge (ADB) which is a command line tool that can be used to communicate with Android Devices.
1. Enable ADB in SideQuest: In SideQuest, navigate to the top right, where the green dot and device model name is present. Click on it, and find the option labelled “Show ADB commands”. Click on this, and a new command prompt window will appear.
2. Type the Command: Inside the command prompt, type adb install -r “path to your apk”. Make sure you input the full location of where your .apk file is on your computer.
3. Press Enter: Press the enter key on your keyboard and the application will start installing.
Finding Your Custom Games on Your Meta Quest 3
Okay, you’ve sideloaded your game! Now let’s find it:
1. Put on Your Headset: Put your Meta Quest 3 on.
2. Go to the App Library: Press the Meta button on your right controller to open the Quick Settings menu and choose the “App Library” option.
3. Change the Filter In the top right corner of your App Library, you will find a dropdown. Click on this and change the filter from “All” to “Unknown Sources”.
4. Find Your Game: Scroll through the “Unknown Sources” list. Your custom games should be somewhere in the list.
5. Launch Simply select the icon of the custom game you want to play, and enjoy!
Tips for a Smooth Custom Game Experience
Here are some handy tips to keep in mind:
Game Compatibility: Not all games work perfectly with the Meta Quest 3. If a game seems buggy or won’t launch, check the game’s page or community for any known issues.
Storage Space: Sideloading many games will take up storage on your Meta Quest 3. If you start to experience any lagging, consider removing some games you do not play anymore.
Updates: Custom games won’t automatically update like apps from the store. You’ll need to download the latest version and sideload it again when they are available. Check for updates regularly from where you downloaded the game.
Security: Always download custom games from trusted sources. Avoid downloading .apk files from unknown websites, as they could contain viruses and malware.
Experiment: Don’t be afraid to try out different games! That’s part of the fun of custom games. If you like a game, show your support to the developers.
Troubleshooting: If a game isn’t working, try restarting your Meta Quest 3 and try installing again. Also, check the game’s page or community for troubleshooting guides.
Exploring the World of Custom Games
Once you start playing with custom games, you’ll open a whole new world of VR possibilities. There are tons of amazing independent developers who create all kinds of games that you won’t find anywhere else. You’ll find everything from unique puzzle games to early prototypes of big VR titles. Sideloading lets you explore these hidden gems.
Custom games allow you to experience VR gaming in ways that the official store may not offer. You might find some small, innovative games that are just tons of fun to play, or find early prototypes of upcoming games. Sideloading opens up the possibilities of what you can play on your headset and allows you to try a wide variety of different content.
Sideloading may seem a bit complicated at first, but it’s a straightforward process once you get the hang of it. The ability to play custom games really allows you to fully take advantage of what your headset can offer, and provides a much more interesting and varied way to play VR. Now you can go and experience the amazing world of custom games. Have fun!
The Quest 3’s pass-through looks insane 🫣
Final Thoughts
To get custom games on Meta Quest 3, you must first enable developer mode through the Meta app. Then, you need to sideload game files using SideQuest or a similar platform. This process lets you access content beyond the official Meta store.
Remember that these steps will allow you to play various experiences created by other users. Carefully choose the sources you download from to avoid risks. This is the key to how to get custom games on Meta Quest 3.

