
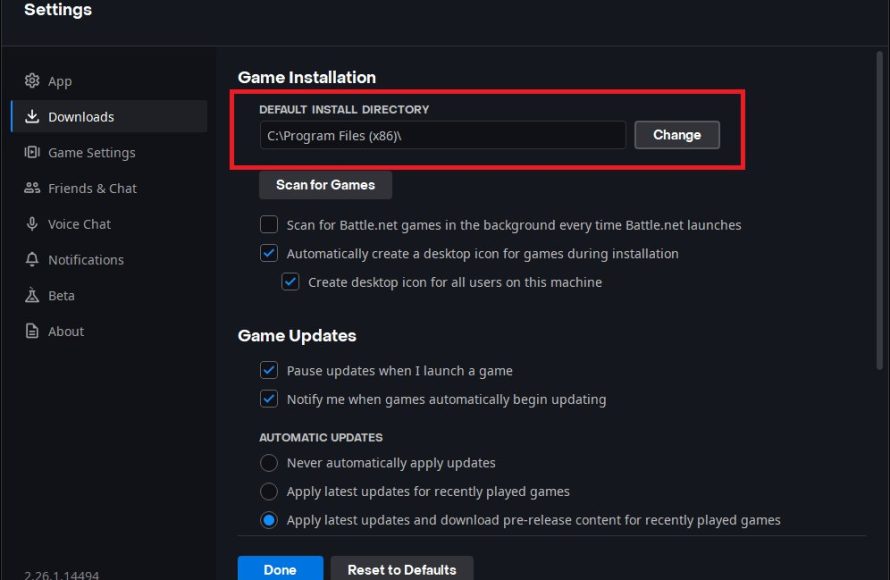
Moving games to another drive typically involves using the game launcher’s settings, or the operating system’s built-in app management features to relocate the installation files.
Running out of space on your primary drive? It’s a common problem, especially with today’s large game installations. The good news is, you don’t have to uninstall and re-download everything. We will walk you through how to move games to another drive, freeing up precious space.
This process varies slightly depending on the game launcher you use, like Steam, Epic Games, or others, but the general principle remains the same. You can easily relocate the game files with a few simple steps, and continue enjoying your games without interruption.

How to Move Games to Another Drive
Running out of space on your computer’s hard drive is a common problem for gamers. Those big, beautiful game files can quickly fill up your storage, leaving you with slow loading times and no room for new adventures. Luckily, you don’t have to delete your games to free up space. You can easily move them to another drive, like an external hard drive or a larger internal one. This article will guide you through different ways to move your precious game collection, keeping your gaming experience smooth and enjoyable.
Why Move Games to Another Drive?
Before we dive into the how, let’s talk about why you might want to move your games. There are several good reasons:
- Free up space on your main drive: Your main drive, often called the C: drive, is usually where your operating system and other important programs live. If it gets too full, your computer can slow down. Moving games to a different drive can significantly improve your computer’s overall performance.
- Faster loading times: If you move your games to a Solid State Drive (SSD) from a traditional Hard Disk Drive (HDD), your loading times can be dramatically faster. SSDs read data much faster than HDDs.
- Organize your files: Keeping games on a separate drive can help you organize your computer. You can dedicate a specific drive just for gaming and another for work, school, or other purposes.
- Prepare for future games: As games become more complex and visually stunning, they also get bigger. Moving to another drive gives you extra space for future games.
Preparing to Move Your Games
Before you start moving your games, there are a few things to take care of:
Choose the Right Drive
Not all drives are created equal. When choosing a new home for your games, think about these points:
- SSD vs HDD: As we mentioned, SSDs are much faster than HDDs, which results in faster loading times. If you want your games to run quickly, an SSD is a great option. HDDs are a good choice if you need lots of storage space at a lower cost, but the performance won’t be as good.
- Storage Space: Make sure the drive you choose has enough space to hold all the games you plan to move, plus a little extra room for updates and new games. You don’t want to run into the same space problem again.
- External vs Internal: An external drive is easy to connect and move between computers, but it may not be as fast as an internal drive. An internal drive offers better performance and a permanent storage solution.
- Drive Connection: Consider the connection type that your new drive uses (e.g., USB 3.0, SATA). Faster connection types lead to quicker data transfer when moving games.
Back Up Your Games (Just in Case!)
Before making any big changes, backing up your game files is a smart idea. While moving games is usually safe, there is always a small chance something could go wrong. A backup ensures you can quickly get back to playing even if there are any problems during the move.
- External Hard Drive: Copy the game folder from the installation folder and paste it to a new external hard drive to create a backup. This is the safest method.
- Cloud Storage: If your game save data is backed up to the cloud, you don’t need to back it up separately. Steam and other game launchers offer cloud save functionalities.
It’s better to be safe than sorry, especially with all the hours you’ve invested in your game progress!
Moving Games Through Game Launchers
Many of the most common game launchers have a built-in feature to move games to another drive. This is often the easiest way to relocate your games. Let’s take a look at how to do this with some popular launchers:
Moving Games on Steam
Steam makes moving games straightforward. Here’s how you can move your games to a new drive:
- Open Steam: Start by opening the Steam client on your computer.
- Go to Steam Settings: Click on “Steam” in the top left corner, then select “Settings”.
- Navigate to Downloads: In the Settings window, click on “Downloads”.
- Click Steam Library Folders: At the top of this page, you will see “Steam Library Folders”. Click on this button.
- Add a New Library Folder: Click the “Add Library Folder” button and choose the new drive or folder where you want to store your games. Click “Select” to confirm.
- Move the Game: Right-click on the game in your library that you want to move. Select “Properties.”
- Go to Local Files: In the properties window, select “Local Files”.
- Click “Move Install Folder”: Click the button labeled “Move Install Folder.”
- Choose the New Location: From the dropdown menu, choose the new drive that you added and click “Move Folder”.
- Wait: Steam will move the game files to the new location. This could take some time, depending on the size of the game.
That’s all there is to it! Now the game is on the new drive. You can use the same process to move more games to that same location, or you can add additional storage locations for more flexibility.
Moving Games on Epic Games Launcher
The Epic Games Launcher also provides an easy way to relocate games:
- Open Epic Games Launcher: Start by launching the Epic Games Launcher on your computer.
- Go to Library: Click on “Library” in the menu on the left.
- Find the Game: Locate the game you want to move from your library.
- Click the Three Dots: You will see three dots next to the game’s name. Click the three dots, and select “Uninstall.”
- Reinstall Game to New Drive: Click on the game again, choose install and when prompted select your new drive for the installation. Epic will verify the game files.
The Epic Launcher does not allow you to move the game, you have to uninstall it and reinstall to the new location.
Moving Games on GOG Galaxy
If you use GOG Galaxy, here’s how to move games:
- Open GOG Galaxy: Launch the GOG Galaxy application.
- Select Game: Select the game you would like to move.
- Click the Settings Button: On the game page, click the setting button.
- Manage Installation: In the dropdown menu click the “Manage Installation” option.
- Change Location: Here you will see the current installation folder of your game. Click on the “Change Folder” option to choose a new installation location.
- Move the Game: Select the new location, then click “Move.” Wait for the moving process to complete.
Moving Games on the Xbox app on Windows
If you play games through the Xbox app or Game Pass, you can relocate your games like this:
- Open the Xbox app: Launch the Xbox app on your computer.
- Go to My Games: Go to “My Games”.
- Select the game: Find the game you wish to move and select it.
- Click the three dots: Click on the three dots located next to the play button.
- Select Manage: From the dropdown menu, click on the option called “Manage”.
- Move Game: Select “Move” from the “General” menu, and select your new hard drive. Confirm and then wait for the game to relocate.
Manually Moving Games (Advanced Users)
If your game doesn’t use a launcher, or if you are comfortable with moving files around, you can move games manually. This method requires more careful attention. Here is how:
Find the Game’s Installation Folder
First, you need to find where your game is installed. Here are some common places to look:
- Program Files: The default location for many programs is in the “Program Files” or “Program Files (x86)” folder in your main drive (usually C:).
- Custom Locations: You might have installed your game in a specific location. Think back to when you first installed the game and where you selected to install it.
Copy the Game Folder
Once you have found the folder for your game, copy the entire folder to the new drive. This could take a while, especially if the game is large. Make sure your computer doesn’t go to sleep during this step!
Create a Shortcut
After you’ve copied your game folder, you have to remove or rename the original one to avoid confusion. Then, you can create a shortcut to your game’s executable file (.exe) on your desktop so you can launch it directly. The game may not function correctly if you do not complete this step.
Manually moving games requires a good understanding of computer file structures. If you’re not comfortable with these steps, it is generally safer to use the built-in moving options through your gaming platform launchers.
Common Issues and Troubleshooting
Moving games isn’t always smooth sailing. Here are some common issues you might face and how to fix them:
Game Won’t Launch After Moving
If you moved a game manually and it won’t start, make sure that you:
- Update Shortcuts: Make sure that the game shortcut is pointing to the new location.
- Update Game Launcher: If you are using a game launcher, verify that the game library knows the new location of the game.
- Verify Game Files: Some game launchers may have an option to “verify” the game file’s location, and will fix any game files that are in the incorrect location.
Game Save Files Are Missing
Game save files may be stored in a different location. Usually, you’ll find the saved files in:
- The “Documents” Folder: Game save files are often located in the “Documents” folder under a “My Games” or similar folder.
- Game Installation Folder: Some games keep save files in the game installation folder.
- Appdata: Some save files are hidden within your user’s “AppData” folder.
If you can’t locate the files, copy them to the new drive at the same place, or verify that the game launcher is linked correctly to your old save files.
Slow Transfer Speeds
If your games are taking a long time to transfer, check the following:
- USB Connection: If using an external hard drive, ensure you’re using a USB 3.0 or higher connection, and not a slower USB 2.0 or lower.
- Drive Health: If using an older hard drive, it may be slower because it’s nearing the end of its lifespan.
- Drive Type: SSDs generally have faster transfer speeds than HDDs.
Game Library not Recognizing New Location
Sometimes, the game launcher does not recognize the new location of your game files automatically. Follow these steps to remedy this issue:
- Re-add Game: Re-add the new game install location to your game launcher’s library options.
- Scan for Games: Some game launchers offer an option to “Scan for Games” in a new location.
Moving your games to another drive is a great way to free up space on your main hard drive and improve your computer’s performance. Using the methods explained in this article, whether through game launchers or manually, you can manage your game files with confidence.
How To Move Steam Games to Another Hard Drive (2023 Tutorial)
Final Thoughts
Moving games is simple. You can use the game client settings or Windows storage options. These methods allow you to transfer your game files without needing to redownload.
Choose the approach that best fits your platform. Ensure the destination drive has sufficient space. This process keeps your games organized.
In short, to summarize, how to move games to another drive involves either the specific game platform or Windows built-in tools; a must-have skill for managing your PC storage effectively.

