To open console in Unity games, press the tilde (~) or backtick () key.
Ever wondered how to access hidden information or debug your favorite Unity game? Many developers embed a console for testing, and knowing how to access it can be quite helpful. This quick guide shows you exactly how to open console in Unity games. It’s usually a simple keyboard shortcut, so you can check game variables or even send commands.

How to Open Console in Unity Games
Let’s dive into the exciting world of game development with Unity! One of the most helpful tools for both developers and players is the console. This special window lets you see what’s going on behind the scenes of your game. It can show you errors, warnings, and even custom messages you’ve programmed. Knowing how to open and use the console is a super useful skill for anyone working with or playing Unity games.
Why is the Console Important?
The console is like a detective’s notebook for your game. It records important things that happen while the game is running. Here are a few reasons why it’s so valuable:
- Finding Bugs: When something goes wrong in your game, like a character not moving or an object disappearing, the console often shows an error message that gives you a clue about what happened.
- Tracking Game Events: Developers can write messages to the console to see if parts of their game are working correctly. For example, they can check if a button is being clicked or a level is loading.
- Debugging: Debugging means finding and fixing problems in your game. The console helps you see these problems more clearly so you can fix them faster.
- Player Feedback: In some games, the console can be used by players to report issues or give feedback to the developer.
Different Ways to Open the Console
There are several ways to open the console in a Unity game, and the method used might be different depending on whether you’re in the Unity editor (when you’re making the game) or playing a built version of the game (after it’s finished). Let’s explore both scenarios:
Opening the Console in the Unity Editor
When you are developing your game in the Unity editor, opening the console is very easy. You just have to click a button! Here’s how:
- Look for the Console Window: In the Unity editor, you’ll see different windows like “Scene,” “Game,” and “Project.” The console window is usually at the bottom of the screen or next to these windows.
- Open the Console Tab: If you don’t see the Console window, go to the “Window” menu at the top of the screen. Then, find and click on “Console.” This will make the Console window appear.
- See Messages: Once the Console window is open, you’ll see a list of messages. These messages can be errors, warnings, or other things that the game is telling you.
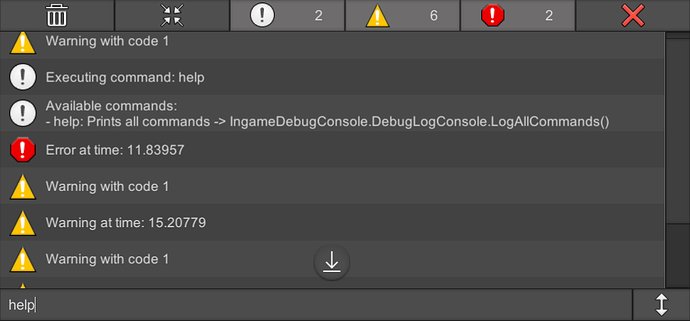
Understanding Console Messages in the Editor
The Unity editor console messages can have different colors and symbols which indicates what they are about. Let’s break down what these mean:
- Errors (Red): Red messages are bad! They mean something went wrong in your code and the game might not work correctly. You need to fix these right away.
- Warnings (Yellow): Yellow messages tell you that something might cause a problem later, but it doesn’t stop your game from working. You should look at these soon.
- Messages (White/Gray): These are normal messages from the game or the editor. They tell you about things that are happening and help you keep track.
Opening the Console in a Built Game
Things get a little different when you’re playing a built game – the version that you share with others. The standard Unity editor console isn’t available directly in built games, but you can create your own custom console for debugging and player interaction. Let’s look at how this can be achieved.
Creating a Basic In-Game Console
To build an in-game console, you usually need to write some code and use Unity’s UI system. Here’s a high-level explanation of how it generally works:
- User Interface (UI): You will create a new UI Canvas that will store the console window. This canvas is hidden by default and is only visible when you press a specific key or button on your keyboard.
- Text Area for Messages: Within the canvas, you need a large text box that is called a TextMeshPro or Text UI component. All the console messages will appear in this window.
- Input Field: If you want to let players type commands, you will also add a text input field to the console UI.
- Code Logic: Here’s a basic idea of the code involved:
- You need a script to manage the console. This script will control whether the UI canvas appears when a certain key is pressed, and it’s also where you will store all the messages that appear in the console window.
- The script will have methods that write log messages, warnings, and errors to the text area. These methods can use the Debug.Log, Debug.LogWarning, and Debug.LogError commands you use in the editor to display them.
- If you added an input field, your script will also need to process text entered in that input area. You can have a set of commands that the player can type. For instance, a command to change game settings or a command that outputs useful game information.
Now, let’s explore an example of a simple C# script you might use to implement an in-game console in Unity. This will give you a real, practical idea of what the code can look like.
Example C# Script for In-Game Console
Here is a simplified C# script to demonstrate the core concept. In a real game, you will want to make it more detailed to handle various console messages and commands.
 using UnityEngine;
 using UnityEngine.UI;
 using TMPro;
 using System.Collections.Generic;
 public class InGameConsole : MonoBehaviour
 {
     public GameObject consolePanel; // Reference to the Canvas panel holding the UI
     public TMP_Text consoleText;   // Text area for displaying console output
     public TMP_InputField inputField; // Input field for commands
     public KeyCode toggleKey = KeyCode.BackQuote; // The key used to open/close the console
     private List logMessages = new List(); // Stores all log messages for display
     private int maxMessages = 20; // Maximum messages to display
     private bool consoleVisible = false; // Whether the console is visible or not
     void Start()
     {
        consolePanel.SetActive(false); // Start with the console hidden
     }
     void Update()
     {
        if (Input.GetKeyDown(toggleKey))
        {
            ToggleConsole();
         }
     }
     // Called by Input field
    public void ProcessCommand(string input)
     {
          if(!string.IsNullOrEmpty(input))
          {
            LogMessage(">" + input);
            //Process input here, this can be custom commands.
          inputField.text = ""; // Clear the input field
          }
    }

    public void LogMessage(string message)
    {
       logMessages.Add(message);

        if (logMessages.Count > maxMessages)
        {
            logMessages.RemoveAt(0);
        }
      UpdateConsoleText();

    }
    //Show log
    private void UpdateConsoleText()
    {
        consoleText.text = "";
      foreach(string message in logMessages)
        {
            consoleText.text += message + "\n";
        }
    }
    public void ToggleConsole()
    {
      consoleVisible = !consoleVisible; // Toggle visibility
      consolePanel.SetActive(consoleVisible); // Set canvas on or off
      if (consoleVisible)
      {
        inputField.ActivateInputField();
      }
     }
 }
How to Use This Script:
- Create a new C# script in your Unity project, name it InGameConsole, and copy-paste this code into it.
- Create a new UI Canvas and name it “ConsoleCanvas”.
- Create a panel inside the canvas and add a TextMeshPro text area for output called “ConsoleOutput” and a text input field named “ConsoleInput” to it.
- Make sure that the “ConsoleOutput” field has enough space to show multiple lines of text.
- Create an empty GameObject and name it “ConsoleManager”. Add this script “InGameConsole” to it.
- Assign the “ConsoleCanvas” to the “consolePanel” variable, the “ConsoleOutput” to the “consoleText” variable and the “ConsoleInput” to “inputField” variable in the inspector of the “ConsoleManager” gameObject.
- Make sure the Input Field has the OnEndEdit event triggered, which calls the ProcessCommand function on the “ConsoleManager” GameObject, passing the text from the input field.
- Run the game. The console will be hidden. Press the ~ key (or the backquote key) to toggle the in-game console. You can also change the key if you want to use another one.
- Call GetComponent
().LogMessage(“Your message”); from any other script to log messages to the console.
Adding More Advanced Features to the Console
You can make your console even more powerful by adding more features:
- Command Parsing: Let the player type commands like “godmode on” or “give item sword” and have the script react to those commands.
- Color Coding: Give your logs a special colors, red for errors, yellow for warnings, etc, and help you easily see important messages in the console.
- Filtering: Allow to filter out the console logs depending on the type, for example only showing warnings and errors.
- Variable Tracking: Display the value of important game variables, that can help for debugging purposes.
- Scrollable text area: If you have many messages, you may want to make the text area scrollable.
Tips for Using the Console Effectively
Here are a few tips to help you get the most out of the console:
- Be Descriptive: When you’re writing messages to the console, be clear about what they mean. Instead of just writing “error,” write “error loading player data.”
- Use Log Levels: Separate errors, warnings, and normal messages so you can focus on the most important information.
- Keep it Clean: Don’t write too many messages to the console. Only write the ones that are really important. Too many can make it hard to find the messages you’re looking for.
- Test Frequently: Use the console while you are developing your game. Catch the problems early, before they become big issues.
Customizing Your Console
Unity is flexible, and you can change how the console looks and acts. You can even use external console systems if you want more features. Some developers like to add custom commands that are unique to their game and make them easy to use.
You can customize the colors of messages, font sizes, and the overall look of the console to match your game’s style. The possibilities are endless, and they depend on your specific project’s needs.
The console is your friend when making or playing games in Unity. Whether you are a developer who is finding errors or a player who wants to send feedback to a developer, the console plays an important role. By understanding how to access the console and what you can do with it, you gain an advantage in your game development journey. Remember that practice makes perfect. The more you use the console, the better you will get at spotting issues and fixing them quickly.
unity for beginners – part 1
Final Thoughts
To open the console in Unity games, you usually need to press a specific key combination. Often, this is the tilde (~) key or the backtick (). The console allows you to input commands for debugging or other purposes.
Remember, how to open console in unity games can differ based on how the game developer implemented it. Check game documentation or forums if standard keys don’t work. Sometimes, developers may use other specific keyboard shortcuts.

