
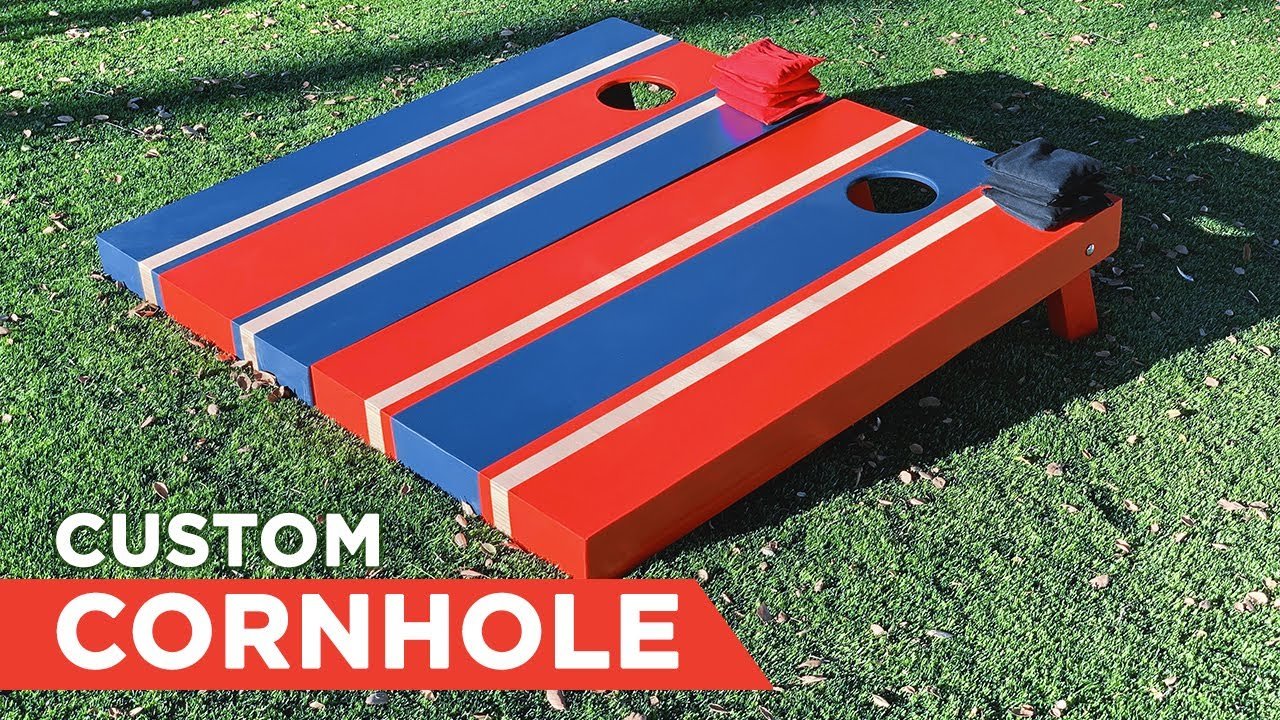
To paint a corn hole game, you’ll need to sand the boards, apply a primer, then paint your desired design using exterior paint, and finally, seal it with a clear coat.
Ready to add your personal touch to your backyard games? Painting a corn hole game is a fun and relatively simple project. It allows you to create a custom set that reflects your style.
This guide will show you the steps involved in how to paint a corn hole game properly. You’ll learn how to prep the wood and choose the right paints for a durable finish. Let’s get started!

How to Paint a Corn Hole Game: A Step-by-Step Guide
Ready to give your corn hole set a serious makeover? Painting your own corn hole boards is a fun project that lets you show off your personality and creativity. Whether you’re aiming for a sleek, professional look or something totally wild and unique, this guide will walk you through each step, making sure you end up with a game you’re proud to play. We will cover everything from gathering your supplies to sealing your finished design, so let’s jump right in!
Gathering Your Supplies
Before you can start painting, you need to make sure you have all the right tools and materials. Having everything ready will make the process much smoother and more enjoyable. Here’s a list of what you’ll need:
- Corn Hole Boards: Obviously! Make sure they are sanded smooth and free of any dust or debris. You can use pre-made boards or build your own.
- Sandpaper: Different grits for smoothing the boards before painting. You’ll want medium grit (around 120) for general smoothing and fine grit (220 or higher) for a very smooth finish.
- Painter’s Tape: For creating clean lines and masking off areas. A good quality tape is essential to avoid paint bleeding.
- Primer: A good primer will help the paint adhere to the wood better and give you a nice, even base. Choose a primer that’s suitable for wood.
- Paint: Exterior grade paint is best, it can withstand the elements if you plan on using your corn hole game outside. Acrylic or enamel paints are both great choices. You’ll want to choose colors you love, maybe to match your favorite sports team or just what looks great.
- Paint Brushes: Have a variety of sizes, including a large brush for covering large areas and smaller brushes for detail work. Foam brushes can also be useful for achieving a smooth finish.
- Paint Rollers: A small foam roller can be great for applying primer and base coats quickly and evenly.
- Stencils (Optional): If you’re adding designs or letters, stencils can make the process much easier. You can buy these pre-made or make your own with card stock.
- Measuring Tape or Ruler: To ensure that all of your lines are straight and your designs are positioned correctly.
- Pencil: For lightly sketching out designs on the board before painting.
- Clear Coat or Sealer: To protect your finished paint job from wear and tear. Polyurethane is a good option.
- Drop Cloths or Old Sheets: To protect your work area from paint spills.
- Clean Cloth or Tack Cloth: To remove any dust or debris from the board.
- Gloves: To keep your hands clean.
- Safety Glasses or Goggles: To protect your eyes from dust, paint, and primer.
Having all your supplies organized before you begin can make the project more fun and less stressful. It means you won’t have to pause mid-project to search for a paint brush or a roll of tape. Setting up your workspace properly is also essential for a clean finish.
Preparing the Corn Hole Boards
Proper preparation is key to achieving a great finished product. Think of it like building a house; you need a strong foundation. In this case, a well-prepped corn hole board makes the paint job look its best and last longer. Here’s what you need to do:
Sanding
Start by sanding the entire surface of your corn hole boards. Use a medium-grit sandpaper (like 120 grit) to get rid of any rough spots, splinters, or imperfections. Make sure you’re sanding in the direction of the wood grain. When the surface feels smoother, switch to a fine-grit sandpaper (220 or higher) for an even smoother finish. This step ensures your primer and paint will adhere properly.
Don’t forget to sand around the edges and the hole. A good sanding job will get rid of any uneven parts and make sure the paint sticks where it’s supposed to. After sanding, wipe down the boards thoroughly with a clean cloth or a tack cloth to remove any sanding dust. Dust will interfere with the paint, so make sure you get rid of all of it.
Cleaning
After sanding, cleaning the boards thoroughly is very important. Use a tack cloth or a slightly damp cloth to wipe away any remaining dust. You want the surface of the boards to be smooth and completely clean before you start priming. This makes sure that paint will not get affected by any small particle left on the boards.
Taping Off Areas
If you want to create clean lines or geometric shapes, use painter’s tape to mask off any areas you don’t want to paint. Press the edges of the tape down firmly to prevent paint from seeping underneath. It’s important to use a high-quality painter’s tape for the best results. Take your time in this step, it is very important to get this right.
You might want to plan your design at this stage if it has specific shapes or different sections. Measure carefully and use your pencil to make any marks you need before you start to tape up the boards. Take your time, accurate measurements are essential for a good finish.
Priming the Boards
Priming your corn hole boards is an essential step that often gets overlooked but makes a big difference in the finished product. Primer acts as a base coat, creating a smooth and even surface for your paint to stick to, and it prevents the paint from getting absorbed into the wood, meaning that you may need to apply fewer coats.
Applying Primer
Choose a high-quality wood primer and apply it evenly to the entire surface of the corn hole boards. You can use a brush or a small foam roller for this step. If you use a roller make sure that you don’t apply too much primer, this can create a messy look. Apply a smooth and even coat, making sure to cover all areas and corners. You might need to apply two coats, depending on the thickness of the primer and how porous the wood is. If you apply two coats, make sure that you wait until the first coat is completely dry before adding the second coat. This is very important to give the boards enough time to dry before the next step.
Drying Time
Always allow the primer to dry completely before moving on to the next step. Check the manufacturer’s instructions for the recommended drying time, as different primers can have different drying times. Usually, it takes a few hours. Try to make sure the boards are completely dry by touch. If the primer is not completely dry, it can cause the paint to peel, bubble, or just look bad. Patience is very important at this stage.
Painting Your Design
Now comes the fun part – bringing your vision to life with paint! This is where you let your creativity show. Whether you want simple stripes, a detailed picture, or a team logo, take the time to create a design that reflects your personal style. The possibilities are virtually limitless.
Applying Base Coats
Before starting on any detailed designs, apply your base coat(s) of paint. Use a roller or brush to apply the paint evenly, making sure you cover the entire surface. It’s generally better to use multiple thin coats rather than one thick coat. This avoids any drips and makes for a more even finish. Again, make sure to let each coat dry thoroughly before adding the next one. Patience is essential to get the best finish.
Creating Designs
This is where you can bring all your creativity to the process. If you taped off areas to make stripes, or geometric patterns now is the time to apply your paints. If you are using stencils, you need to make sure that they are firmly in place before adding any paint, and use light coats to stop the paint from seeping underneath the stencil. If you are painting freehand, sketch out your design with a pencil before picking up the paint brushes. Take your time, and work slowly to create your design. It’s always good to use a smaller brush for detail work so that you can make more precise lines and patterns.
If you make any mistakes, don’t worry. You can always let the paint dry, then sand the area lightly and re-paint. This is a process that often involves some trial and error, so don’t give up if it doesn’t come out perfectly the first time. You can also correct small mistakes with a fine detail brush. Making a small mistake will not ruin the whole process.
Drying Times
Just like the primer, it is very important to let each coat of paint dry completely before adding another coat. Drying times depend on the type of paint and the climate you are working in, but it is recommended to follow the guidelines given by the manufacturer of the paint. Rushing this step can cause problems later on, so you have to be patient.
Adding Details and Finishing Touches
After the base coats and main designs are dry, you can start adding those extra details that will take your corn hole set to the next level. Details are what make the designs unique, these might be stripes, logos, names, or even a free hand art. It is time to make those final touchups that will give your corn hole game a great finished look.
Adding Stencils, Lettering, and Details
If you’re using stencils for lettering or designs, carefully position them and use a small brush or sponge to apply the paint. Use light, even coats to avoid any bleeding under the stencil. If you’re adding lettering, take your time to ensure it’s neat and legible. You can also use paint pens for finer details if you feel comfortable using them. These pens are great for adding very small details and straight lines.
After you are done adding all your small and big details, double check your work. Look out for any smudges, uneven coats, and mistakes. Fix any errors and give time to paint to dry completely. Now you are ready to move onto the final step which is sealing the corn hole boards.
Sealing the Painted Boards
Sealing your corn hole boards is very important to protect your hard work and keep your paint looking amazing for a very long time. A clear coat will protect your boards from weather, wear and tear, and fading. This is a critical step and will make sure your paint job will last. Without this, your artwork may get damaged by frequent use or any exposure to the outdoor elements.
Applying Clear Coat
Apply a clear coat or polyurethane sealant evenly over the entire painted surface. You can use a brush or a spray sealant. Make sure that the clear coat that you are using is suitable for wood and is compatible with the paints that you have used. Apply thin and even coats and allow each coat to dry before applying the next coat. Check the manufacturers directions for best results. You may need to apply two or three coats for sufficient protection.
Drying Time
Again, make sure you let the clear coat dry completely before using your corn hole boards. Allow plenty of time for it to dry, as directed by the manufacturer. Depending on the sealant you use, this may take some hours. Don’t rush this step, because if the boards are still a little sticky, or not completely dry, it can damage the final result. You can always use your hand to gently touch the boards to make sure that they are completely dry before you start to use them for a game.
Final Inspection
Before you get ready for playing your game, make sure you give your corn hole boards a final inspection. Look over the entire surface to make sure that the paint and the clear coat are dry and that there are no uneven spots, paint drips, or missed spots. If you find any problems, you can always fix them before using the boards. If you feel that everything is good, you have completed the whole process, and it is time for you to enjoy your custom designed corn hole game.
And there you have it! You’ve learned how to paint a corn hole game, from start to finish. This project not only results in a fun activity but also a personalized work of art. Enjoy playing your new, custom corn hole game and show off your work to your friends and family!
How to Paint DIY Cornhole Boards with Vinyl Stickers or Decals [Two of 2 Videos]
Final Thoughts
So, you’ve learned the steps! Prepare the boards, apply primer, and select your favorite paints. Then, carefully paint your design or solid color. After that, seal your artwork with a protective finish, allowing it to dry completely.
The process of how to paint a corn hole game is quite simple. Remember, patience is key and attention to detail yields the best results. Now you have a unique and personalized game.

