
To remove ReShade from a game, simply delete the ReShade files (usually .dll and .ini) from the game’s installation directory.
Ever found yourself wanting to revert back to a game’s original visuals? You might have installed ReShade for some graphical enhancements, but now, you’re ready for the vanilla experience. Understanding how to remove ReShade from a game is actually quite straightforward.
It’s a common situation; after experimenting, many players wish to get rid of ReShade. Fortunately, the process is normally quite simple, involving file removal within the game’s files. Don’t worry, we’ll guide you through it.

How to Remove ReShade from a Game
Okay, so you’ve been experimenting with ReShade, making your games look super awesome. Maybe you added some cool color effects, sharper details, or even a vintage film grain look. That’s all great fun! But what if you decide you don’t want those changes anymore? Or maybe ReShade is causing a problem with your game, like making it run slower or even crashing. Don’t worry, taking ReShade out of your game is usually pretty simple. Let’s get started!
Understanding ReShade and How it Works
Before we jump into removing it, let’s quickly understand what ReShade is and how it works. Think of ReShade as a special filter that sits between your game and your graphics card. It intercepts the image your game is creating and then applies all those fancy effects before showing it on your screen. This is important to know because it explains why we need to look for specific files to remove. ReShade doesn’t change the game’s original files directly but instead adds its own files into the game’s folder. These files are the ones we’ll be targeting for removal.
Identifying ReShade Files
When you install ReShade, it puts several files into your game’s folder. The exact files will depend on the version of ReShade you used, but generally, they will have these characteristics. It’s crucial to find them to completely remove ReShade. Here are the common files and folders you’ll need to look for:
- dxgi.dll or d3d11.dll, d3d9.dll, opengl32.dll: These are the main ReShade library files that allow ReShade to hook into the game’s graphics. Sometimes you might see different files depending on the game’s graphic engine or game type, as like mentioned above.
- ReShade.ini: This configuration file stores ReShade’s settings and effects configuration.
- ReShade-Shaders folder: This folder holds all the shader files for ReShade. These are the actual special effects.
- A few other related files: you might see files like Reshade.log or Reshade.fx or maybe the other related files, these files help with logging and loading the files during the game run time
It’s good to remember that these files are in the same folder as your game’s main executable (.exe) file. This is generally where most of the game files reside. If you’re not sure where your game is installed, here’s how you can find that out:
Finding Your Game’s Installation Folder
- Using Steam:
- Open your Steam library.
- Right-click on the game you want to remove ReShade from.
- Select “Properties”.
- Click on “Local Files”.
- Click “Browse Local Files”. This will open the folder containing your game.
- Using Other Game Launchers (Epic Games, GOG, etc.):
- Open the launcher.
- Find the game in your library.
- There’s usually an option similar to “Manage” or “Options”.
- Look for an option to “Open Installation Folder” or similar.
- If you have shortcut on your desktop:
- Right Click on the shortcut icon of the game
- Click on “Open File Location”
Step-by-Step Removal Guide
Now that we know what to look for and where to look, let’s start the process to get rid of ReShade. It’s like cleaning up your room, you just have to put the right things in the right place!
Manual Removal (Recommended)
This method is the most effective for ensuring a complete removal of ReShade and it’s usually the preferred method.
- Close Your Game: Make sure the game you are going to change is completely closed. ReShade files could still be in use by the game, and deleting while the game is active can lead to problems.
- Open Your Game’s Folder: Use one of the methods described above to open the game’s installation folder.
- Find ReShade Files: Carefully look for files like dxgi.dll, d3d11.dll, opengl32.dll, ReShade.ini and the “ReShade-Shaders” folder.
- Delete ReShade Files and Folder: Select all of these files and the ReShade-Shaders folder and permanently delete them, by right clicking and selecting ‘Delete’. You may also use the keyboard by pressing the delete key.
- Confirm Deletion: Make sure that all the files and folder are removed, check your recycle bin to confirm, if you have permanently deleted them by pressing ‘shift+delete’ then it should not be in recycle bin, if you find these deleted files in the recycle bin and you want to free up space, you can permanently delete them by right clicking on them and selecting ’empty Recycle Bin’.
- Start Your Game: Now launch the game. ReShade should no longer be present.
- Check for Remnants: While rare, some games may generate a cache for reshade. Check the game folder and search for any files that may be reshade related, if you find any, just delete them, and if these files are also generated in config files or some other folder you may also delete those.
Using ReShade Setup Program (If Available)
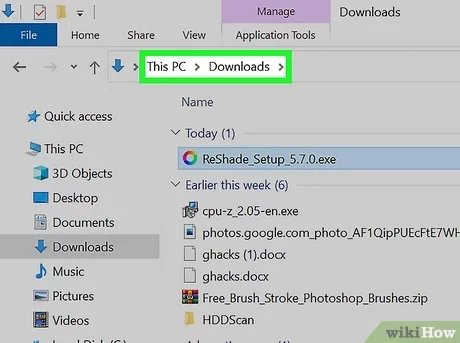
If you still have access to the ReShade setup executable you used to install it, you might be able to remove it using the following steps. This approach can be quicker, but it’s not always reliable, and it doesn’t completely remove every file. Usually this is for older versions of reshade. Newer version of reshade don’t have any uninstaller program.
- Run the ReShade Setup: Run the same setup application file that you used to install ReShade initially.
- Select the Game: The ReShade setup program should find the game you installed it with. Select the game from the list.
- Select Uninstall/Remove option: Look for an “Uninstall” or “Remove” button.
- Follow the prompts: Follow all the instructions provided by the ReShade installer.
- Confirm the removal: After completing the steps, confirm that the files has been removed, if you have any doubt, you can check manually by removing the files as described in the manual method.
Uninstalling via Third-Party Tools
In very specific and old scenarios, some tools may claim to uninstall ReShade. However, this is highly uncommon. These tools, if they exist, may not always do a thorough removal and could even be risky. It’s best to avoid this method unless absolutely necessary and you know that you are using a genuine tool, we recommend manual removal is always a best option.
Troubleshooting Common Issues
Sometimes things don’t go exactly as planned. If you’re still having trouble even after trying to remove ReShade, here’s how to troubleshoot it.
ReShade Effects Still Present
If the ReShade effects are still showing up even after you deleted the files, try the following.
- Check the Correct Game Folder: Make sure you removed the files from the right game’s folder. Sometimes we might have similar named folders or games. Double-check the path.
- Game Specific Shaders: Some games have their own built in graphics configuration settings. Make sure to look inside game graphics settings.
- Restart Your Computer: Sometimes your computer may still be holding a cache of files or programs that is creating the same effect. Restarting it can clear things up.
- Verify Game File Integrity: If you use Steam, or any other launcher like Epic games, you may try verifying your game files to repair any corrupted or modified files by third-party softwares, that can be done via game launcher settings options, but make sure to backup your save games, if you need.
- Look for a ReShade Installer: Sometimes you might have installed reshade with some other tools or third-party application, if it’s the case then you might have to completely uninstall that application or tool to completely remove reshade.
- Reinstall ReShade Temporarily: if you still can’t remove it completely, you can install reshade again, and carefully uninstall it again by following the instructions given in the above steps.
Game Crashing or Performance Issues
If your game starts crashing or running slower after removing ReShade, here are some things to consider. Note that ReShade usually doesn’t cause crashes after it’s been properly removed. These kind of issues can be related to other factors that affect your game.
- Driver Issues: Make sure you have the latest drivers for your graphics card. Outdated drivers can cause problems with games.
- Game Updates: Sometimes game updates can cause some incompatibilities. Check for updates for your game.
- System Requirements: Ensure that the game still meets your system requirements.
- Other Conflicts: There may be other programs or mods that cause conflicts with your game.
“Missing DLL” Errors
If you get errors mentioning missing DLL files, then that means something went wrong during the removal process. Usually this happens when any essential files are removed from the folder.
- Verify Game Files: Try verifying game files integrity using your game launcher, and let the launcher install and repair all the files that it needs.
- Reinstall Your Game: If all the steps don’t work, consider a fresh re-install of your game, this will usually fix the issue.
Preventing Future ReShade Issues
To avoid issues in the future, here are some steps you can take when using ReShade.
- Use the Latest Version: Always use the most recent version of ReShade, which usually has fewer issues.
- Read Instructions: Pay attention to any instructions provided by ReShade when installing or removing it.
- Back Up Game Files: You can always back up your game folders before making any changes, so if anything wrong happens, you can recover your games to their original state.
- Install Only if Required: If you don’t need some particular graphics effect, then don’t install it, only install if you really need it, as some effects can cause some issues in some games.
Removing ReShade from your game is a straightforward process once you know what to look for and where to look. By following these steps, you can get your game back to its original look, or just fix any issues that you were facing, remember to be careful when deleting game files, and always try to do a manual deletion, as its the most effective way.
How To Uninstall Reshade From ANY Game (Easy Guide)
Final Thoughts
To remove Reshade from a game, locate the game’s installation folder. Delete the ‘dxgi.dll’ or ‘d3d11.dll’ file, along with the ‘reshade-shaders’ folder. Also, delete any .ini files related to Reshade.
Following these steps will completely remove Reshade. This process explains how to remove reshade from a game quickly and effectively. Removing all these files restores the game to its original visual settings.

