You can uninstall Xbox Game Bar through the Windows Settings app, under the Gaming section, by toggling the “Xbox Game Bar” option off, and then via the Apps section for complete removal.
Are you finding the Xbox Game Bar popping up when you don’t want it? It can be a useful tool for some, but if you prefer a cleaner experience, knowing how to uninstall Xbox Game Bar is essential. This guide will show you the simple steps to remove it from your system.
We’ll walk you through the process step-by-step. You can quickly disable it or completely remove it, depending on your needs. With just a few clicks, you can reclaim control over your gaming setup.

How to Uninstall Xbox Game Bar
Okay, so you’ve decided that the Xbox Game Bar isn’t your cup of tea. Maybe you don’t use it for recording gameplay, or perhaps it’s causing some unexpected hiccups on your computer. That’s totally fine! The good news is, uninstalling the Xbox Game Bar is usually pretty straightforward. We’ll guide you through all the different ways you can remove it, so you can choose the method that works best for you. No tech wizardry needed!
Understanding the Xbox Game Bar
Before we dive into the how-to, let’s quickly understand what the Xbox Game Bar actually is. It’s a built-in feature in Windows 10 and Windows 11 designed to enhance your gaming experience. Think of it as a quick access menu for things like recording gameplay, taking screenshots, monitoring system performance, and even chatting with friends on Xbox. It’s pretty handy for some folks, but not everyone needs or wants it running in the background.
Why Uninstall Xbox Game Bar?
There can be several reasons why someone might choose to remove the Xbox Game Bar. Some of the most common reasons include:
- Performance Issues: In some cases, the Game Bar can consume system resources, potentially causing lag or slowdowns, especially on older machines.
- Conflicts with Other Software: Sometimes, the Game Bar might conflict with other software or applications, leading to errors or instability.
- Unwanted Features: If you don’t use any of the Game Bar’s features, it can just feel like an unnecessary extra running in the background.
- Privacy Concerns: Some users prefer to disable the recording and social features due to privacy concerns.
No matter your reason, removing the Game Bar is a valid choice, and we’re here to show you how.
Method 1: Uninstalling Through Windows Settings
The easiest and most common way to get rid of the Xbox Game Bar is through the Windows Settings app. Here’s how you do it:
- Open Settings: Click on the Windows Start button (usually the Windows logo in the bottom-left corner of your screen), then click on the “Settings” icon, which looks like a little gear.
- Navigate to Apps: In the Settings window, click on “Apps.” You might see “Apps & features” also, go to this section.
- Find Xbox Game Bar: In the list of apps, scroll down until you find “Xbox Game Bar.” You can also use the search bar at the top of the apps list and type “Xbox Game Bar” to quickly find it.
- Uninstall: Click on “Xbox Game Bar.” Then, click the “Uninstall” button that appears.
- Confirm: You will get a confirmation prompt. Click “Uninstall” again to confirm that you want to remove the application.
That’s it! The Xbox Game Bar should now be removed from your system. If you followed these steps, the game bar will uninstall, and this process is fairly easy for everyone.
Method 2: Using PowerShell (For a More Thorough Removal)
For a slightly more advanced method that ensures a more complete removal, you can use PowerShell. PowerShell is a command-line interface that lets you interact with your Windows system directly. Don’t worry, it’s not as scary as it sounds! Here’s how to use it for uninstalling the Xbox Game Bar:
Opening PowerShell with Administrator Rights
First, we need to open PowerShell with administrator privileges. This allows us to make system-level changes. Here’s how:
- Search for PowerShell: Click on the Windows Start button and type “PowerShell.”
- Run as Administrator: Right-click on “Windows PowerShell” (or “PowerShell”) in the search results and choose “Run as administrator.”
- Confirm User Account Control: Windows might ask you for permission. Click “Yes” to allow PowerShell to make changes to your computer.
Using the PowerShell Command to Uninstall
Now that we have PowerShell running with admin rights, we can execute the command to remove the Xbox Game Bar:
- Type the command: Copy and paste or type the following command into the PowerShell window:
Get-AppxPackage Microsoft.XboxGamingOverlay | Remove-AppxPackage - Press Enter: Press the Enter key on your keyboard to execute the command.
PowerShell will now work its magic and uninstall the Xbox Game Bar. You might not see any immediate change on the screen, but the process is running in the background. In most cases, you will not see any confirmation message. This method works best for those who want complete removal of the game bar with no trace.
Alternative PowerShell Commands
If the previous command does not work, which is rare, you can try using these alternative commands to uninstall the Xbox Game Bar. Use one at a time and try the other if first doesn’t work.
Get-AppxPackage -AllUsers | Where-Object {$_.PackageFullName -like "xboxgamebar"} | Remove-AppxPackageGet-AppxPackage xbox | Remove-AppxPackage(This command will remove all Xbox packages. Use with caution)
Remember, these commands will be executed when you press the “Enter” key.
Method 3: Disabling Xbox Game Bar via Settings (Alternative to Uninstalling)
Instead of completely uninstalling the Xbox Game Bar, you might prefer just to disable it. This way, it won’t run in the background or interfere with your system, but you can easily re-enable it later if you change your mind. Here’s how to disable it:
- Open Settings: Just like with the uninstall method, click on the Windows Start button and then the “Settings” icon.
- Go to Gaming: In the Settings window, click on “Gaming”.
- Select Game Bar: On the left-hand menu, click on “Game Bar”.
- Turn it Off: Locate the toggle switch that says “Enable Xbox Game Bar” and turn it to the “Off” position.
This will prevent the Xbox Game Bar from popping up, recording in the background, or using system resources. It won’t remove the application from your computer, but it will disable its functionality, and this may be enough for most of the users.
Disabling Xbox Game Bar Capture Settings
You can also disable other related Xbox Game Bar features within the “Gaming” settings. Here’s how:
- Open Settings, Go to Gaming: Open the Windows Settings window again and go to “Gaming”.
- Select Captures: On the left-hand side, click on “Captures.”
- Turn off Background Recording: Find the option for “Record in the background while I’m playing a game” and turn it “Off”.
- Turn off Recorded Audio: Locate the audio section and turn off recording audio.
By turning off these capture settings, you can stop the Game Bar from recording or capturing anything, which can help reduce resource consumption. These settings will ensure that the Game Bar is completely disabled.
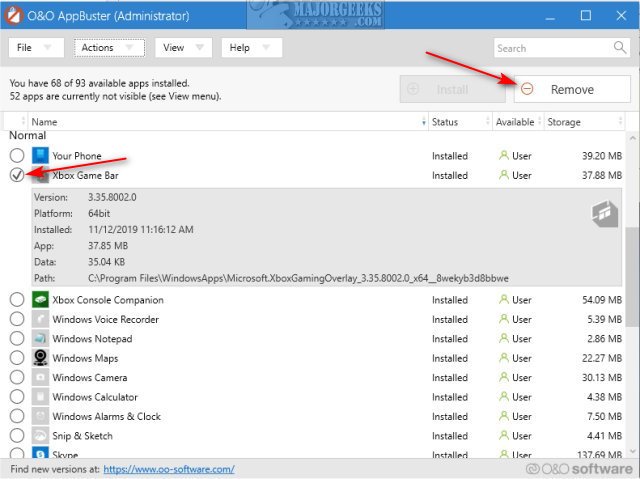
Method 4: Using Third-Party Software Uninstallers
While the previous methods are usually sufficient, sometimes you might prefer to use a third-party uninstaller. These tools can sometimes help remove stubborn applications or ensure a more thorough uninstall by deleting any residual files and registry entries. A couple of examples of these software include:
- Revo Uninstaller: Revo Uninstaller offers a free version with solid uninstallation capabilities.
- IObit Uninstaller: IObit Uninstaller is another popular option with many useful features, although it is not free.
How to Use a Third-Party Uninstaller
- Download and Install: Download and install your preferred uninstaller.
- Open Uninstaller: Open the uninstaller application.
- Locate Xbox Game Bar: In the list of installed applications, locate the “Xbox Game Bar”.
- Uninstall: Select the “Uninstall” option, and the uninstaller will guide you through the process. Some uninstallers will have a “Scan for leftovers” option, so make sure that you select that as well.
Using a third-party uninstaller can be beneficial if you have difficulty removing the Xbox Game Bar using the other methods or if you want to ensure a complete and clean uninstallation process. But in general, the first three methods will be enough for most users.
Checking for Successful Uninstall
After you’ve uninstalled the Xbox Game Bar using any of the methods above, it’s a good idea to make sure it’s actually gone. Here’s how you can check:
- Check the Start Menu: Look for the Xbox Game Bar entry in your Start menu. It should no longer be there if you have correctly uninstalled it.
- Check the Apps List: Open “Settings” and navigate to “Apps” and then “Apps and Features.” Search for “Xbox Game Bar”. If it isn’t there, you know it’s uninstalled.
- Try the Shortcut: Press the Windows key + G on your keyboard, the shortcut for the Xbox Game Bar, if nothing happens, then it’s most likely uninstalled.
If you still see any evidence of the Xbox Game Bar after uninstalling, you might want to try another method or try re-installing and then uninstalling it.
Reinstalling Xbox Game Bar
If at any point in the future you decide you do want the Xbox Game Bar back, you can reinstall it fairly easily. It’s part of the Microsoft Store ecosystem.
- Open the Microsoft Store: Click on the Windows Start button and then click on the “Microsoft Store” icon.
- Search for Xbox Game Bar: Use the search bar in the top right corner and type in “Xbox Game Bar”.
- Install: Click on the “Xbox Game Bar” app in the results, and then click on the “Install” button.
The Xbox Game Bar will then install, and you will be able to use it like normal. The installation process will vary, depending on your internet speed, but it shouldn’t take too long. Once installed, you might need to restart your computer for changes to fully take effect.
Troubleshooting Common Issues
Sometimes, you might encounter problems when trying to uninstall the Xbox Game Bar. Here are some common issues and how to fix them:
- Uninstall Option Missing: If you do not see the uninstall option in the Settings, try the PowerShell method. The PowerShell method should work even if the Settings method does not.
- Game Bar Still Appearing: If you uninstalled the Game Bar using the setting but it still appears, try to uninstall using the PowerShell method. You can also try uninstalling the game bar through a third party uninstaller, as these programs do a deeper scan.
- Errors during PowerShell Command: If you are having errors during the execution of the PowerShell command, make sure you run PowerShell as administrator.
If you are still experiencing difficulties after trying all the steps, it might be helpful to try restarting your computer, and attempt the uninstallation process again.
Removing the Xbox Game Bar can free up system resources and make your PC run a little smoother. Whether you choose the easy route through Settings, the more thorough PowerShell method, or disable it entirely, you now have the knowledge to control this Windows feature. If you ever need it back, it is simple to reinstall as well.
How to Remove the XBox Game Bar on Windows 11
Final Thoughts
To uninstall Xbox Game Bar, begin by navigating to your system’s settings. Find the ‘Apps’ section, then locate the Xbox Game Bar application in the list. Click it, and select the uninstall option.
Confirm the uninstall and the process will remove the program from your system. That’s how to uninstall xbox game bar easily. Remember this procedure for removing it whenever needed.

