
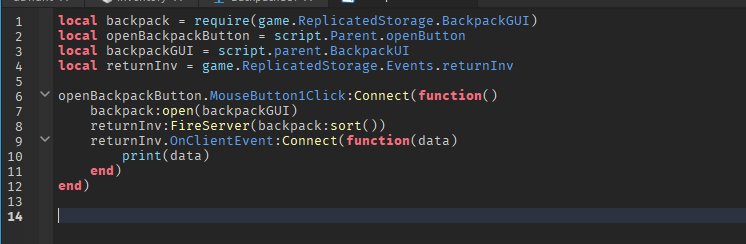
To use Roblox Remote Events, you define them on the server and fire them to clients or from clients to the server, passing data as needed.
Have you ever wondered how to make a button on a game affect all players? That’s where remote events come in. They are the key to communication between the server and individual game clients, enabling all sorts of interesting game mechanics. Learning how to use Roblox remote events is really essential for any serious Roblox developer.

How to Use Roblox Remote Events
Have you ever wondered how to make cool things happen in your Roblox games, like having a button on one side of the map make something move on the other side? That’s where Remote Events come in! They’re like magical messengers that let different parts of your game talk to each other, even if those parts are on different sides of the game’s network.
Understanding the Basics of Remote Events
Imagine you have a walkie-talkie. One person talks into it, and the other person hears the message. That’s very similar to how Remote Events work. In Roblox, you have a client (that’s the game running on the player’s computer or phone) and a server (that’s where the game runs and keeps track of everything). Remote Events let the client and server send messages back and forth.
These messages can be anything, like “the player clicked the button,” “a player wants to buy an item,” or “the enemy has been hit.” Let’s break down the key ideas behind these messages.
Client and Server Communication
The client is what each player sees and interacts with. It’s like your own personal view of the game world. The server, on the other hand, is the brain of the game. It controls the rules, keeps track of all the players and items, and makes sure everyone’s experience is synced.
Clients can’t directly change things for other players. They need to send a message to the server, which then decides what to do with that message. That’s where Remote Events become useful, they make this communication possible.
How a Remote Event Works: The Walkie-Talkie Analogy
Think of a Remote Event as a specific channel on your walkie-talkie. You create a named channel. For instance, you might call it “ButtonPressed.” Now when you send a message through this channel, everyone listening to that channel can hear it. In Roblox, you create a Remote Event using a special script. You then use that event to send messages from the client to the server or vice-versa.
Creating Remote Events in Roblox Studio
Let’s get hands-on with creating a remote event in Roblox studio. It is actually quite simple and straightforward. Here is how you can create one.
Inserting a Remote Event
First, open up Roblox Studio and make a new game (or open an existing one you’re working on). In the Explorer window (usually on the right side), locate the “ReplicatedStorage” service. Right-click on it, hover over “Insert Object”, and then click on “RemoteEvent”. A new RemoteEvent will appear in ReplicatedStorage, it would have a default name called “RemoteEvent”. Go ahead and rename this to something more meaningful like, “MyRemoteEvent”.
ReplicatedStorage is a special place where both the server and client can see and access the things you put there, making it the perfect place for our Remote Events.
Naming Your Remote Event
It’s very important to name your remote event in a descriptive and easy to understand way. If it’s for a button press, consider calling it ButtonPressed. For a player buying an item, you could name it PurchaseItem. Clear and simple names will save you headaches later!
Remember, good naming makes your code easy to read and lessens the chances of error down the road. It also make it clear for anyone else reading or using your code.
Sending Messages with FireServer and FireClient
Now that you have your remote event set up, let’s talk about sending those messages through it. There are two primary methods you’ll use: FireServer and FireClient. Each of these is used for sending message between different parts of the game.
Using FireServer
You use FireServer when a client wants to send a message to the server. For example, if a player clicks a button or buys an item, the client will use FireServer to inform the server.
Here’s a code example of how to do it in a local script (a script inside of a client-side object):
        -- Get the RemoteEvent from ReplicatedStorage
        local ReplicatedStorage = game:GetService("ReplicatedStorage")
        local myRemoteEvent = ReplicatedStorage:WaitForChild("MyRemoteEvent")

        -- When a button is clicked (assuming you have a button object called Button)
        local button = script.Parent

        button.MouseButton1Click:Connect(function()
          myRemoteEvent:FireServer("Player clicked the button!")
        end)
In this example, whenever someone clicks on the button named “button”, we send the message “Player clicked the button!” to the server using FireServer. This tells the server what happened.
Using FireClient
The FireClient method is used when the server needs to send a message to a specific client. Imagine the server needs to show a special effect to just one player, or needs to inform a specific player about their current score or status.
Here is a code example on how to use this in a server side script.
        -- Get the RemoteEvent from ReplicatedStorage
        local ReplicatedStorage = game:GetService("ReplicatedStorage")
        local myRemoteEvent = ReplicatedStorage:WaitForChild("MyRemoteEvent")

        -- When the event is fired from the client
        myRemoteEvent.OnServerEvent:Connect(function(player, message)
          -- Now we receive the message, let's send a different one back to the client
          myRemoteEvent:FireClient(player, "Server received the message and sending it back!")
        end)
Here, the server receives the message, and then it responds back to that exact player with a different message.
Firing to Multiple Clients using FireAllClients
If you want to send a message to all the clients connected to the server, you can use the FireAllClients method. For instance, when a new round starts in your game, you might use this method to notify all the players.
Here’s an example:
        -- Get the RemoteEvent from ReplicatedStorage
        local ReplicatedStorage = game:GetService("ReplicatedStorage")
        local myRemoteEvent = ReplicatedStorage:WaitForChild("MyRemoteEvent")

        -- Some event triggers this
        -- Fire to all connected clients
        myRemoteEvent:FireAllClients("The round has started!")
In this example, FireAllClients sends the message “The round has started!” to every player currently in the game.
Receiving Messages: OnServerEvent and OnClientEvent
It’s not enough to just send messages; you also need to be able to receive them! To do this, you’ll use OnServerEvent on the server and OnClientEvent on the client.
Handling Server-Side Messages with OnServerEvent
On the server, you use OnServerEvent to listen for messages sent from clients using FireServer. When the server receives a message, the code inside OnServerEvent runs.
Let’s look at that example from earlier again.
        -- Get the RemoteEvent from ReplicatedStorage
        local ReplicatedStorage = game:GetService("ReplicatedStorage")
        local myRemoteEvent = ReplicatedStorage:WaitForChild("MyRemoteEvent")

        -- When the event is fired from the client
        myRemoteEvent.OnServerEvent:Connect(function(player, message)
          -- The player who sent the message
          print(player.Name .. " sent a message: " .. message)
        end)
Here, the code listens for the MyRemoteEvent. When a client sends a message, the server prints that player’s name and the message they sent to the output console in Roblox studio.
Handling Client-Side Messages with OnClientEvent
On the client, you use OnClientEvent to listen for messages sent from the server using FireClient or FireAllClients. Whenever the client receives a message, it will then do whatever the code inside of OnClientEvent says.
Here’s a code example, as seen in our previous example:
        -- Get the RemoteEvent from ReplicatedStorage
        local ReplicatedStorage = game:GetService("ReplicatedStorage")
        local myRemoteEvent = ReplicatedStorage:WaitForChild("MyRemoteEvent")


        -- When the event is fired from the server
        myRemoteEvent.OnClientEvent:Connect(function(message)
          -- Do something with message
           print("Received message from server: " .. message)
        end)
In this example, any time a client receives a message, that message will be printed into the output console.
Passing Arguments with Remote Events
You’re not just limited to sending simple text messages through Remote Events. You can pass along all sorts of data, such as numbers, strings, tables, and even more complex things. These arguments give the receiving side more context and control.
Sending Multiple Arguments
When sending through FireServer, FireClient or FireAllClients, you can add more than one argument. For example, if you want to tell the server that a player wants to purchase an item and how much money they have, you can send both the name of the item and the amount of money as separate arguments.
Here’s how you’d send multiple arguments from the client:
        -- Get the RemoteEvent from ReplicatedStorage
        local ReplicatedStorage = game:GetService("ReplicatedStorage")
        local purchaseEvent = ReplicatedStorage:WaitForChild("PurchaseItem")

        -- The user clicked purchase button
        local itemName = "CoolSword"
        local playerMoney = 500

        purchaseEvent:FireServer(itemName, playerMoney)
Receiving Multiple Arguments
When receiving a message, you also receive all the arguments in the order they were sent. The first argument is always the player object if it is fired from FireServer, and the other arguments that you sent via FireServer. For FireClient and FireAllClients you only receive the arguments you sent.
Here’s how you’d receive the multiple arguments on the server:
          -- Get the RemoteEvent from ReplicatedStorage
          local ReplicatedStorage = game:GetService("ReplicatedStorage")
          local purchaseEvent = ReplicatedStorage:WaitForChild("PurchaseItem")

          -- When server receives the event
          purchaseEvent.OnServerEvent:Connect(function(player, itemName, playerMoney)
            print(player.Name .. " wants to purchase " .. itemName .. " for " .. playerMoney .. " money.")
            -- perform some actions
          end)
In this example, the server receives the player, the name of the item the player is trying to purchase, and the amount of money they have available.
Practical Examples
Let’s look at some specific use cases where Remote Events are super useful.
Creating a Button that Changes Something on the Server
Let’s say you have a button that you want the players to click, and when they do, something special happens (like a door opening or a light turning on). The client will register the player clicking on the button and will tell the server, and the server will actually make the change in the game.
Here’s a breakdown:
- Local Script (Client): The local script is in the button object. It detects the player click and tells the server.
- Server Script: This script is in ServerScriptService. It gets notified from the client and makes the changes.
Example Setup
Place a button in your game, and add a local script inside it. Then, place a server script in ServerScriptService. In the server script we will also add the remote event. Here’s the code:
- Local Script:
-- Get the RemoteEvent from ReplicatedStorage local ReplicatedStorage = game:GetService("ReplicatedStorage") local buttonEvent = ReplicatedStorage:WaitForChild("ButtonEvent") local button = script.Parent button.MouseButton1Click:Connect(function() buttonEvent:FireServer() end) - Server Script:
                  -- Get the RemoteEvent from ReplicatedStorage
                   local ReplicatedStorage = game:GetService("ReplicatedStorage")
                    local buttonEvent = ReplicatedStorage:WaitForChild("ButtonEvent")

                    buttonEvent.OnServerEvent:Connect(function(player)
                      print("Button clicked by " .. player.Name)
                        -- Do something on the server, like open a door or turn on a light.
                    end)
Creating a Leaderboard That Updates for All Players
You might want to create a leaderboard that shows the players score and updates for all players in real-time. A server script will calculate and update the data and will send information to all the clients to render the score. Here’s how you can do that.
- Server Script: This script calculates scores, saves the scores, and fires updates to all players when required.
- Local Script: Each players local script receives those updates and updates the UI on their game.
Example Setup:
Here is the code example.
- Server Script:
-- Get the RemoteEvent from ReplicatedStorage local ReplicatedStorage = game:GetService("ReplicatedStorage") local updateLeaderboard = ReplicatedStorage:WaitForChild("UpdateLeaderboard") -- Function that simulates fetching the leaderboard local function getLeaderboardData() -- In reality you would fetch data here local leaderboard = { ["Player1"] = 1200, ["Player2"] = 2400, ["Player3"] = 1600 } return leaderboard end -- Some event triggers this -- When the leaderboard need to be updated local function updateAllClient() local leaderboard = getLeaderboardData() updateLeaderboard:FireAllClients(leaderboard) end -- Run the function once every 5 seconds while true do task.wait(5) updateAllClient() end - Local Script:
                  -- Get the RemoteEvent from ReplicatedStorage
                   local ReplicatedStorage = game:GetService("ReplicatedStorage")
                    local updateLeaderboard = ReplicatedStorage:WaitForChild("UpdateLeaderboard")

                    updateLeaderboard.OnClientEvent:Connect(function(leaderboard)
                      -- Here you would write code to render leaderboard
                      print("Leaderboard received", leaderboard)
                  end)
Important Considerations
When working with Remote Events, there are a few things to keep in mind, to avoid problems and security issues.
Security and Validation
Never trust the client! Clients can be tampered with. If you let clients tell the server about everything without checking, cheaters could easily break your game. Always check the data sent from the client, on the server, to make sure it’s valid.
For example, if a player claims to have bought an item, you should verify on the server if they really have enough money, instead of just taking the client’s word for it.
Rate Limiting
If you let the client send messages too fast, it can overload the server. This can cause lag and make your game glitchy or crash. You should implement rate limiting. This means limiting how often a client can send messages. You can use os.time() to track the last time a player sent a message, and disallow them to send another message for a short time.
Error Handling
Errors can and will happen. You should handle these errors gracefully. Wrap your code in pcall blocks to prevent your code from breaking down if there is an error.
Here is a code example on how to do it:
            local success, errorMessage = pcall(function()
            -- Code you wish to run, will catch any errors in this code
            myRemoteEvent:FireServer()
            end)

            if not success then
                warn("An error happened: " .. errorMessage)
            end
Remote Events are a very important part of creating multiplayer experiences in Roblox. By understanding how they work, you’ll be able to add all sorts of cool features to your games. Always make sure to keep security in mind and check your data, and you’ll be making amazing games in no time.
How to Use RemoteEvents (for dummies) – Roblox Studio
Final Thoughts
In short, send data between server and client using FireServer and FireClient. OnServerEvent and OnClientEvent are used to receive that data. Remember to keep security in mind.
Properly utilizing RemoteEvents is crucial for complex Roblox games. Understanding ‘how to use roblox remote events,’ enhances your game’s functionality. This makes your game interactive and effective.

