
The NBA 2K25 camera control allows players to switch between various preset views and customize camera settings for an ideal gameplay perspective.
Ever felt like you’re not quite in the game? That’s often because the default view isn’t hitting the sweet spot for everyone. Understanding how to manipulate the NBA 2K25 camera control is a game changer.
Adjusting the camera angle can significantly impact your court awareness and overall experience. Some players prefer a wide, zoomed-out view, while others want something closer and more personal.
Finding your perfect view enhances your precision, so take the time to play with the different options and tailor your camera settings to your unique style in NBA 2K25.

NBA 2K25 Camera Control: See the Game Your Way
Alright, basketball fans! You know how much the camera angle can change the whole vibe of a game, right? It’s like watching a movie from different viewpoints. In NBA 2K25, controlling the camera is super important, whether you’re trying to nail that perfect three-pointer, drive to the hoop, or play solid defense. This isn’t just about clicking a button; it’s about making the game feel exactly how you want it. Let’s dive into all the ways you can take charge of your view in NBA 2K25.
Understanding Default Camera Views
Before we get into tweaking things, let’s check out the standard camera angles the game offers. These are the views you’ll usually start with, and they give you a good feel for the action. Knowing these is important so you can decide if you like them, or want something different. Here are some of the common ones:
- 2K Camera: This is often the default view. It’s a slightly angled view that follows the ball. It gives a good balance of seeing what’s happening around you and keeping an eye on your player. Many people like this because it’s simple to understand. It’s a nice middle ground.
- Broadcast Camera: Think of watching a real basketball game on TV. This camera gives you that wide view from high above the court. It lets you see all the players on the floor. It’s good for seeing plays develop but might feel a little far away for some.
- Baseline Camera: Imagine sitting right behind the basket. That’s what the baseline view is like. It’s great for driving and seeing those explosive dunks up close. However, it can be harder to see what’s going on across the entire court.
Why Different Views Matter
Each of these views has its pros and cons. For instance, if you’re more into dribbling and fancy footwork, the baseline camera can make you feel like you’re right in the action. However, if you prefer to make plays with the whole team, a view like the 2K camera is going to be very helpful. Finding the view that works for you improves your game. It helps you see the court better and react faster.
Switching Between Camera Views
So, how do you switch between these views? It’s usually pretty simple. In most 2K games, you can toggle through the camera angles using the D-pad or controller buttons.
- During Gameplay: Look for the buttons shown on screen, usually displayed in the game’s settings or on-screen prompts.
- In the Pause Menu: You can always access the camera settings in the pause menu during a game. Usually, these settings can be found under the ‘Options’ or ‘Settings’ category and then in the ‘Camera’ section.
This lets you easily switch to another view if you need a change. For instance, if you are playing some defence and find the baseline camera is not comfortable, you can easily switch to 2K camera to check the players.
Customizing Your Camera Settings
Now, let’s get into the fun part: changing the camera view to be exactly how you like it! NBA 2K25 lets you adjust camera settings. This allows you to customize the view even further. You have more control than just picking a default angle. Here are some things you might be able to adjust:
Camera Height and Zoom
Do you feel like you’re too far away from the action? Or maybe you feel too close? You can probably change the height of the camera to raise or lower the view. You can also zoom in or out. Changing these settings can really affect how you see the court. Zooming out makes it easier to see everyone, while zooming in makes those dunks and dribbles feel up close and personal. The setting is important so that you can make it according to your comfort and game style.
Camera Angle and Rotation
Besides height and zoom, you can also adjust the angle of the camera. Want a more top-down view? Or maybe you prefer a more angled view? The rotation setting lets you twist the camera slightly to make your view feel perfect. This is really helpful if you have a preference on how you see the court. For example, some may feel comfortable with a straight view, while others feel good with a slightly tilted view. These adjustments are all about your personal feel and game plan.
Camera Speed and Smoothing
How quickly does the camera move as you run up and down the court? Some people like it smooth and steady, while others prefer a quicker, snappier feel. You can usually find settings to adjust the camera speed, and this also include the smoothing. Camera smoothing will affect how the camera moves from side to side and in and out. Making the view smooth helps prevent any jerky movements, making the view more comfortable and easy to watch. Adjust these settings to suit your preference and see what you like best.
Camera Shake
Do you want your screen to vibrate when you get a slam dunk? Some players like the extra shake, while others find it distracting. The camera shake setting lets you turn on or off the vibration when something exciting happens in the game. Turn it off if you want a steadier view of the game.
Advanced Camera Control Tips
Okay, you know the basics. Now let’s look at some ways to get even more out of your camera control:
Experiment with Different Settings
Don’t be afraid to try different combinations of camera settings. Try different zoom levels, heights, angles, and camera smoothing until you find what feels right for you. The best camera settings are the ones that make you comfortable and help you play your best.
Match Your Camera to Your Play Style
Are you a shooter who likes space? Maybe a zoom-out view helps you find open teammates and get your shots away. Or, are you a big man who dominates inside? Perhaps a lower, zoomed-in view helps you get those rebounds and dunks. Think about how you play the game, and adjust the view to match.
Camera Settings for Different Game Modes
Sometimes, you might prefer different camera settings based on game mode. Here’s a quick guide:
- Quick Play: This is where you might want to experiment. Try something new to see if you like it.
- MyCareer: You might prefer a camera angle that makes you feel like you’re right there with your player. It lets you create your own story with the right angle.
- Online Play: Here, it’s all about what helps you win. You may want to use a view you’re very comfortable with for best performance.
Practice with Camera Control
Like any skill, camera control takes practice. Take a bit of time in practice mode, changing the camera settings, and get comfortable with what you are doing. This practice will help you become more aware of the view and how that helps you in game. This will become very important when you try to play in a serious game against other players. The more you practice, the more natural controlling the camera will become.
Specific Camera Setups for Specific Positions
If you play multiple positions, you might want different camera setups for each. For example, when you play point guard, you’ll need a view that allows you to see the entire court. If you’re a center, you may want a closer view, to focus on rebounds and close range shots.
Using Camera Control for Defensive Advantages
Don’t only use the camera for offense! The right view helps you see passing lanes and rotations better on defense. The best players use the camera to find the best place for interception, steals and help defense. Mastering the camera is about improving both the offense and defense.
Troubleshooting Common Camera Issues
Sometimes, things might go a little wonky. Here are some common issues and how you can fix them:
- Camera Jumps or Stutters: Try adjusting the camera smoothing setting. Also, make sure that the settings you’ve set aren’t creating a conflict with your device hardware.
- Camera Feels Too Far Away or Too Close: Adjust the zoom setting. Start with small changes and test them out.
- Camera Isn’t Following the Ball: Make sure that the camera is set to follow the ball in the settings.
If you’re still having trouble, you can try resetting your camera settings back to default. This will start you fresh and you can go through each setting again. If things are still acting up, it might be a good idea to check the game’s forums or support pages for any common issues.
In the end, there is no single best camera setting, everyone has their own comfortable level and preference. It’s all about finding what works for you. So, get into NBA 2K25, experiment with those camera settings, and find that perfect view that’ll help you dominate on the court. With a little effort, you’ll be able to fine-tune your settings, becoming more comfortable and enjoy the game to the fullest.
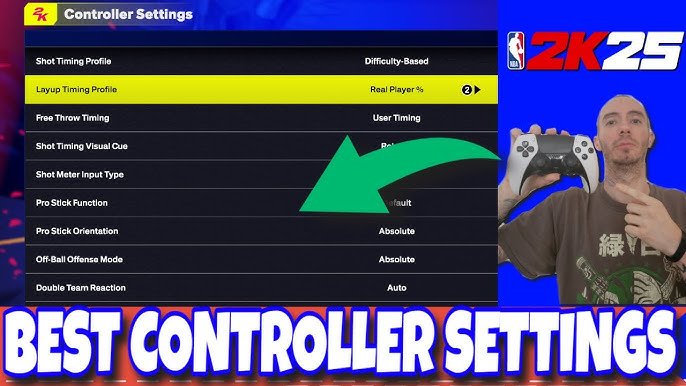
NBA 2K25 Shooting Tips: Best Controller Settings Visual Cues #nba2k25 #2k25
Final Thoughts
Ultimately, effective camera adjustments in NBA 2K25 give you a competitive edge. Finding what works best with your play style improves court vision.
Experiment with different settings; the right angle can significantly impact gameplay. NBA 2K25 camera control is essential for both offense and defense.

