The best NBA 2K25 camera settings typically involve choosing the ‘2K’ or ‘Broadcast’ view for a balanced perspective or experimenting with ‘MyPlayer’ settings for a closer, personalized experience.
Finding the right view in NBA 2K25 can significantly impact your gameplay. The camera angle you choose affects how you see the court, your players, and the action overall. This NBA 2K25 camera setting guide will help you navigate the options and find what works best for your style.
Different perspectives offer unique advantages. For example, some players prefer a higher, broader view, while others like a closer, more intimate look at the game. This guide helps you find the perfect setting to enhance your experience.

NBA 2K25 Camera Setting Guide
Okay, so you’re ready to step onto the virtual court in NBA 2K25, but something just doesn’t feel right. Maybe you feel like you’re watching the game from too far away, or maybe the default view makes it hard to see all the players. Well, you’re not alone! The camera settings in NBA 2K25 can really change the whole game. Finding the perfect view can improve your playing experience big time, making it easier to dribble, shoot, and defend. This guide will help you understand all the options and find the view that’s right for you. Let’s jump in and get your game looking and feeling great!
Understanding the Basics of Camera Views
Before we dive into specific settings, let’s talk about what camera views actually do. Think of it like choosing the best seat at a real basketball game. You have different perspectives that change how you see everything on the court.
Broadcast View: This is the standard view you see on TV. It’s like watching a real NBA game. It’s good for seeing the whole court, but it can sometimes feel a little far away when you’re trying to control one player.
2K View: This is a closer, angled view from behind your player, allowing you to get a more personal experience, making it easier to dribble and make shots because you see more of your player.
MyCareer View: This one is similar to the 2K view, focusing primarily on your own player’s actions. It’s really tailored for the single-player MyCareer mode.
Custom Views: These let you adjust several settings to build a view that fits your unique playing style.
Choosing the right view is all about personal preference, but there are advantages to each. Don’t be afraid to try them all out and figure out which works best for you!
Exploring Common Camera Options
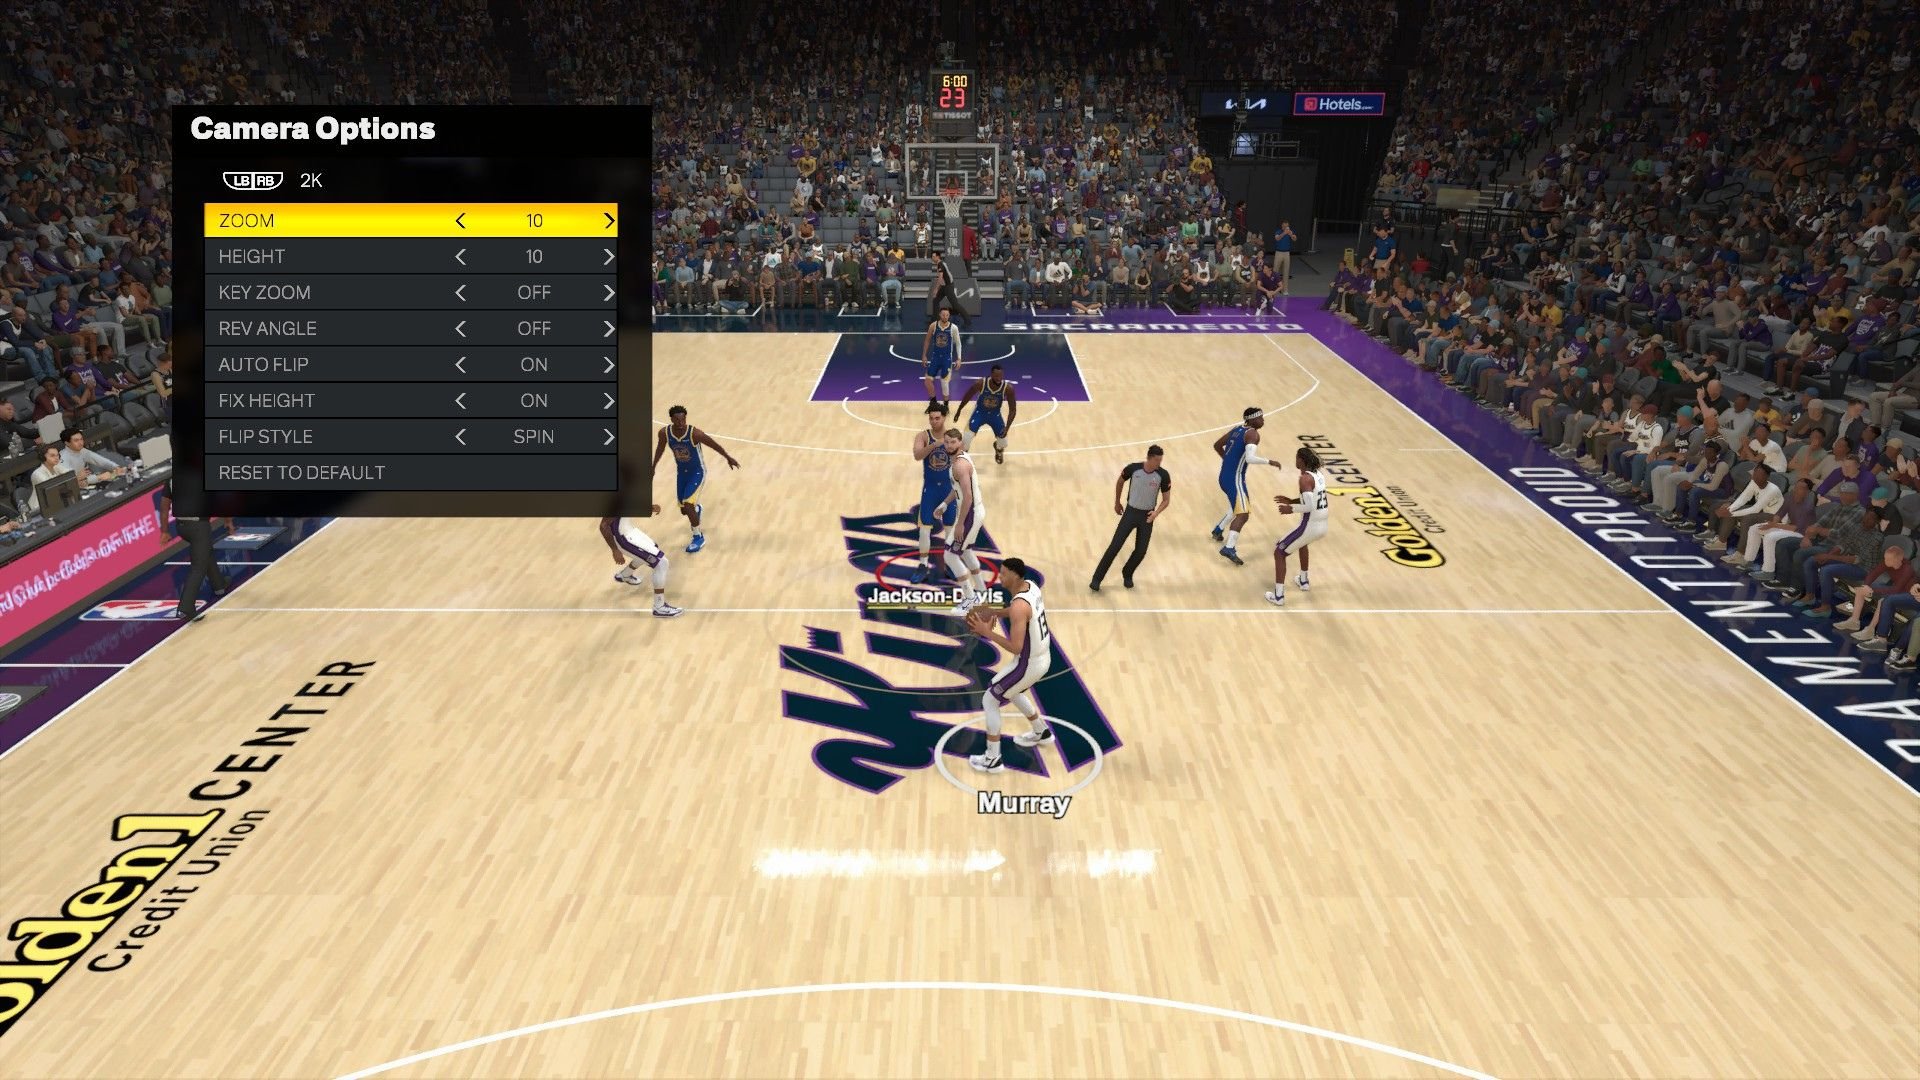
Okay, let’s get to the settings you can actually tweak in NBA 2K25. There are a few common ones you’ll see regardless of the camera view you choose. Understanding these will help you fine-tune your game:
Zoom: This setting controls how close or far away the camera is from the court. You can zoom in for a closer view of the action, which is helpful for focusing on your player or zoom out for a better view of the entire court, which can help with understanding how the players are positioned.
Height: This adjusts how high or low the camera is positioned above the court. A higher view gives you a better overall picture of the court, while a lower view offers a more immersive, on-the-ground feel.
Angle: This changes the tilt of the camera. You can adjust it to look directly down onto the court or at an angle. This setting changes how you percieve the depth of the game.
Transition Speed: This determines how quickly the camera moves when the action changes. You can set it to be fast, slow, or somewhere in between. A faster speed gives a very fast-paced experience, whereas the slower transition speed can make it seem like you are slowly following the ball or player around the court.
These settings are usually within each individual camera view, so you can customize each view separately.
Detailed Look at Popular Camera Views
Let’s take a closer look at the most frequently used camera views and how you might use them:
Broadcast Camera
The Broadcast camera view is meant to mimic what you see when you watch a real NBA game on TV. Here is what this camera looks like:
Pros:
Good for seeing the whole court and player positions
Familiar if you watch a lot of basketball on TV
Great for setting up plays and finding open teammates
Cons:
Can feel a little distant from your player
Not ideal for dribbling or making moves close to the basket
Sometimes hard to see the fine movements of your player
Who Should Use It: Players who like to think about the game from a strategic viewpoint and focus on plays that use the entire court.
2K Camera
The 2K camera is all about you. It gives you a closer, behind-the-player view. This is how it works:
Pros:
Great for dribbling and making moves
Immersive, you really feel like you are your player.
Good for seeing your player’s movements and shots.
Cons:
Can sometimes make it harder to see other players on the court
Can be a little difficult when transitioning from offense to defense.
Sometimes challenging to see your player’s direction, but not hard.
Who Should Use It: Players who want a close up view of their player and focus on skills.
MyCareer Camera
The MyCareer camera view is all about following your created player in the game. This is how it’s structured:
Pros:
Tailored specifically for the MyCareer mode, allowing to focus on the action of your player.
Good for immersion in your player’s story.
Easy to learn as a beginner.
Cons:
May be too narrow for people who want to see more of the entire court.
Might not be the best for advanced team gameplay.
Not suitable for playing a position other than the one your MyCareer player plays.
Who Should Use It: Players who love the MyCareer mode and care most about the experience of their created player and do not care about anything else that is happening on the court.
Creating Your Own Custom Camera View
Now, let’s talk about making your own unique view. This is where you can really tailor the game to your specific style. Here is how to set up a custom camera:
1. Go to the Settings: In the main menu of NBA 2K25, go to “Options” and then select “Camera Settings.”
2. Choose “Custom”: You’ll see a list of camera views. Choose the one labeled “Custom.”
3. Adjust the settings:
Use the “Zoom” setting to get closer or farther from the action. Experiment and find the level of closeness that you prefer.
Use the “Height” setting to adjust the camera’s view, higher or lower.
Use the “Angle” setting to control the tilt. Try various angles to find your favorite depth perception.
Use the “Transition Speed” setting to set the camera’s movement speed.
4. Test Your Settings: Go to a scrimmage or practice game and test your new camera settings.
5. Make changes: If you don’t like it, don’t be afraid to come back and make further adjustments.
This is where the fun begins! Take your time to experiment with each setting and create a view that feels natural and comfortable.
Tips for Finding Your Ideal Camera Settings
Figuring out the perfect camera settings can take time, but here are a few extra tips to help you get there:
Start with Defaults: Start with the default settings of each view, and then make small adjustments from there. This will help you understand the effect of each setting individually.
Experiment Regularly: If a camera view isn’t working for you, don’t be afraid to switch. Try different settings until you find what fits your style.
Consider Your Game Mode: Your ideal camera might change depending on whether you’re playing MyCareer, MyTeam, or a quick game. Experiment and find what’s best for each scenario.
Pay attention to detail: Pay close attention to how the camera settings affects your dribbling, shooting, and defense. This will help you determine what settings you need.
Watch Professional Gamers: Watch videos or streams of professional NBA 2K players. They often use custom camera settings that they’ve refined for peak performance. Try out what they use and then alter them to your liking.
Ask for feedback: Ask friends who also play NBA 2K25 for their advice. They might see something you are missing and provide valuable insights.
Don’t Give Up!: Finding the right camera settings takes time and effort, but the improvement in your gameplay is well worth it!
Advanced Camera Tips for Serious Players
Once you’ve gotten the basics down, here are some advanced tips for those looking to push their game to the next level:
Customizing Camera for Different Positions: If you play different positions, you might want slightly different camera settings. For example, a point guard might want a wider view of the court, while a center might prefer a closer view to see the action in the paint.
Using Camera Angle to Your Advantage: A low angle can make it easier to see dribbling moves, whereas a high angle helps you see the entire floor which is useful for passes.
Quick Camera Switching: While it may be disorienting at first, you may choose to switch between camera angles while you play to quickly view your player, then the action around them.
Understanding Transition Speed: Playing with a fast transition speed can make you feel like you’re actively participating in the game, making the action seem more dynamic. A slow transition speed helps keep a better sense of control.
Camera Shake: Some players like to turn camera shake off because the camera movement may be slightly distracting when trying to shoot or dribble.
These advanced tips are for players that really want to dive deep into fine-tuning their game. With practice and experimentation, you can see a dramatic impact on your performance.
Common Mistakes and How to Avoid Them
Many players make a few common mistakes when choosing camera settings. Here’s how to sidestep them:
Sticking with Default: Many players just stick with the default, but that’s not always the best choice for you. Take the time to explore and see what works for you.
Not Adjusting: When you try a camera setting, you need to give it time, and make small adjustments. Don’t just jump to another setting before trying to fix the problem with the current setting.
Choosing Too Extreme: Choosing zoom or height settings that are way too high or low can make it very hard to play. Start with small adjustments and make bigger changes if necessary.
Ignoring Transition Speed: The speed at which the camera shifts can also have a huge impact on your playing experience. Make sure the transition speed feels comfortable to you.
Not Understanding the Camera’s limitations: Each camera has limitations. The broadcast view is not good for dribbling, while the 2k view does not give you good perception of the rest of the court. Pick the camera view and adjust to the settings.
Getting Frustrated Too Quickly: Finding the right camera setting takes time. Be patient, and experiment until you find one that feels right.
By being aware of these common errors, you can avoid the frustration and speed up the process of finding the perfect camera setting.
In the end, finding the perfect camera setting is a journey, not a destination. Don’t feel stuck with what you’re using now. Keep experimenting, tweaking and have fun on the court. With the right camera view, you can see a real improvement in your game and enjoy NBA 2K25 even more. Remember the goal is to find something that feels comfortable, natural, and really helps you play at your best.
5 SECRET Settings That You NEED To Use In NBA 2K25
Final Thoughts
Ultimately, finding the right camera angle in NBA 2K25 is a personal preference, but experimentation with settings is key to improving your gameplay. Use this NBA 2K25 camera setting guide to tailor your view. This guidance helps find the angles that suit your play style.
Remember, different camera perspectives greatly impact visibility and reaction time. Try various heights, zooms and angles, and find the combination that helps you perform your best on the virtual court.

