
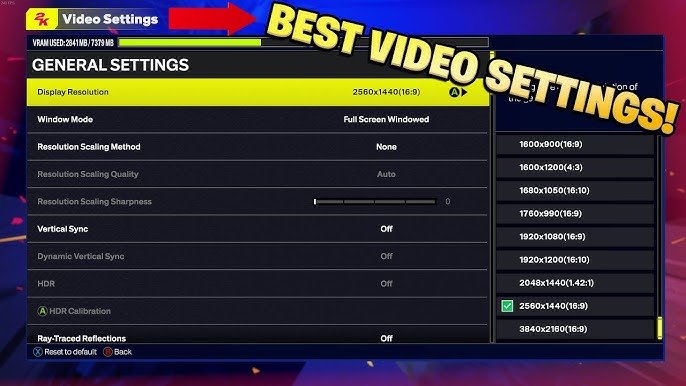
Optimizing your visuals in NBA 2K25 involves adjusting settings like resolution, texture quality, and anti-aliasing within the game’s graphics menu.
Struggling to get the best visual experience in the new NBA 2K25? Many players find themselves tweaking settings to achieve smooth gameplay without sacrificing visual fidelity. This NBA 2K25 graphics configuration guide will help you navigate those options.
We’ll explain what each setting does and how they affect your game’s performance. This information enables you to make informed choices about graphics settings. We aim to help you find the perfect balance between performance and visual quality for your setup.

NBA 2K25 Graphics Configuration Guide
Alright, gamers! Ready to make NBA 2K25 look its absolute best? Getting the perfect graphics settings can be tricky, but it’s super important for a smooth and awesome gaming experience. Whether you’re playing on a super powerful computer or something a little older, understanding the graphics options is key to getting the most out of the game. This guide is going to walk you through all the settings, explaining what they do and how they affect your game. We’ll cover everything from basic adjustments to more advanced tweaks, so you can fine-tune your setup for optimal performance and stunning visuals. Let’s get started and make sure your court is looking its absolute best!
Understanding the Basics
Before we jump into the nitty-gritty settings, it’s helpful to understand some of the basic concepts behind computer graphics. Think of it like building with virtual LEGOs – you need the right pieces and the right instructions to make something cool. In gaming, those pieces are the various elements that make up the visuals, and the instructions are the settings we’re about to explore.
Resolution
This is like the size of your TV screen for your game. Higher resolution means more detail and a sharper picture. Think of it like having more pixels to create the image.
1920 x 1080 (1080p): This is a pretty common resolution. It looks good on most monitors and TVs.
2560 x 1440 (1440p): This gives you a clearer picture than 1080p. If you have a good monitor, this is a sweet spot.
3840 x 2160 (4K): This is the highest resolution. It looks amazing, but you need a powerful computer to run it smoothly.
When you pick your resolution, keep in mind that higher resolution needs more power from your computer. If your game runs too slow, try lowering the resolution a little.
Refresh Rate
This tells your monitor how many times per second the picture is updated. Think of it like flipping the pages of a flipbook. More pages mean a smoother animation.
60 Hz: This is a standard refresh rate. It’s ok for most games, but it can look a little choppy sometimes.
120 Hz and 144 Hz: These higher refresh rates make your games look really smooth. They’re great for fast-paced games like NBA 2K25.
240 Hz and above: This is for serious gamers who want the absolute smoothest picture possible.
Make sure your monitor supports the refresh rate you want to use.
V-Sync
V-Sync is like a traffic cop for your computer’s graphics. It makes sure your game’s pictures get sent to your monitor at the right time. Sometimes your computer can make more pictures than your monitor can show, causing screen tearing. This tearing makes it look like the picture is ripped apart. Turning on V-Sync can stop this from happening, but it can sometimes make your game slower. If you have this issue, it might be necessary to enable it. If not, you don’t need to enable it.
Exploring the In-Game Graphics Settings
Now that we have some of the basic knowledge, let’s get into the game and explore the graphics settings in NBA 2K25. You can find these in the game’s settings or options menu, often in the ‘Video’ or ‘Graphics’ section. These settings help you to make the game look great on your monitor. We’re going to take a closer look at each setting.
Graphics Quality Presets
Many games offer preset graphics options. These are like ready-made recipes for your graphics.
Low: This setting makes the game run smoothly on weaker computers. You might lose some details, but the game will be faster.
Medium: This setting is a balance between looks and speed. It’s good for most computers.
High: This makes the game look very good, with lots of detail. You need a stronger computer for this.
Ultra: This gives you the best possible visuals, with everything turned up. You will need a very powerful computer to run it smoothly.
Custom: This option allows you to change all the settings one by one. This is where you can really fine-tune the game.
Experimenting with these presets can give you a good starting point for your custom graphics settings.
Advanced Graphics Options
Now, let’s dive into the more detailed settings. These options allow you to really fine-tune the look and feel of the game, so you can get the perfect combination of beautiful and smooth. We will go through each setting one by one.
Texture Quality: Texture refers to the detail you see on surfaces like the court, the players’ uniforms, and the basketball itself.
Low: Textures might look blurry.
Medium: Textures are clearer.
High/Very High/Ultra: Textures will look very sharp and detailed. Increasing this setting will make the game look better, but will need more powerful computer.
Anti-Aliasing: Anti-Aliasing removes jagged edges from objects. Think of it as smoothing the edges of the objects.
Off: Jagged edges may be very visible.
FXAA/SMAA: These methods are quicker but can make the game look a little blurry.
TAA/MSAA: These methods work much better at removing jagged edges. MSAA needs a lot more power from your computer.
Shadow Quality: Shadows add depth and realism to the game.
Low: Shadows may look blocky or simple.
Medium: Shadows look better but may not have all the details.
High/Ultra: Shadows are very detailed and smooth. These will make the game look realistic, but it will require more power.
Ambient Occlusion: This setting adds shadows where objects touch. This makes the scene feel more grounded and real.
Off: The scene looks flatter.
SSAO: This method adds good-looking shadows.
HBAO: This method provides very detailed shadows. It might be a little more demanding.
Shader Quality: This controls how realistic the lighting and reflections look on objects.
Low: Shaders are basic, with fewer fancy effects.
Medium: Shaders are good looking.
High/Ultra: This adds more lighting effects. This adds lots of detail, but it needs more power to run well.
Cloth Simulation: This makes the player’s uniforms and cloth banners appear to move more naturally.
Low: The cloth will look static.
Medium/High: Cloth moves more realistically.
Motion Blur: This effect blurs moving objects, giving the impression of speed.
Off: No motion blur is added.
Low/High: You’ll see more blur when things move fast. This can help in hiding visual artifacts or improve the sense of speed.
Crowd Density: This controls how many people are in the audience.
Low: Fewer people are shown in the stands.
Medium/High: More people are shown, making the arena look much fuller.
Reflection Quality: This controls how much detail is seen in reflections.
Low: Reflections look simple.
Medium/High: Reflections are more realistic.
Bloom: Bloom adds a glow to bright areas.
Off: No glow is added.
On: A glow is added around bright spots.
Depth of Field: This makes faraway objects look blurry. It can help the player focus on what is close to the camera.
Off: Everything is in focus.
On: Objects in the distance are blurred.
Optimizing Performance for Different Setups
Now that we’ve covered the settings, let’s talk about how to adjust them for different computers. If you have a high-end computer, you can probably use all the high or ultra settings. But if you have an older or less powerful computer, you need to be more careful with your choices.
For High-End Computers
If you have a powerful gaming rig, you can probably crank most settings up to their max. Here are some things you might want to try:
Resolution: Go for 1440p or even 4K if your monitor supports it.
Refresh Rate: Set it as high as your monitor can go.
Graphics Preset: Select “Ultra” to get the best visuals.
Texture Quality: High or Ultra.
Anti-Aliasing: Use a stronger option like TAA or MSAA.
Shadow Quality: High or Ultra.
Ambient Occlusion: HBAO for the best shadows.
Shader Quality: High or Ultra.
Cloth Simulation: High.
Motion Blur: Try Low or High to see if you like it.
Crowd Density: High to fill the stands with fans.
Reflection Quality: High.
Bloom: On.
Depth of Field: On if you like.
For Mid-Range Computers
If you have a computer that is not new, you’ll need to be a bit more careful with the settings. Here’s a setup that should work well:
Resolution: Try 1080p or 1440p if your monitor supports it.
Refresh Rate: Set it at 60Hz or 75Hz if your monitor supports it.
Graphics Preset: Start with “Medium” or “High” and see how the game performs.
Texture Quality: Medium or High.
Anti-Aliasing: FXAA or SMAA is usually a good choice.
Shadow Quality: Medium.
Ambient Occlusion: Try SSAO.
Shader Quality: Medium.
Cloth Simulation: Medium.
Motion Blur: Try low or off if it affects your speed too much.
Crowd Density: Medium.
Reflection Quality: Medium.
Bloom: On or off, depending on your preference.
Depth of Field: On or off, depending on your preference.
For Lower-End Computers
If you have an older computer, you’ll need to focus on keeping the game running smoothly. Here’s a good starting point:
Resolution: Use 1080p or lower, if needed.
Refresh Rate: Use 60 Hz.
Graphics Preset: Choose “Low” to reduce the amount of processing power the game uses.
Texture Quality: Low.
Anti-Aliasing: Turn this off, or use FXAA if you have to.
Shadow Quality: Low.
Ambient Occlusion: Turn this off.
Shader Quality: Low.
Cloth Simulation: Low.
Motion Blur: Off.
Crowd Density: Low.
Reflection Quality: Low.
Bloom: Off.
Depth of Field: Off.
Tips for Fine-Tuning
Start with Presets: The game presets can be a good starting point. Start with them and adjust from there.
Test After Changes: After each change you make, play the game for a bit to see how it performs.
Prioritize Smoothness: If your game is running too slow, it might be better to turn off some settings to help it play smoothly.
Monitor Resources: Use the Windows Task Manager to see how much of your computer’s power the game is using. If your CPU or GPU is always at 100%, you should lower some of the settings.
Update Drivers: Make sure you have the latest drivers for your graphics card. New drivers can sometimes make the game run faster and look better.
Try Different Combinations: Don’t be afraid to play with settings. What works best can depend on your computer and what you like.
Use in Game Performance Monitor: Most games will have a performance monitor, use this to make sure that you’re not going over your system’s capabilities.
Look for Feedback: Check out forums and online guides to get feedback from other players with similar setups.
Finding the perfect graphics settings is all about finding the right balance between how good the game looks and how smoothly it runs. It takes a bit of experimenting and playing around, but it’s worth it when you can enjoy the game without any lag or visual hiccups.
No matter what type of computer you have, understanding these graphics settings will help you to get the most out of NBA 2K25. You can fine-tune your setup to get the perfect combination of amazing visuals and smooth gameplay. It’s like being a coach for your own computer, deciding which settings to focus on to achieve the best results. So go ahead, jump into the game, and start tweaking those settings!
Best Graphics Settings for NBA 2K25 (FIX LAG AND STUTTERING)
Final Thoughts
Optimizing your settings is key for smooth gameplay. Finding the right balance between visuals and performance is critical. Experiment with different presets, adjusting resolution and anti-aliasing.
Testing various configurations provides the best experience for your setup. Remember to monitor frame rates to see changes. Proper configuration avoids lag and stuttering, ensuring fluidity.
Ultimately, the ideal settings depend on your specific hardware. This NBA 2K25 graphics configuration guide helps you navigate the options. Finding your perfect settings will significantly improve your experience.

