
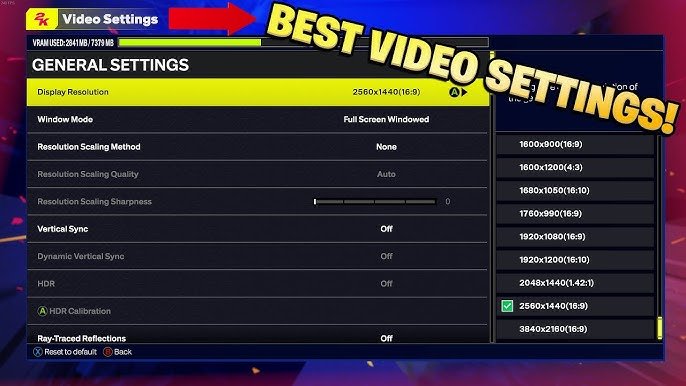
The optimal NBA 2K25 graphics configuration depends on your PC’s hardware; adjust settings like resolution, texture quality, and shadows to balance visual fidelity with performance.
Diving into NBA 2K25? We know getting the game to look great while running smoothly is key. Achieving that perfect balance comes down to understanding the nuances of NBA 2K25 graphics configuration.
Finding the sweet spot for your system isn’t always straightforward. Tweaking individual options will make a difference. Experimenting is a great approach to fine-tune visual settings to maximize the performance of your system.

NBA 2K25 Graphics Configuration: Getting the Best Look
Let’s talk about making NBA 2K25 look its absolute best on your computer or console. It’s not always plug-and-play; sometimes, you need to tweak things to get the smooth, gorgeous gameplay you deserve. Think of it like tuning a race car – you’ve got to adjust a few things to get it performing at its peak. This section will walk you through all the important graphics settings you might encounter in NBA 2K25, explain what they do, and help you figure out what settings are right for you. This is not just about making it pretty; it’s also about getting the game running smoothly so you don’t have to deal with lag or stutters in the middle of an important play.
Understanding the Basics: Resolution and Refresh Rate
Before we dive into the nitty-gritty, let’s talk about two fundamental concepts: resolution and refresh rate. These two work hand-in-hand to determine how crisp and smooth your game looks.
Resolution Explained
Resolution is like the number of tiny dots (pixels) that make up the picture on your screen. A higher resolution means more dots, and more dots make the image look sharper and clearer. Common resolutions you might see include:
- 720p (HD): Pretty standard, but you’ll likely want to go higher if your system can handle it.
- 1080p (Full HD): A very popular resolution for gaming, offering a good balance of sharpness and performance. This is what most people use.
- 1440p (QHD or 2K): A step up from 1080p, it gives you even sharper details. If you have a stronger computer, this is a great option.
- 2160p (4K): The highest resolution, providing the most detail. It requires a powerful gaming setup.
If you select a higher resolution, your game will look much clearer and detailed, but it will also require more power from your computer. If you select lower resolution, your game will not look as detailed, but it will be easier on your computer.
Refresh Rate Explained
Refresh rate is how many times your screen updates the image every second. It’s measured in Hertz (Hz). A higher refresh rate means your game will feel smoother and more responsive. Common refresh rates are:
- 60Hz: The standard for most TVs and many monitors. It looks ok but can appear a little blurry in fast motion.
- 120Hz/144Hz: A good refresh rate for gamers, producing much smoother motion than 60Hz. This is ideal for fast-paced games like NBA 2K.
- 240Hz/360Hz: These are very high refresh rates. If you’re a hardcore gamer or you play a lot of competitive matches, you may want to check your display support for these.
Always try to match your monitor’s refresh rate with the frame rate that your computer is outputting. This creates a more consistent experience and helps prevent screen tearing.
Graphics Settings Deep Dive
Now that we understand the basics, let’s jump into the graphics settings you will find in NBA 2K25. These settings let you control things like the quality of textures, lighting, shadows, and other visual effects. Adjusting these settings will affect both the game’s look and how well it runs. It is not possible to provide exact instructions for your game, so please refer to settings and wording in your particular game build. Also note that the availability of some settings may depend on your hardware.
Texture Quality
Texture quality dictates the clarity and detail of surfaces in the game. Think of player jerseys, the court floor, and even the crowd – these are all examples of what textures control. Higher quality means crisper images, but requires more system resources.
- Low: The least detailed textures, suitable for low-end computers.
- Medium: A good middle ground, balancing detail with performance.
- High: Detailed textures provide a more immersive experience, but it requires more processing power.
- Ultra: The highest possible texture quality, providing the most detail and the highest system requirements.
Recommendation: If your system is not a gaming-oriented one, start with medium textures and gradually increase the setting until you reach the quality you desire, while having comfortable performance.
Shadow Quality
Shadows add a great deal of realism to the game. However, they also put a strain on your graphics card. The shadow setting determines the sharpness and detail of the shadows.
- Low: Simple, low-resolution shadows.
- Medium: Better defined shadows, offering a decent balance between visuals and performance.
- High: High-resolution shadows provide very realistic-looking shadows, but they use more of your computer’s power.
- Ultra: Very detailed shadows.
Recommendation: Start with medium and move to high if your system can handle it. Sometimes, you don’t notice shadows, but they are important for a realistic game.
Anti-Aliasing
Anti-aliasing makes edges of objects and characters appear smoother. Without it, lines can sometimes look jagged or pixelated. There are several types of anti-aliasing, but the general concept is the same: remove jaggies by smoothing edges in the image.
- Off: No anti-aliasing, edges might be jagged.
- FXAA (Fast Approximate Anti-Aliasing): A less demanding anti-aliasing method that uses less system resources than other anti-aliasing solutions.
- SMAA (Subpixel Morphological Anti-Aliasing): Another good anti-aliasing method that is also less demanding, but provides better results than FXAA.
- MSAA (Multisample Anti-Aliasing): A very good way of anti-aliasing but, it is very demanding. Using this will result in less performance.
- TAA (Temporal Anti-Aliasing): Can look very good, but it can sometimes result in blurrier images.
Recommendation: If you’re running on a lower-end machine, try FXAA or SMAA. For more powerful rigs, consider MSAA or TAA.
Ambient Occlusion
Ambient occlusion makes objects seem more three-dimensional and grounded by adding realistic shadows in corners and crevices. It’s especially noticeable around player models and in the environment.
- Off: No ambient occlusion.
- Low: Basic ambient occlusion.
- Medium: A good compromise between detail and performance.
- High: High quality ambient occlusion, which provides the most realistic visuals, but uses more resources.
Recommendation: It’s usually a good idea to use low or medium ambient occlusion. It adds a lot to the game’s look, and it is not as demanding as some other settings.
Special Effects
Special effects cover things like lighting, particle effects (like dust or sweat), motion blur, and lens flare. These add to the visual appeal and overall experience of the game.
- Low: Minimal effects, this setting does not use much processing power.
- Medium: A good balance of special effects and performance.
- High: High levels of special effects, looks good, but uses more power from your system.
Recommendation: Adjust based on personal preference. If you like visuals more, go high, but if you value good performance, go for low or medium settings.
Motion Blur
Motion blur is a special effect that makes things look blurry when they are moving fast. Some people think it makes the game more realistic, others find it distracting. The amount of blur may depend on your display settings or on the game settings.
- Off: No motion blur.
- On: Motion blur is enabled.
Recommendation: It’s a matter of personal preference. If you feel dizzy when playing a game with motion blur turned on, turn it off. If you like it, you can keep it enabled.
Vertical Synchronization (V-Sync)
V-Sync matches your game’s frame rate with your monitor’s refresh rate. This helps prevent “screen tearing,” which is when you see horizontal lines in the image. However, it can sometimes reduce performance.
- Off: V-Sync disabled, might lead to screen tearing but may increase performance.
- On: V-Sync enabled, eliminates screen tearing, but may reduce performance.
Recommendation: If you experience screen tearing, turn V-Sync on, but keep an eye on your performance. If the game becomes too slow, turn it off and try other graphics settings before enabling V-Sync again. If you do not see screen tearing, there is no reason to turn V-Sync on. If V-Sync does not improve the experience, use adaptive sync. More information about this feature may depend on the specifics of your display device.
Advanced Settings
Some versions of the game may include other types of settings. Examples of these settings include, but are not limited to the following:
- Dynamic Resolution Scaling: This setting automatically changes the game’s resolution to keep performance smooth. If your computer is struggling, this can make the game look a little blurry to keep the frame rate high.
- Field of View (FOV): FOV controls how much of the game world you can see at once. Some players may prefer wider fields of view.
- Color Correction: This controls colors, saturation and contrast. This may be useful if your monitor colors are inaccurate.
Optimizing for Performance: Finding the Balance
The trick with graphics settings is to find the right balance between visual appeal and smooth performance. You want your game to look great, but also play well. It’s not always about maxing out everything; it is more about finding that “sweet spot” where the game is both pretty and responsive. There are some general techniques to achieve optimal performance. Keep in mind that the following techniques may not be valid for every build of the game.
Start with a Preset
Many games, including NBA 2K25, have preset graphic settings like “Low,” “Medium,” and “High.” Start with one of these as a base, such as medium or low, depending on what kind of computer you have. Then, tweak the settings individually.
Test and Adjust
After you change a setting, play the game for a few minutes. Pay attention to whether the game runs smoothly and how good the visuals look. If you experience slow down, reduce the graphics settings. You may have to go through several iterations of adjustment to obtain the best possible setting for your setup.
Monitor your FPS (Frames Per Second)
Many games include a FPS counter. This tells you how many frames are being drawn per second. The higher the FPS, the smoother your game will look. In NBA 2K25, the ideal target FPS is 60. However, depending on your setup, you may need to aim for a different number to achieve comfortable performance.
- Below 30 FPS: The game might look and feel very slow.
- 30-60 FPS: The game will be playable, but it may not feel as smooth as possible.
- 60 FPS and Above: The best experience for most gamers.
Use Monitoring Software
You can use special software to monitor how much resources are used by your computer. These software programs may show CPU usage, GPU usage, temperature of different components. Monitoring this information during the game can help you understand which parts of your setup may be causing performance issues.
Lower Resolution if Necessary
If your game is still struggling even after adjusting all graphics settings, you may need to lower the resolution. It’s often better to play at a lower resolution with smooth gameplay than at a higher resolution with stuttering and slow motion. Lowering the resolution reduces the load on your graphics processing unit (GPU).
Driver Updates
Make sure you always have the latest graphics drivers installed. Graphics card manufacturers like NVIDIA, AMD, and Intel release driver updates frequently. These updates can make your games run better and fix any possible bugs.
Console Considerations
If you are playing NBA 2K25 on a console, the graphics settings options might be more limited compared to a computer. Consoles are designed to have a standard experience across all users. That means you may have a limited number of adjustable options. However, it is important to know what can be adjusted on the console to achieve your optimal experience.
Performance Mode vs. Fidelity Mode
Some console games will let you choose between a “Performance” mode and a “Fidelity” mode. Performance mode aims for a higher frame rate (smoother motion) while Fidelity mode focuses on better visual detail. Choose the one that you prefer, but keep in mind the game’s performance. The performance mode is usually a better pick for most players.
HDR Settings
If your TV supports High Dynamic Range (HDR), check the HDR settings for your console and game. HDR can make colors look more vibrant and improve the overall image quality. Please note that the HDR effect may be very different depending on your display device. You may need to calibrate the HDR settings of your TV in order to achieve the best results. This may be more important to consider when playing games on consoles, but may also apply to desktop devices.
Television Display Settings
If you are playing a console game, check your display settings on your television. TVs have many options to adjust image quality, colors, brightness, etc. It is often beneficial to understand what these features do and how you can use them to your advantage.
- Game mode: Some TVs have a game mode option. This option usually reduces input lag by reducing the amount of image processing.
- Image sharpening: Sometimes, image sharpening is not beneficial, and can produce unwanted artifacts. Depending on your game, and how you use this setting, results may be different.
- Noise reduction: Sometimes, noise reduction may introduce blur and negatively impact the sharpness of the image.
It is important to always experiment with display settings to achieve a good experience.
Adaptive Sync
Some modern TVs and consoles support adaptive sync. Adaptive sync reduces tearing between frames, and it can create a smoother gaming experience. This feature works similarly to V-sync, but it may produce better results.
Adjusting the graphics settings in NBA 2K25 doesn’t have to be complicated. By understanding what each setting does, testing different configurations, and monitoring performance, you can find the ideal balance for your setup. Whether you’re a PC gamer with a high-end rig or a console player, you can fine-tune the game to get the best experience possible. Remember, it’s about what looks and feels good to you. Happy gaming!
Best Graphics Settings for NBA 2K25 (FIX LAG AND STUTTERING)
Final Thoughts
Optimizing your settings allows for smoother gameplay. Experimenting with different options finds the best balance between visual fidelity and performance. Remember to adjust resolution, texture quality, and shadow details.
Finding that sweet spot in the NBA 2K25 graphics configuration is key. Players should tailor settings to their specific gaming rig. Doing so provides optimal visual experience.
With these tips, you can enjoy NBA 2K25’s gameplay. Effective NBA 2K25 graphics configuration ensures a fantastic experience.

