The optimal NBA 2K25 in game settings involve adjusting controller preferences, camera angles, and gameplay sliders to match your personal style and skill level.
Getting the perfect gameplay experience in NBA 2K25 comes down to tweaking the options. It’s more than just a game; it’s a customizable basketball simulation that adapts to your preferences. This guide will walk you through the core elements of the NBA 2K25 in game settings guide. We’ll show how small adjustments can make a big difference.
Finding the correct controller setup is key for comfort and responsiveness. We will also explore how adjusting the visuals with the camera settings can enhance your gameplay. Finally, we’ll break down how gameplay sliders can fine tune your experience.

NBA 2K25 In-Game Settings Guide
Alright, hoop heads! You’ve got NBA 2K25 in your hands, and you’re ready to ball out. But wait, before you hit the court, let’s talk settings. Just like a good coach sets up a play, the right in-game settings can make a huge difference in how you play and, more importantly, how much fun you have. This guide will walk you through the key options, helping you to customize your game to fit your style. Let’s dive in!
Controller Settings: Finding Your Perfect Feel
The most fundamental part of your NBA 2K25 experience is how your controller feels. These settings let you control how your players move, dribble, shoot, and defend. Getting these right is key to playing at your best. Let’s look at the important areas:
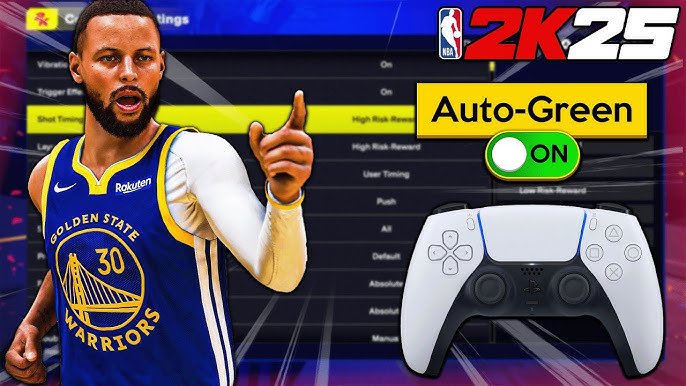
Shot Meter
The shot meter is the little bar that shows up when you shoot. It helps you time your shot perfectly. You can choose how it appears:
- On: The meter always shows when you shoot. This is helpful for learning the timing of different players’ shots.
- Off: The meter disappears, relying on your feel for the shot. Great for experienced players who know their players’ timing.
- Free Throws Only: The meter shows only during free throws. A nice middle ground for some.
Experiment with each option and see what feels best for you. Don’t be afraid to switch it up if things aren’t working out.
Vibration
Controller vibration provides feedback, letting you feel the impact of in-game actions. Here’s what you can choose:
- On: The controller vibrates during actions like dribbling, bumping, and shooting.
- Off: No vibrations. Some players find this less distracting.
Vibration is very much a personal choice. Give both a try to see what helps your game.
Pro Stick Function
The Pro Stick, usually the right analog stick, controls a lot of moves. The settings here affect how it feels and how it responds to your input.
- Dribble Only: The Pro Stick only does dribble moves. This is simpler but limits creativity.
- Default: This is the standard, letting you use the Pro Stick for dribbling and shooting.
- Absolute: This option is for more advanced players, offering more control over specific move types.
Start with Default and then explore if you want more in-depth dribbling control.
Shot Timing
Shot Timing determines how forgiving the game is on your release. Getting this right is essential for hitting those clutch shots.
- Timing: This is the most common option. You need to release the shot at the right point of the meter.
- Real Player%: With this option, the success of your shot depends more on the player’s real-life shooting ability, making it more realistic.
- Off: This turns off the timing aspect almost entirely. It relies heavily on your player’s stats.
Experiment and pick a timing that fits you best. Real Player % is great for people who value realism, while Timing is good for those who like the meter.
Gameplay Settings: Adjusting the Game’s Feel
Moving beyond your controller, these settings tweak how the game plays, influencing everything from how quickly players move to the difficulty of the game. Let’s get into those now:
Game Difficulty
This setting controls how challenging the game is. If you’re new to 2K, it’s wise to start lower, while seasoned players might want a tougher challenge. Your options:
- Rookie: Very easy, good for learning the game.
- Pro: A step up, a good starting point for most players.
- All-Star: A real challenge, requiring good strategy and skills.
- Superstar: Very difficult, only for experts.
- Hall of Fame: The most difficult setting in the game.
Don’t be shy about changing the difficulty if you feel things are too easy or too hard. The right difficulty setting makes the game way more fun.
Game Speed
Game Speed affects how fast the action happens on the court.
- Slower: The game feels slower, and this gives more time for strategy and movement.
- Normal: The default setting.
- Faster: The game feels much quicker, needing quick reflexes.
Many players love to adjust the game speed as their play style varies.
Game Style
This setting impacts how the CPU behaves on the court.
- Simulation: This style focuses on realistic play, where the CPU makes smarter choices.
- Arcade: The game feels less realistic, with players making incredible shots and moves.
- Casual: This offers a balanced experience with a mix of realism and arcade-style play.
Think about what you’re going for. If you want a more realistic game, Simulation is your choice. For a more over-the-top experience, go with Arcade.
Off-Ball Offense/Defense
These settings decide how your teammates move when you don’t control them.
- Automatic: CPU controls how players move off the ball. This is the basic option.
- Manual: You use specific controls to move teammates without the ball. This is for those who want very specific control.
If you want total control, go with manual. If you want less to think about, Automatic is your jam.
Camera Settings
Your camera angle affects how you see the court. Choose a camera that lets you see all of the players while you play:
- 2K: The default camera that feels like playing on TV.
- Broadcast: A higher angle, good for seeing the entire court.
- Baseline: A low camera angle, giving you a more dramatic feel.
- Player Lock: Puts the camera on your player. Great for MyCareer.
- Freelance: An option to move camera angles according to what you want.
Try each camera angle and see what you like best. The view should make it easy to play.
Coach Settings
Coach settings let you customize how the coach handles tactics and strategy. This is good for people who want a team that follows certain plans.
- Offensive/Defensive Playbooks: Choose the specific play styles you want your coach to use.
- Timeout Management: Decide when you want the coach to call timeouts or to do it on your own.
- Substitution Logic: Adjust the way the coach rotates players in and out of games.
These options let you either fine-tune your team’s strategy or trust the coach to make the best decisions.
MyCAREER Specific Settings: Personalizing Your Journey
MyCAREER mode is where you create your own basketball player and take them to the top. This mode has some specific settings that help make your journey unique.
Takeover Meter
The Takeover is a special power-up for your player. You can control how that looks and when it comes to you.
- On: The meter shows your progress in gaining Takeover.
- Off: The meter disappears.
- Automatic: The game activates the takeover for you.
- Manual: You need to activate the takeover by yourself.
The Takeover meter being on or off is something a lot of players have different views on.
MyCAREER Difficulty
This lets you set the difficulty of your MyCAREER games.
- Rookie: Starts with a very easy level to learn things.
- Pro: A step up, good starting point.
- All-Star: Harder games that need strategy and practice.
- Superstar: A very tough challenge.
- Hall of Fame: The most difficult level.
The difficulty is really important to make the game enjoyable.
Badge Progression
This setting decides how you earn badges, which improve your player’s skills.
- Automatic: The game progresses your badges for you, letting you focus on playing.
- Manual: You have a say in choosing what badges you develop based on your gameplay.
If you like to take charge of your player, manual badge progression is the better option.
Audio Settings: Getting the Right Sound
Sound is important to fully enjoy the game. These settings control the volume of everything.
Music Volume
This adjusts how loud the game’s music is. Adjust as you like.
Commentary Volume
This setting controls how loud the announcers are.
SFX Volume
This controls how loud the sound effects are, like dribbling, shoes squeaking, and the ball hitting the net.
Crowd Volume
This adjusts the volume of the crowd.
Balancing these audio levels can add a lot to the overall experience, so dial them in to your preference.
Visual Settings: Making the Game Look Great
These settings affect how the game looks on your screen. It’s good to have these settings optimized for how you play.
Graphics Quality
This sets how good the graphics look.
- Low: Gives you more smooth gameplay on older systems.
- Medium: Balance between graphics quality and good performance.
- High: Best looking graphics but might slow down performance.
Choose a setting that fits with your system’s power.
Frame Rate
This sets how smooth the game appears. A higher frame rate means a smoother game.
- 30 FPS: Standard for games, might cause some lag.
- 60 FPS: Much smoother than 30fps.
- 120 FPS: An option if your system supports it, offers a much better visual feel.
A higher frame rate makes the game more responsive.
Resolution
This affects the sharpness of the game.
- 720p: A lower resolution.
- 1080p: A good standard resolution.
- 1440p: Higher and sharper resolution.
- 4K: Very sharp resolution if your system supports it.
Choose what your monitor supports. Don’t pick a resolution that’s too much for your computer to run.
Brightness
This adjusts how bright the game looks.
Set it to a level that is easy on your eyes.
Contrast
Contrast makes light and dark colors more different, improving the visuals.
Set the contrast to your personal taste.
By taking the time to adjust these settings, you can get the most out of NBA 2K25. It’s all about making the game feel good to you. Don’t be afraid to test different settings to see what feels best and gives you the edge on the court. Each person is different, and what works for one person might not work for another. So jump in, try things out, and have fun playing!
BEST SETTINGS, TIPS and TRICKS on NBA 2K25 (NEW SHOT TIMING PROFILE)
Final Thoughts
Tweaking settings properly is must for enjoying NBA 2K25. This NBA 2K25 in game settings guide emphasizes key adjustments for gameplay.
Experiment with camera angles to find your preferred viewpoint. Adjust controller options for precise movement and shooting control.
Sound settings also impact your experience, modify them for better feedback. Focus on these specific settings to enhance your game.

