The NBA 2K25 input configuration guide allows players to customize their controller settings for optimal gameplay, adjusting button mapping and sensitivity to suit individual preferences.
Want to fine-tune your game? It’s essential to have your controls exactly how you like them. Our NBA 2K25 input configuration guide is here to help.
This guide will walk you through how to personalize your controls, ensuring you have the most responsive and intuitive experience when playing. This will allow you to play at your very best.

NBA 2K25 Input Configuration Guide
Alright, ballers! Let’s talk about getting your controls just right in NBA 2K25. Whether you’re a seasoned pro or a rookie hitting the court for the first time, having your controller set up the way you like is super important. It can be the difference between draining that game-winning three and throwing up a brick. This guide will walk you through everything you need to know about setting up your input configuration in NBA 2K25. We’ll cover the different controller types, how to customize the buttons, and some tips to make sure your game is as smooth as possible. Let’s jump in!
Understanding Your Controller Options
NBA 2K25 is designed to work with a bunch of different controllers. Knowing your options is the first step to finding the perfect setup for you. Most people will use either an official console controller (like a PlayStation DualSense or an Xbox Wireless Controller) or a PC controller. Let’s break down the main types.
PlayStation Controllers
The PlayStation DualSense controller is packed with features, including haptic feedback and adaptive triggers. These fancy features can make the game feel more real, but you can also adjust how they work in the game settings. For example, you can change the trigger resistance if you find it too much for shooting. Here’s a quick rundown of the buttons you’ll be using:
- Left Stick: Movement (Dribbling, Running)
- Right Stick: Dribbling Moves, Shot Stick
- D-Pad: Quick Plays and Timeout
- X Button: Pass
- Circle Button: Shoot/Dunk
- Square Button: Rebound/Box Out
- Triangle Button: Through Pass/Lob Pass
- L1 Button: Call for Pick & Roll
- R1 Button: Modifier (for example: Icon Pass)
- L2 Button: Post Up/Defense
- R2 Button: Sprint
- Options Button: Pause Menu
- Touchpad: Open the MyPlayer Menu
Xbox Controllers
The Xbox Wireless Controller is a classic choice and super comfortable for many gamers. It has a solid, reliable feel and works great for NBA 2K25. Just like the DualSense, you can change how certain buttons respond in the game’s controller settings. Here are the button assignments:
- Left Stick: Movement (Dribbling, Running)
- Right Stick: Dribbling Moves, Shot Stick
- D-Pad: Quick Plays and Timeout
- A Button: Pass
- B Button: Shoot/Dunk
- X Button: Rebound/Box Out
- Y Button: Through Pass/Lob Pass
- LB Button: Call for Pick & Roll
- RB Button: Modifier (for example: Icon Pass)
- LT Button: Post Up/Defense
- RT Button: Sprint
- Menu Button: Pause Menu
- View Button: Open the MyPlayer Menu
PC Controllers
If you’re playing on PC, you might be using a variety of controllers. Most wired or wireless controllers will work with the game and should be automatically detected. If your controller isn’t automatically set up right, go to the controller settings in the game to manually choose your device. Regardless of the controller type, the button assignments and input adjustments are done through the game settings in same manner. Once you connect your PC controller, the game generally recognize it as either a Playstation or Xbox controller, so it would have similar buttons as mentioned above.
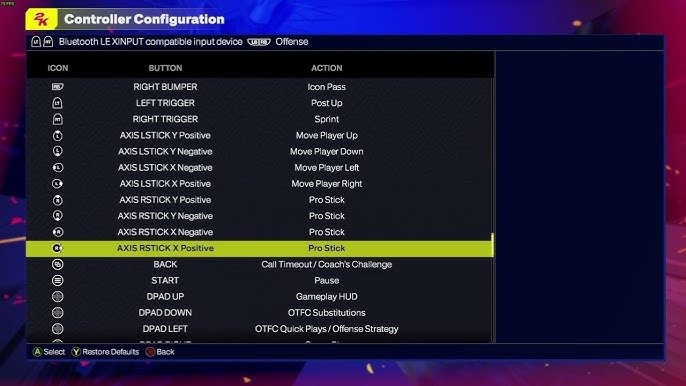
Navigating the Input Configuration Menu
Now that we’ve looked at the controllers, let’s talk about how to change the settings. The Input Configuration menu is where you’ll go to customize everything. You can usually find it in the game settings, under a section called “Controller” or “Input”. Here’s how it typically works:
- Open the Game Settings: When you are in the main menu or paused, head to settings. Look for the options menu or gears icon.
- Find Controller Settings: Usually you’ll see something like “Controller,” “Input,” or “Controls” within settings.
- Enter the Input Configuration Area: This area will let you remap your controller buttons, adjust vibrations, and change other settings.
- Choose Your Control Scheme: If the game has different control schemes (like “Default” or “Advanced”), try them out first. Sometimes the different schemes better suits your play style and preference without changing it manually.
- Start Customizing: If pre-defined control schemes don’t cut it, you can manually change all button layouts to fit your need.
Customizing Your Controller Layout
This is where the fun begins! You don’t have to stick with the standard button layout. If there is a button that is harder for you to press or a different action that feels more comfortable in a different position, feel free to change the configuration and remap the buttons. Here are some customization options you might want to explore.
Button Remapping
Button remapping is the most common change people make. You can switch any button to do a different action. For instance, some people prefer to shoot using the right stick instead of a button. This is a personal preference that can make shooting feel more natural, especially for the step-back jumpers or fadeaway shots. Here’s how to do it:
- Select the Button to Change: Go to the Input Configuration menu and pick the action you want to change (like ‘shoot’ or ‘pass’).
- Choose a New Button: Press the button on your controller that you want to assign to that action.
- Test it out: After you make the switch, go into a quick game and try it out. This will help you adjust and ensure the button feels comfortable.
Adjusting Sensitivity
Adjusting sensitivity is another way to make the game feel more responsive to you. Sensitivity typically refers to how quickly your character responds to the analog stick or trigger inputs. Some people prefer a higher sensitivity which means the player or camera movement reacts faster to small movements of the joystick or buttons, while some prefer it low sensitivity for more control, this means you need to move the joystick or press the button further to make a movement. Here’s where you might want to make changes:
- Analog Stick Sensitivity: Adjust how quickly your players move and react to your inputs. If you tend to overshoot your passes, lower sensitivity will give you more control.
- Trigger Sensitivity: Change how much pressure you need to apply to the triggers for actions like shooting and sprinting. If you barely press triggers, you might need to increase the sensitivity.
Vibration Settings
Vibrations can add to the immersive experience, but some players find them distracting. You can adjust the intensity of vibrations or turn them off entirely. It’s a matter of personal preference. If you like having vibrations to get feedback when you make contact or land a rebound, then keep them on. But if you want smoother and more consistent gameplay, try disabling them and see how it feels.
Preset Controller Layouts
Some games come with preset controller configurations that might just be the change you need. Some of the preset layouts are:
- Default Layout: This is the standard configuration you get when you first start the game. It is mostly used by people who are just starting the game or are familiar with it.
- Alternative Layout: Many games have an alternative layout that switches some of the buttons. This can be great if you prefer different hand positions or button mapping.
- Custom Layout: The Custom Layout is basically where you set it up by yourself, as you desire.
Before you start remapping every single button, it’s worth it to explore those different pre-set layouts. You may find a layout that fits your needs better than you expected, and you won’t need to do that much manual customization.
Advanced Input Techniques
Once you’ve got your basic controls down, there are some more advanced techniques to experiment with. These involve specific button combinations and timing. Let’s check them out!
Shot Meter Controls
The shot meter is a crucial part of shooting in NBA 2K25. Understanding the different ways to time your shots can make a big difference. You can configure these settings in the controller customization menu:
- Button Shooting: This is the standard way where you press the shoot button and release it at the right time to get a perfect shot release.
- Stick Shooting: Here, you push down on the right analog stick to start your shot, and release it at the ideal moment.
- Shot Timing Settings: You can adjust how strict the shot timing is or whether to show the meter or not. Some players prefer to turn off the meter for a greater shooting challenge.
Experiment with different methods to see what feels best for you. Some players find the stick shooting more natural, while others prefer the traditional button press.
Dribbling Moves
Dribbling moves are a key part of creating space and getting past defenders. The right stick controls all the basic dribbling, and you can combine it with other buttons for more complex moves. Let’s see the basic controls:
- Basic Dribbling: Use the left stick to move around the court, and the right stick for simple dribbling moves.
- Combination Moves: Learn to combine right stick movement with other buttons for crossovers, behind-the-back moves, and hesitations.
- Practice: Head to the practice mode and keep practicing those dribbling moves, so you can use them during a match.
Defensive Controls
Defense is just as important as offense in NBA 2K25. Make sure you’re comfortable with these defensive controls:
- Steal: Use the dedicated button to attempt to steal the ball from your opponent.
- Block/Rebound: Time your button press to block shots and grab rebounds.
- Defense Position: Use the left stick to move around and keep your player in front of the opponent.
- Defensive Stance: Hold down the L2 (PS) or LT (Xbox) button to get into a defensive stance, which helps you stay in front of the ball handler.
Mastering the defensive controls is just as important as knowing how to score. Use the practice mode to polish up your defense.
Passing Controls
The right passing can change the course of a game. Here are the basic passing control options:
- Basic Pass: Use the ‘pass’ button for a standard pass to the nearest open teammate.
- Through Pass/Lob Pass: Use the designated button for a through pass that leads a teammate or a high arcing pass for a teammate cutting to the basket.
- Icon Pass: Use the modifier button (R1/RB) and then press the button associated with the teammate you want to pass to.
Good passing is a skill, and it improves when you get comfortable with the controls.
Tips for Optimal Configuration
Here are a few more tips to ensure your controller setup is perfect for you. These are general tips that apply regardless of the controller you choose.
Experiment and Adjust
Don’t be afraid to try out different configurations. What works for one person might not work for you. Spend some time tweaking the settings, and you’ll find a sweet spot. The best way to find a setup that feels best for you, is to always try various combinations in practice mode or in a quick game.
Start Simple
Don’t feel like you need to completely redo all your buttons in one go. Start with one or two changes, and play a few matches to see how they feel. Then, make more changes as you feel comfortable. Don’t make too many changes at the same time, as this might confuse your muscle memory.
Use Practice Mode
The Practice mode is a lifesaver for testing out new control schemes and settings without risking a game. Practice your shooting, dribbling and passing, and you will find the right control set up for you.
Consider Controller Type
The type of controller you use can make a difference. If you’re used to the feel of a PlayStation controller, switching to an Xbox controller might take some time. Choose the controller you feel most comfortable with and use it consistently.
Check Game Patches
Sometimes game updates can make changes to controller settings or control responsiveness. Check the game’s patch notes to see if there are any specific changes that might affect your set up.
By taking the time to configure your input settings, you will enjoy the game a whole lot more. Remember, this guide will help you to understand the game’s input configuration menu, and by exploring the different control schemes and customizing them, you can find the perfect layout for your gaming style. Remember that practice makes perfect, so don’t stop tweaking your set up until you feel completely comfortable and confident.
5 SECRET Settings That You NEED To Use In NBA 2K25
Final Thoughts
Finding the perfect settings enhances your gameplay. This guide helps you customize your controls for the best experience. It covers various input options.
The right configuration can significantly impact your performance. Experimenting with different settings is key to improvement. Remember personal preference plays a big role.
Ultimately, personalizing your settings is essential. This NBA 2K25 input configuration guide shows how to adjust controls. Try these tips to improve your skills.

