
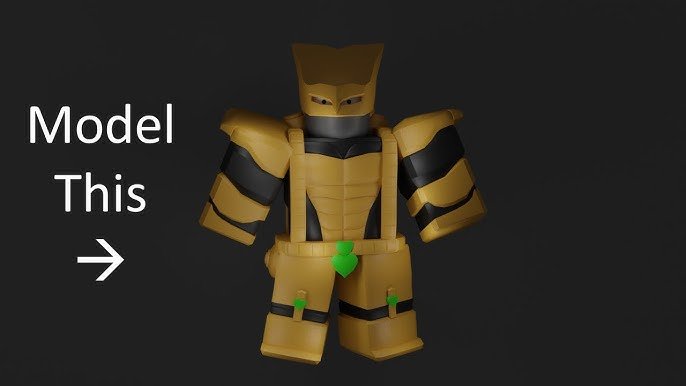
‘Roblox 3D modeling for beginners typically involves using the built-in Studio tools to create and manipulate basic shapes, which can then be combined and customized.’
Ever wanted to make your own cool stuff in Roblox? Starting with Roblox 3D modeling for beginners can seem tricky, but it’s actually quite approachable. It’s all about getting comfortable with the tools the game provides.
You’ll learn to work with simple blocks, spheres, and cylinders, modifying them to fit your vision. Don’t worry if you aren’t an expert right away; everyone starts somewhere.

Roblox 3D Modeling for Beginners
Ready to create your own awesome stuff in Roblox? It’s totally possible to go beyond just playing the games – you can build them! 3D modeling is how you make the cool objects you see in Roblox worlds, like buildings, characters, and even magical swords. If you’ve ever wondered how those things are made, then you’re in the right spot. This guide will show you the simple steps to get started with Roblox 3D modeling, even if you’ve never done anything like it before.
Why Learn 3D Modeling for Roblox?
Learning 3D modeling opens up a whole new world within Roblox. It’s not just about playing; it’s about creating! Here are a few awesome reasons why learning this skill is a fantastic idea:
- Build Your Own Games: You aren’t limited to games others make. You can build whatever you imagine – a racing game, a spooky haunted house, or a beautiful fantasy land.
- Make Unique Avatars: Want a special character that stands out? You can create your own custom hats, clothes, and even accessories.
- Earn Robux: If you get really good, you can sell your creations on the Roblox marketplace and potentially make some Robux!
- Impress Your Friends: Imagine the look on their faces when they see the amazing stuff you’ve built in Roblox!
- Learn New Skills: 3D modeling is a valuable skill that can help you in many areas, even outside of Roblox. It helps with creativity, problem-solving, and technical skills.
Understanding the Basics: What is 3D Modeling?
Okay, let’s break down what 3D modeling actually is. Imagine you’re playing with clay. You start with a lump, and then you shape it into a ball, then maybe a little creature, right? 3D modeling on a computer is kind of like that, but instead of clay, you use digital tools to create objects that have height, width, and depth – that’s what makes them 3D. It’s like taking a drawing and making it come alive!
Key Concepts in 3D Modeling:
- Vertices: These are the points that make up your 3D model. Think of them like the dots you connect when drawing.
- Edges: Lines that connect vertices. These form the shape of your model.
- Faces: The flat surfaces created by the edges and vertices. These fill in the shape and make it solid.
- Mesh: A collection of vertices, edges, and faces that make up a 3D model. Think of it as the skeleton and skin of your object.
Don’t worry if this sounds a little complicated right now. We’ll make it simple to understand as we go!
Tools You’ll Need for Roblox 3D Modeling
To start your 3D modeling journey, you’ll need a couple of things. Luckily, most are free!
Essential Tools:
- Roblox Studio: This is the program you use to make Roblox games and it’s where you’ll import your 3D models. It’s free to download from the Roblox website.
- A 3D Modeling Program: There are several programs you can use. Here are a couple of popular choices that are great for beginners:
- Blender: A very powerful and completely free program used by professionals all over the world. It might seem a little overwhelming at first, but there are lots of tutorials to help you learn.
- TinkerCAD: This is a super simple, web-based program perfect for beginners. It’s easy to learn and uses a block-based building style.
- A Computer: You’ll need a computer or laptop that can run Roblox Studio and your chosen 3D modeling program. Most modern computers will work fine.
We will be focusing mostly on Blender as our main 3d modeling tool in this guide, due to it’s popularity and power.
Setting Up Your Workspace in Blender
Let’s dive into Blender! Don’t be scared by all the buttons and panels – we’ll start with the basics.
Navigating the Blender Interface
When you open Blender for the first time, you’ll see the main 3D viewport in the center. Think of this as your main working area. Here’s what you should know:
- The Cube: You’ll see a default cube in the middle of the view. This is your starting point.
- Selection Tools: These let you choose objects, vertices, edges, or faces you want to work with. You will see an arrow icon, using that you can easily select objects.
- Move, Rotate, and Scale Tools: You will see these tools on the left side of the viewport. These tools allow you to move your selected object, rotate or scale in size.
- The 3D Cursor: It looks like a tiny target. This shows where new objects will appear when you add them.
Basic Blender Navigation:
It’s important to know how to move around in the viewport. Here’s how:
- Rotate View: Click and drag with your middle mouse button (or scroll wheel).
- Pan View: Hold Shift and drag with your middle mouse button.
- Zoom View: Scroll your middle mouse wheel in and out.
Practice moving around the 3D viewport. Get comfortable with looking at the cube from different angles.
Your First 3D Model: A Simple Block
We’ll start simple by creating a block in Blender.
Steps to Create a Block:
- Select the Cube: If the cube isn’t already selected, click on it with your left mouse button. You should see an orange outline around it.
- Move the Cube: Click on the Move Tool (the arrow icon) in the toolbar on the left. You’ll see three arrows appear around the cube – red, green and blue. Click and drag the arrows to move the cube along those axes. Practice moving the cube around the scene.
- Scale the Cube: Select the scale tool(the box with arrow symbol) on the toolbar. Now, Drag the tiny colored box near the center of the cube, it allows to scale up and down. you can also scale the cube using the tiny squares near the colored arrow.
- Save Your Project: Click on “File” in the top menu, then select “Save As”. Choose a name for your file and save it somewhere you can find it later.
Congratulations! You’ve made your first 3D model in Blender – even if it is just a block!
Understanding Mesh Editing in Blender
Now that you have made a simple block, let’s delve more into mesh editing, where we can manipulate the vertices, edges and faces of your object and create a variety of shapes.
Entering Edit Mode:
To start editing the cube, you have to enter the edit mode.
- Select the cube by left-clicking on it.
- Press the “Tab” key on your keyboard. This will switch you from object mode to edit mode. You’ll see the cube change and now you can see the dots, lines and surfaces.
Selecting Vertices, Edges, and Faces:
- Vertex Select: Click on the vertex select icon(the dot with surrounding square) on the top left of your viewport. Then select individual dots of the cube.
- Edge Select: Click on the edge select icon(the line with surrounding square) on the top left of your viewport. Then select individual lines of the cube.
- Face Select: Click on the face select icon(the square with surrounding square) on the top left of your viewport. Then select individual faces of the cube.
Basic Editing Techniques:
Once you’ve selected the desired part of your object, you can change their positions.
- Move: Using the Move tool, you can drag selected vertices, edges, or faces to change their position and reshape your object.
- Rotate: Using the Rotate tool you can rotate your selected parts of your object.
- Extrude: Extrude adds a new surface or extends the existing surface. Select one face and press “E” to extrude. Now you can drag that extruded face to add volume in your object.
Creating Something New:
Let’s put this in to practice and create a simple pyramid.
- Enter Edit Mode using the “Tab” key.
- Select the Top Face of the cube.
- Press “E” to extrude the face. Move your mouse to create a new top face.
- Click the move tool and drag the top face on the Z axis (blue arrow) to move it upwards.
- Select the top face again.
- Press “S” to scale the face, and move your mouse inwards to reduce the size of the top face.
- Congratulations, you have created your first pyramid using basic mesh editing skills.
Keep practicing with these techniques. The more you experiment, the better you’ll get at shaping things in Blender!
Adding Textures to Your Models
Right now, our block and pyramid are plain. Adding textures can make them look much more realistic and interesting. A texture is like wrapping your object with an image.
Understanding Textures
- Color: The main color of the texture.
- Pattern: Any design, shape, or image on the surface.
- Material: How the texture reflects light. Is it shiny like metal, dull like wood, or smooth like glass?
Applying a Simple Texture in Blender:
- Select Your Object: Make sure you’re in Object Mode (press Tab if you’re still in Edit Mode). Select the object you want to texture.
- Open the Shading Tab: Click on the “Shading” tab at the top of the Blender interface. You might see a node setup already visible, ignore that for now.
- Create a New Material: Click on the “New” button in the “Material” panel.
- Add an Image Texture: Press Shift + A to open add menu. Navigate to Input->Image Texture. A new image texture node will appear. Connect this to the “base color” socket of the Principled BSDF node, which is usually already in the node graph by default.
- Load an Image: Click on the “Open” button in image texture node. Find the image you want to use and load it.
- Adjust UV Mapping: Press Tab to go to the edit mode and press “A” to select the entire object, then press “U” and select “Unwrap”. This unfolds your 3d model into a 2D plane so that texture can be applied properly.
Now, your object should be wrapped with the image you chose!
Exporting Your Model From Blender to Roblox
Once your model is complete in Blender, you need to get it into Roblox Studio. Here’s how to export your model correctly:
Exporting as an FBX file:
- Select Your Model: Make sure your object is selected in object mode.
- Go to File > Export: Click on “File” in the top menu, then hover over “Export”. Choose “FBX (.fbx)”.
- Choose a Save Location: Pick a location on your computer to save your FBX file.
- Adjust Settings: In the settings panel to the left of save window, check “Selected Objects” and leave other settings as default.
- Click “Export FBX”: Click on the export button to save your file.
Importing Your Model into Roblox Studio
Now for the final step: bringing your model into Roblox Studio!
Importing Process:
- Open Roblox Studio: Launch Roblox Studio and create a new baseplate place.
- Go to the “View” Tab: Go to the menu on the top and select “View”, and click on “Asset Manager”.
- Import 3D Model: In the Asset manager window, click the 3 dots, then click “Bulk Import”. Select your exported FBX file.
- Place Your Model: Select your uploaded model, you will see a plus(+) button next to it. Click on that to import the model into your scene.
You can now move, resize, and play with your creation in your Roblox world!
Tips for Success in 3D Modeling
Starting anything new can feel hard. Here are a few tips to help you grow your 3D modeling skills:
- Start Simple: Don’t try to make a super complex model right away. Start with basic shapes and slowly learn more advanced techniques.
- Practice Regularly: The more you practice, the better you’ll get. Try to make something new each day.
- Watch Tutorials: There are tons of helpful tutorials on YouTube and other websites. Search for “Blender for beginners” or “Roblox 3D modeling”.
- Join Communities: There are lots of Roblox and 3D modeling communities online. Share your work, ask questions, and learn from others.
- Don’t Give Up: You’ll make mistakes, and that’s okay! Keep practicing and you’ll get better with time.
Creating 3D models for Roblox is a fun and rewarding way to express your creativity. Remember to start with the basic tools and techniques we discussed and keep practicing. Your imagination is the limit!
Noob vs Pro artist: creating handrails #blendertutorial #blender #blendercommunity #blender3d #b3d
Final Thoughts
Starting with simple shapes and practicing consistently helps beginners progress. Don’t be afraid to experiment with Roblox Studio’s tools. You will improve with time.
Remember, ‘roblox 3d modeling for beginners’ requires patience and dedication. Focus on learning the basics first, then gradually tackle more complex projects. Have fun creating your own virtual world!

