
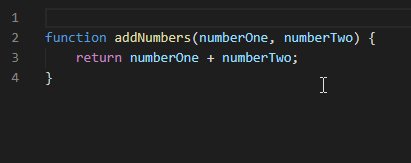
Roblox code documentation best practices emphasize writing clear, concise comments within your scripts, using descriptive variable names, and organizing your code logically for easy understanding and maintenance.
Have you ever inherited a Roblox project with code that felt like a cryptic puzzle? It’s a common issue, often stemming from a lack of focus on good documentation. Effective practices are crucial for any Roblox developer, especially when working in teams or revisiting old projects. We’ll dive into some simple methods to improve your process.
Following roblox code documentation best practices saves time and frustration. When your code is well documented, it becomes significantly easier to update, debug, and share with others. Let’s start making your development process easier.

Roblox Code Documentation Best Practices
Okay, so you’re making awesome games on Roblox, right? You’ve probably got some pretty cool scripts whirring away behind the scenes. But what happens when you come back to your code weeks, months, or even years later? Can you still understand it? Or what if you want to share your work with others? That’s where good code documentation comes in. Think of it like a map for your code – it helps you and others know where things are, what they do, and how they all fit together. Let’s dive into how to make your Roblox code documentation the best it can be!
Why is Good Documentation Important?
Imagine trying to build a Lego castle without any instructions. Sounds like a mess, right? Code without documentation is similar. It can be confusing, hard to debug, and difficult for anyone else (or even future you!) to work with. Good documentation makes your code:
- Easier to Understand: Clear explanations make it simple to grasp what each part of the code does.
- Faster to Debug: When things go wrong, well-documented code is like having a detailed roadmap to the problem.
- Simpler to Modify: If you want to change your code later, good notes mean you won’t have to spend hours deciphering your own work.
- Shareable and Collaborative: If you want others to help you with your game, good documentation allows them to jump in easily.
- More Professional: Clean and well-documented code shows that you care about quality and maintainability.
Basic Principles of Documentation
Before we get into specifics, let’s cover some core ideas about documentation:
Keep it Simple
Don’t use complex or hard-to-understand language. Imagine you’re explaining your code to a friend who is just starting out. Short, clear sentences work best.
Be Accurate
Make sure your documentation matches what your code actually does. Incorrect comments can cause more problems than no comments at all.
Be Consistent
Use the same style and formatting throughout your comments. This makes your documentation easier to read and more organized.
Update Your Documentation
Whenever you make changes to your code, update your comments to reflect those changes. Outdated documentation is not helpful.
Types of Documentation in Roblox
In Roblox, documentation primarily comes in two forms:
- In-Code Comments: These are notes you add directly within your Lua scripts.
- External Documentation: This could be a separate document, like a README file, that provides an overview of your project.
In-Code Comments: Your Best Friend
In-code comments are the most common and important type of documentation in Roblox. They are written directly in your Lua scripts and explain specific parts of your code.
Types of Comments
There are a few different ways to use comments in Lua. Here’s how:
- Single-Line Comments: Start with two dashes (–). These are used for brief explanations or to temporarily disable a line of code.
-- This line changes the player's speed
player.Speed = 16
--[[
This function handles the player jumping.
It checks if the player is on the ground
and if they press the jump key.
--]]
function handleJump()
-- ... more code here ...
end
What to Comment
Now, what exactly should you be commenting in your scripts? Here are some key elements to focus on:
Function Headers
Explain what each function does, what it takes as input (arguments), and what it returns. This is crucial for anyone trying to use your functions. Write a comment before the function declaration.
--[[
    This function takes the player's name and points to increase the score
    @param playerName String - Name of the player
    @param points Number - The point of the player
    @return Number - The total score
--]]
function addScore(playerName, points)
--  ... more code here ...
end
Variable Declarations
Describe what each variable holds and what its purpose is. This helps clarify the purpose of different data points in your script.
-- Speed of the player
local playerSpeed = 16

-- How much damage the player takes when hit
local damage = 5
Complex Logic
If you have a tricky section of code, explain what it’s doing step-by-step. This is vital for making sure your code is maintainable. If you have a function with complex calculations or a conditional statements, add a note on each important step, explaining what’s happening.
-- Check if the player is close enough to the NPC
if (player.Position - npc.Position).Magnitude < 5 then
    -- If the player is close, start the interaction
    startInteraction(player, npc)
end
Event Handling
When you connect a function to an event, briefly describe what the function does and what event triggers it.
-- Called when the player clicks on the button
button.MouseButton1Click:Connect(function()
    openMenu()
end)
Important Values
If you use any important numbers or strings, explain where they come from and why they have specific values. The values and constants in your code.
-- The time in seconds for a jump
local jumpTime = 1

-- the id of the game pass for the extra content
local GAME_PASS_ID = 123456789
Commenting Do's and Don'ts
Let's talk about some best practices when writing comments.
Do:
- Be clear and concise: Get straight to the point.
- Use meaningful names: Use names that make sense for variable and functions, this will reduce the comments needed.
- Use proper grammar: Write comments as you would write an email.
- Comment before you code: Sometimes it helps to explain things in comments before you write the code to help structure it.
- Review your comments: Before publishing your project, take another look at the comments to see if you missed anything.
Don't:
- State the obvious: Don't comment something that's already clear from the code itself. For example, instead of writing -- adds 1 to x, write a comment that explains why you're adding 1 to x, for example: -- increment by 1 to account for the index starting at 0.
- Over-comment: Don't write too many comments, especially if your code is already pretty easy to understand.
- Write too much on one line: Long comments can be harder to read, keep them short and break them into multiple lines if needed.
- Use jargon: Write comments with regular simple English words.
External Documentation: The Big Picture
While in-code comments explain the details, external documentation is a great way to provide an overall view of your project. This is usually a separate file or document outside of your Lua scripts.
README Files
A README file, typically named "README.md" or "README.txt," is a common type of external documentation. It's often placed in the root directory of your Roblox project.
Here's what you might include in a README file:
- Project Title: The name of your game or project.
- Short Description: A brief overview of what your game does.
- Features: A list of the main features of your game.
- How to Use: Explain how players can interact with your game.
- Dependencies: List any modules or plugins required for your game.
- Credits: Give credit to anyone who contributed to the game.
- Contact Information: How players can reach you with questions or comments.
Example of README.md file:
# Awesome Adventure Game
A thrilling Roblox adventure game where you explore mysterious dungeons and battle monsters.

## Features
- Dungeon Exploration
- Monster Battles
- Puzzles

## How to Use
Click on the adventure button to start.
Use WASD keys for movement.
Click the mouse to attack.

## Dependencies
- CombatModule v1.2
- InventorySystem v2.0

## Credits
- Game Developer: YourName
- Sound Effects: SoundDesigner
- Testing: Tester1, Tester2

## Contact
Email: [email protected]
Other External Documentation
Besides README files, you could also use:
- Wiki Pages: For larger projects, a wiki is a great way to organize a lot of information.
- PDF Documents: Useful for creating more formal documentation or design documents.
- Spreadsheets: Great for mapping out data structures and values.
Tools for Documentation
Although you mostly write your documentation manually, some tools can help make the process easier:
- Text Editors with Comment Highlighting: Text editors like VS Code with Lua extensions can highlight your comments differently from the rest of your code. This makes your comments easier to spot.
- Markdown Editors: Tools like Markdown Preview in VS Code make it easy to write and view README files.
- Documentation Generators: There are some more advanced tools that can generate documentation from your comments, though they're not as common in Roblox, but worth knowing about for future software projects.
Real Examples
Let's look at some real examples of how to apply these documentation practices in your Roblox projects.
Example 1: A Simple Movement Script
-- This script handles the player's movement
local player = game.Players.LocalPlayer
local character = player.Character or player.CharacterAdded:Wait()
local humanoid = character:WaitForChild("Humanoid")

-- Speed at which the player walks
local walkSpeed = 16

-- Get the user input service
local userInputService = game:GetService("UserInputService")

-- This function moves the player based on keyboard input
local function handleMovement()
    local input = userInputService:GetInputActions(true)
    local direction = Vector3.zero

    for actionName, inputState in pairs(input) do
        if inputState.UserInputState == Enum.UserInputState.Begin or inputState.UserInputState == Enum.UserInputState.Change then
            if actionName == "MoveForward" then
                direction += Vector3.new(0, 0, 1)
            elseif actionName == "MoveBackward" then
                direction += Vector3.new(0, 0, -1)
            elseif actionName == "MoveLeft" then
                direction += Vector3.new(-1, 0, 0)
            elseif actionName == "MoveRight" then
                direction += Vector3.new(1, 0, 0)
            end
        end
    end

    -- Move the player
    humanoid:Move(direction  walkSpeed)
end

-- Connect the function to the RenderStepped event
game:GetService("RunService").RenderStepped:Connect(handleMovement)
In this example, every important variable is described, a function header explains what the function does, and a comment explains what event triggers the player movement.
Example 2: A Function to Add a Score
--[[
  Adds points to the player's score
  @param player  Instance - The player object
  @param points  Number - The number of points to add
  @return Number - the new player score
--]]
function addScore(player, points)
  -- Get current score
   local currentScore = player.leaderstats.Score.Value

    -- Add points to the current score
    local newScore = currentScore + points

    -- Update the score
   player.leaderstats.Score.Value = newScore

    -- return the new score
    return newScore
end
Here, the function header explains what the function does and describes each parameter and what it returns. Each step in the function is also described with comments.
Making it a Habit
The key to good documentation is to make it a part of your regular coding process. Don't wait until you're finished to write comments, try to write them as you go. The best documentation is the one that comes naturally as you code.
Start by adding the most important comments, like explaining what each function does, and then add more comments when you want to explain more complex logic, you'll slowly find your own rhythm on how to write the best documentation.
By following these practices, you'll create code that is not only easier for you to understand but also for others to use and collaborate with. Remember, good documentation is an investment that will pay off in the long run.
Good documentation is a key part of professional game development. Taking the time to document your code ensures that your projects are maintainable, collaborative, and professional. By applying the concepts you learned in this article you will be creating good readable documentation. Remember that commenting should be part of your coding process. So keep your code well-documented and keep making amazing Roblox games!
How To Use The Roblox Documentation
Final Thoughts
Effective commenting, consistent formatting, and clear variable naming improve code readability. These practices make maintenance and collaboration much easier. Documenting function parameters and return values aids understanding of code usage. Following roblox code documentation best practices leads to cleaner, more manageable projects.
Adhering to roblox code documentation best practices ensures better code quality. This includes writing concise explanations for complex logic. Good documentation helps others understand and build on your work. This, consequently, saves time in the long run, reducing confusion and errors.

