Implementing a finite state machine in Roblox involves using Lua scripting to define states and transitions between them, controlling the behavior of game objects based on their current state.
Ever wondered how to create complex, reactive systems in your Roblox games? The key is often using a structured approach for handling object behavior changes. A method for this involves the roblox finite state machine implementation, allowing you to model various states and transitions between them. This makes managing different actions and behaviours much more manageable.
Thinking of a simple door, it might have ‘Closed’, ‘Opening’ and ‘Open’ states. Transitions will occur based on player interaction. By using this approach, you organize your game logic and improve code clarity.

Roblox Finite State Machine Implementation
Have you ever played a Roblox game and wondered how the characters seem to know exactly what to do? How a monster switches from wandering to chasing you, or how your avatar smoothly transitions from walking to jumping? Well, a big part of that magic comes from something called a Finite State Machine, or FSM for short. Don’t worry, it sounds more complicated than it is! Think of it like a set of rules that tell a character (or any game object) what to do at different times.
What is a Finite State Machine?
Imagine a light switch. It can be in one of two states: “on” or “off.” It’s a simple system with a limited number of possibilities. That’s the basic idea of an FSM. A Finite State Machine is a way to organize the different behaviors a game object can have. Instead of trying to make a character do everything at once, we break it down into individual states. Each state represents a particular thing the object is doing, like:
- Idle: Just standing around, waiting for something to happen.
- Walking: Moving from one place to another.
- Running: Moving faster.
- Jumping: Going up into the air.
- Attacking: Doing damage to something.
An FSM also defines how an object switches from one state to another. These switches happen based on certain conditions, which are like instructions. For example, a character might switch from the “Idle” state to the “Walking” state when you press a movement key. These conditions can be as simple as a button press or as complicated as a specific enemy coming into a certain range.
Key Components of an FSM
Let’s break down the core pieces of a Finite State Machine:
- States: These are the different conditions or actions an object can have (e.g., “Idle”, “Walking,” “Attacking”).
- Transitions: These are rules that determine when and how an object switches from one state to another.
- Events or Conditions: These are the triggers that cause a transition. They could be user inputs, game events, time elapsed, or more complex checks.
Why Use a Finite State Machine in Roblox?
Why is this system so important in Roblox game creation? Well, using a Finite State Machine can bring some big advantages to your projects:
- Organization: It helps keep your code tidy and easy to understand. Instead of having one giant, confusing block of code, you have small, well-defined states.
- Predictability: Because behaviors are defined within states, you can make sure your character acts how you intend. No more random glitches!
- Reusability: You can easily add new states, remove states, and reuse the logic for different objects. This saves you a lot of time and effort.
- Scalability: FSMs make it easy to develop complex behaviors. As your game grows, you can introduce new states and conditions without messing up existing code.
- Easier debugging: When something goes wrong, you can check which state is active and identify the problem more quickly.
Think of it this way: it’s like having a clear instruction manual for how each thing in your game should act. No more guessing, no more messy code – just smooth, predictable, fun gameplay.
Implementing a Basic FSM in Roblox Lua
Alright, let’s get into some code. We’ll start with a simple example that shows how to make a character switch between “Idle” and “Walking” states.
Setting up the base
First, we will setup the environment for the example:
- Create a new Roblox Place.
- Insert a new Part into workspace and rename to “Character”.
- Insert a script into the ‘Character’ part and rename to “FSM_Script”.
- Open the “FSM_Script” for editing.
Now, in your newly created script, let’s begin by creating some variables that we will use throughout the script:
-- Reference to the character
local character = script.Parent

-- Enum for the different states
local states = {
    IDLE = 1,
    WALKING = 2
}

-- Current state
local currentState = states.IDLE;

-- Movement Variables
local moveSpeed = 5
local targetPosition = Vector3.new(0, 0, 0)

-- Helper function for changing the state
local function changeState(newState)
    currentState = newState;
    print("Changing to state: ", newState);
end
This code sets up our basic script and references the part we just made. We also made the enum, states, which holds the different states as a variable. This way we don’t need to use strings or numbers everywhere, which also helps with error reduction. Then, we have the variable currentState, which holds the currently active state of our FSM. Lastly, we have moveSpeed to change the moving speed of our character and targetPosition to make the character move to a specific position. To make it easier to change the states, we created a function called changeState that we can call whenever we want to change state.
Creating our states
Now, let’s create the logic for each state:
-- Idle State
local function idleState()
    print("Doing nothing")
end

-- Walking state
local function walkingState()
    local direction = (targetPosition - character.Position).Unit
    character.CFrame = character.CFrame  CFrame.fromEulerAnglesXYZ(0,math.atan2(direction.X,direction.Z),0)
    character.Position = character.Position + direction  moveSpeed   0.1
    if (character.Position - targetPosition).Magnitude < 0.1 then
       changeState(states.IDLE);
    end
end
Here, we have two function, one for each state, the idle state will simply log that it is doing nothing. The walking state on the other hand, will calculate the direction it has to move, and then rotate and move towards that direction. Inside of that state function, we also check if the character has arrived at its target position, and if that is the case, we will change the state to the idle state.
Handling the Main loop and transitions
We now need a way to change the state of the FSM and to make our code run constantly. So, let's add a loop:
-- Main update function
while true do
  wait(0.1)

  if currentState == states.IDLE then
    idleState()
  elseif currentState == states.WALKING then
    walkingState()
  end
end
This loop will run constantly and will call a certain function, based on the value of the current state variable. Now, let's add some transitions to our code, in this example, we will make our character walk, when we press the "W" key:
local userInputService = game:GetService("UserInputService");

userInputService.InputBegan:Connect(function(input, gameProcessedEvent)
	if gameProcessedEvent then return end
    if input.KeyCode == Enum.KeyCode.W and currentState == states.IDLE then
        targetPosition = Vector3.new(5,0,5);
        changeState(states.WALKING);
    end
end)
Here, we will get the user input, and if the user presses W and if the current state is IDLE, then we will change the state to the walking state. We will also add the target position to move to, for our character. Now the entire script should look like this:
-- Reference to the character
local character = script.Parent

-- Enum for the different states
local states = {
    IDLE = 1,
    WALKING = 2
}

-- Current state
local currentState = states.IDLE;

-- Movement Variables
local moveSpeed = 5
local targetPosition = Vector3.new(0, 0, 0)

-- Helper function for changing the state
local function changeState(newState)
    currentState = newState;
    print("Changing to state: ", newState);
end

-- Idle State
local function idleState()
    print("Doing nothing")
end

-- Walking state
local function walkingState()
    local direction = (targetPosition - character.Position).Unit
    character.CFrame = character.CFrame  CFrame.fromEulerAnglesXYZ(0,math.atan2(direction.X,direction.Z),0)
    character.Position = character.Position + direction  moveSpeed   0.1
    if (character.Position - targetPosition).Magnitude < 0.1 then
       changeState(states.IDLE);
    end
end


-- Main update function
while true do
  wait(0.1)

  if currentState == states.IDLE then
    idleState()
  elseif currentState == states.WALKING then
    walkingState()
  end
end


local userInputService = game:GetService("UserInputService");

userInputService.InputBegan:Connect(function(input, gameProcessedEvent)
	if gameProcessedEvent then return end
    if input.KeyCode == Enum.KeyCode.W and currentState == states.IDLE then
        targetPosition = Vector3.new(5,0,5);
        changeState(states.WALKING);
    end
end)
Now, if you run the game, you should see the character change state to walking when you press the W key, and it will move to a target position, after which it will return to the idle state. You should also see the logs in the console, if you open it.
Advanced FSM Techniques
That was a simple start, but things can get more complex, for example: imagine a character with a "Combat" state, which has sub states like "Attack", "Defend", and "Stunned". Here's where things get interesting:
Hierarchical State Machines (HSM)
HSMs allow you to have states inside of other states. This is useful for creating complex behaviors with several layers. For instance, we could add our combat state to the example we already created. Let's make the combat state a sub-state of the walking state:
-- Reference to the character
local character = script.Parent

-- Enum for the different states
local states = {
    IDLE = 1,
    WALKING = 2,
    COMBAT = 3,
    ATTACKING = 4,
    DEFENDING = 5,
}

-- Current state
local currentState = states.IDLE;

-- Movement Variables
local moveSpeed = 5
local targetPosition = Vector3.new(0, 0, 0)

-- Helper function for changing the state
local function changeState(newState)
    currentState = newState;
    print("Changing to state: ", newState);
end

-- Idle State
local function idleState()
    print("Doing nothing")
end

-- Walking state
local function walkingState()
    local direction = (targetPosition - character.Position).Unit
    character.CFrame = character.CFrame  CFrame.fromEulerAnglesXYZ(0,math.atan2(direction.X,direction.Z),0)
    character.Position = character.Position + direction  moveSpeed   0.1
    if (character.Position - targetPosition).Magnitude < 0.1 then
       changeState(states.IDLE);
    end
end

--Combat State
local function combatState()
    if currentState == states.COMBAT then
    	print("In Combat");
        changeState(states.ATTACKING);
    elseif currentState == states.ATTACKING then
        print("Attacking");
        wait(1);
        changeState(states.DEFENDING);
    elseif currentState == states.DEFENDING then
        print("Defending");
        wait(1);
        changeState(states.WALKING);
    end
end


-- Main update function
while true do
  wait(0.1)

  if currentState == states.IDLE then
    idleState()
  elseif currentState == states.WALKING then
    walkingState()
  elseif currentState == states.COMBAT or currentState == states.ATTACKING or currentState == states.DEFENDING then
    combatState()
  end
end


local userInputService = game:GetService("UserInputService");

userInputService.InputBegan:Connect(function(input, gameProcessedEvent)
	if gameProcessedEvent then return end
    if input.KeyCode == Enum.KeyCode.W and currentState == states.IDLE then
        targetPosition = Vector3.new(5,0,5);
        changeState(states.WALKING);
    elseif input.KeyCode == Enum.KeyCode.C and (currentState == states.WALKING or currentState == states.COMBAT) then
    	changeState(states.COMBAT);
    end
end)
In this code, we have added a new input to the userInputService to change to the combat state, by pressing the "C" key. When the character enters the combat state it changes to the attacking state, then to the defending state and then it returns to the walking state.
State Machines with Parameters
Sometimes, you need to pass information into your states. For example, if you want to make an attack move that takes a target to move to, you'd do something like this:
local function attackState(target)
    print("Attacking the:", target);
end
-- Function Call
attackState("Player");
Here the attackState function takes a target as input, which allows the logic to be dynamic. You can apply the same logic to the FSM, where you want different states to take input based on different factors.
Using Tables to Represent States
Instead of long if statements, you can use tables to make your code more organized. Here's an idea:
local states = {
  [states.IDLE] = function() print("Doing nothing") end,
    [states.WALKING] = function()
        local direction = (targetPosition - character.Position).Unit
        character.CFrame = character.CFrame  CFrame.fromEulerAnglesXYZ(0,math.atan2(direction.X,direction.Z),0)
        character.Position = character.Position + direction  moveSpeed   0.1
        if (character.Position - targetPosition).Magnitude < 0.1 then
           changeState(states.IDLE);
        end
    end,
    [states.COMBAT] = function()
        if currentState == states.COMBAT then
            print("In Combat");
            changeState(states.ATTACKING);
        elseif currentState == states.ATTACKING then
            print("Attacking");
            wait(1);
            changeState(states.DEFENDING);
        elseif currentState == states.DEFENDING then
            print("Defending");
            wait(1);
            changeState(states.WALKING);
        end
    end,
    [states.ATTACKING] = function() end,
    [states.DEFENDING] = function() end
}

-- Main update function
while true do
    wait(0.1)
    states[currentState]()
end
In this example, we have stored the state logic inside of the table. This allows us to directly call the function from the table, based on the currentState variable. This can make the code look a lot more cleaner.
Common Mistakes and How to Avoid Them
While FSMs are a great tool, there are a few things to keep in mind:
- Overly Complex States: Don’t make a state do too much. If a state starts to get too long, consider breaking it down into sub-states.
- Missing Transitions: Make sure you have clear transitions to and from every state. Characters can get stuck in unexpected states if this logic is missing.
- Inconsistent Logic: Ensure transitions are consistent and well defined. Unclear or non deterministic transitions can make characters act unpredictable.
- Hardcoding Values: Avoid using hardcoded numbers as much as possible, use variables.
These are just a few of the most common mistakes that are made, while implementing a FSM, but the best way to learn is by doing, so try experimenting with the code!
Best Practices for FSM Implementation
To make your FSM development process smoother, consider these good practices:
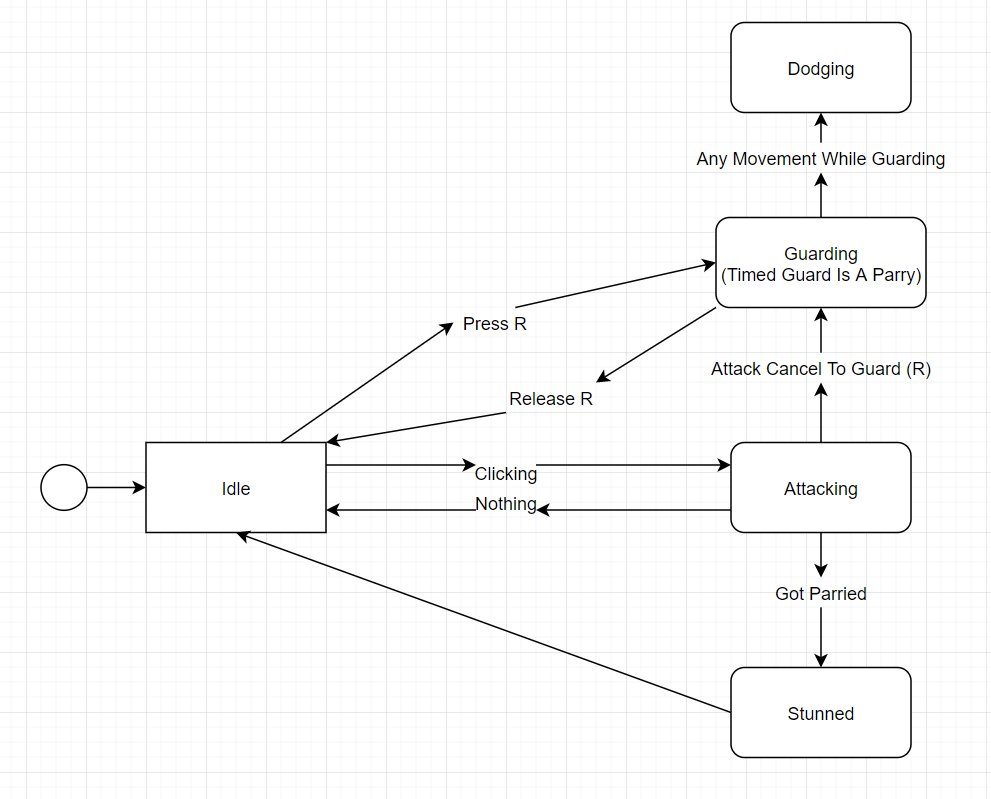
- Planning is key: Before starting, map out the different states and how your game object should move between them. Consider making a visual diagram.
- Keep states simple and focused: A single state should have one responsibility. Avoid states that try to do too much at once.
- Comment everything: When code gets complex, add a lot of comments to the code to help you or other developers to understand what it is doing.
- Test thoroughly: Use different input sequences to make sure every state and transition works as intended.
- Use naming conventions: Use a naming convention that is easy to understand.
By keeping these in mind, you can make the FSM much easier to manage and understand.
By following the tips and examples provided, you are now ready to begin implementing Finite State Machines in your own Roblox projects. It might seem complicated at first, but with some practice, you'll find them to be a powerful and organized way to manage game logic. Go forth, experiment, and make those characters behave just the way you want!
An introduction to finite state machines and the state pattern for game development
Final Thoughts
In short, a good Roblox finite state machine implementation helps structure complex character or object behaviors. This approach makes code cleaner and easier to manage when building interactive experiences.
Utilizing states and transitions improves clarity and maintainability. The finite state machine concept is valuable for crafting engaging gameplay elements.
By carefully implementing a Roblox finite state machine, developers will have a more organized system. This helps avoid tangled code and makes future modifications simpler.

