
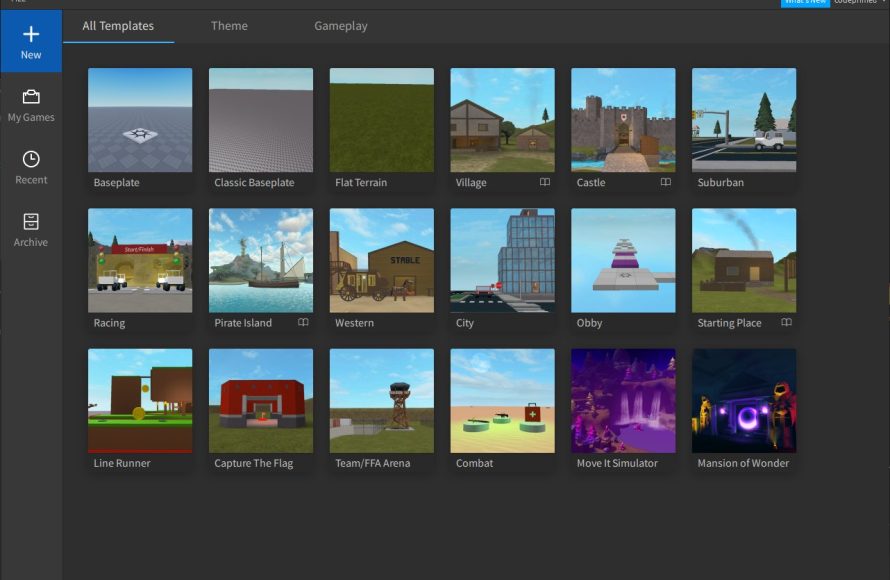
Roblox game creation for dummies involves using Roblox Studio to build environments, add characters, and script game logic using Lua.
Want to make your own game on Roblox, but feel a bit lost? You are not alone; many beginners find it intimidating. This guide, roblox game creation for dummies, is here to help!
It’s designed to make the process of building in Roblox less scary. We will break down the steps into simple chunks.
We will cover the basics, making your first games less confusing.

Roblox Game Creation for Dummies: Your Awesome Adventure Begins!
Hey there, future game developers! Ever dreamed of creating your own awesome game on Roblox? It might seem like a super hard task, but guess what? It’s totally possible, even if you’re just starting out! This guide is like your special map to help you build amazing worlds, even if you’ve never coded before. Get ready for a fun adventure!
Getting Started with Roblox Studio
First things first, we need the right tools. Roblox Studio is like your special building kit for making games. It’s a free program you can download on your computer. Think of it as your game-making playground!
Downloading and Installing Roblox Studio
To get Roblox Studio, go to the Roblox website and log in to your account. Then, find the “Create” button. It might look like a pencil or a gear. Click it, and it will ask if you want to download the studio. Go ahead and do it! It’s like getting a new super cool toy!
Follow the simple instructions to install it on your computer. Once it’s done, you can open it and get started.
Exploring the Studio Interface
When you open Roblox Studio, you will see lots of different buttons and windows. Don’t get scared, it’s not as complicated as it looks! Let’s look at some important parts.
- The Viewport: This is the big area in the middle. It’s where you’ll see your game world. You can move around and look at what you’re building. Think of it as a window into your game world!
- The Explorer Window: It’s usually on the right side. It shows all the parts, objects, and scripts in your game. It’s like a list of all the things you’ve added to your game.
- The Properties Window: This is usually below the Explorer window. When you select something in the Explorer or Viewport, the Properties window shows you what you can change about it, like its color or size.
- The Toolbox: This window allows you to get pre-made models, sounds, and images for your game. It’s like a treasure chest filled with cool things you can use!
Take some time to click around and get to know each area. It will be your friend soon! Remember, it’s ok to be confused at first, just keep trying!
Building Your First Game: A Simple Obstacle Course
Now, let’s start building a simple game! We will create an obstacle course. It’s a game where players have to jump, climb, and avoid traps. We’ll keep it easy so you can learn the basics.
Adding Parts to Your Game
Parts are the basic building blocks of your game. They can be cubes, spheres, or other shapes. Click the “Part” button at the top of the screen. A cube will appear in the Viewport!
Use the tools in the top bar to move, resize, and rotate the cube. Try making it longer and thinner. It will be the first part of your obstacle course.
Changing the Look of Your Parts
Select the part you just added. Now look at the Properties window. You can change its color and material. Make it bright and fun! This makes the game more interesting!
Add more parts to make your obstacle course longer. Maybe add some different colors and materials.
Adding Obstacles
Let’s make it a bit more challenging. Add more parts to create obstacles. Maybe some platforms to jump on, or walls to go around. You can even rotate some parts to make it harder to pass!
Use different parts to make different obstacles. Don’t be afraid to experiment! The possibilities are endless!
Adding a Spawn Point
A spawn point is where players appear when they enter the game. Click on the “Model” tab at the top and select “Spawn Location.” Place it somewhere at the beginning of your obstacle course.
Make sure the spawn point isn’t inside an obstacle! If it is, players won’t start correctly.
Making Your Game Interactive: Introduction to Scripting
Now, let’s add some cool things that make your game more fun. This is where scripting comes in. It might sound hard, but we’ll start with the super basics. Scripting means using code to make things happen in the game.
What is Lua?
Roblox uses a language called Lua. It’s like a special set of instructions for your game. Don’t worry, you don’t have to become an expert right away. We’ll learn as we go! We will only write very basic code!
Adding Your First Script
In the Explorer window, select a part you added. Then click the little “+” button next to the part’s name. Choose “Script”. This adds a script that is attached to that part.
A window will appear where you can write code. Don’t worry, we will start with a simple script.
A Simple Script Example
Let’s make a part disappear when a player touches it. In the script window, type this code:
function onPartTouched(hit)
    local player = game.Players:GetPlayerFromCharacter(hit.Parent)
     if player then
        script.Parent:Destroy()
     end
end

script.Parent.Touched:Connect(onPartTouched)
Don’t worry if you don’t fully understand it. This code makes it so that, when something touches that part, if that something is a player, the part is destroyed or vanishes.
Testing Your Script
Click the “Play” button at the top of the screen to test your game. When you run into the part with the script, it should disappear! If it didn’t work, recheck the script for mistakes.
You can add more of these scripts to your obstacles to make different things happen when players touch them. Try to change the effect to make a part change color instead of disappearing! See what you can create!
Adding Fun Features: Sounds and More
Games are way more exciting with sounds and special effects. Let’s add some of them to our game!
Adding Sounds
Click the “View” tab at the top and select “Toolbox”. In the Toolbox window, click the “Audio” tab. Search for a sound you like.
When you find a sound you like, click it. It will be added to your game. The sound is placed in “Sound” service in “Explorer”.
Using the Sound
Select the “Sound” object. Go to the Properties window. Check the “Playing” property. Now the sound will play. But usually we want to play sounds with scripts.
In the explorer, select a part you added, and add a new script to it. Write this code inside script.
function onPartTouched(hit)
    local player = game.Players:GetPlayerFromCharacter(hit.Parent)
     if player then
        local sound = game.Workspace.Sound
        sound:Play()
     end
end

script.Parent.Touched:Connect(onPartTouched)
Now, when a player touches that part, a sound will be played! You can change the sound object’s name to play different sounds in different areas. You can do even more advanced things with sound like volume, and more. Try it!
Tips for Building Awesome Games
Making games takes time and practice. Here are some tips to help you build the best games:
- Start Simple: Don’t try to make a huge game right away. Start with small ideas and build up. Just like learning a musical instrument, start with basic things.
- Test Often: Play your game a lot while you’re building it. This helps you find mistakes early and fix them quickly.
- Get Inspired: Look at other Roblox games you like. See what features they have and try to add your own spin to them. Don’t copy directly, but get inspired from them.
- Ask for Help: If you get stuck, ask a friend or search online for help. There are lots of other people learning to make games on Roblox too.
- Be Creative: Have fun with it! The best games are the ones that are creative and unique. Try new things and see what happens!
- Practice Regularly: The more you practice, the better you will get. It’s like any skill. If you practice regularly, you will become better and better over time.
Don’t be afraid to make mistakes. Everyone makes them, even experienced game developers. The important part is that you’re learning and having fun!
Publishing Your Game
Once you are happy with your game, you can share it with the world! Here’s how:
- Click “File” in the top left corner.
- Click “Publish to Roblox”.
- Give your game a name and a description.
- Choose a genre for your game.
- Click the “Create” button.
Your game is now live on Roblox! People can play it and give you feedback. Keep updating your game and making it better!
Creating games on Roblox is an exciting adventure. You can build anything you can imagine! Remember that learning takes time, so be patient and have fun!
ROBLOX Studio Tutorial for Beginners!
Final Thoughts
Ultimately, learning Roblox game creation for dummies is achievable. Starting simple, using tutorials, and practicing regularly forms the core.
You can build amazing games even without prior coding knowledge. The key is consistent effort and gradual learning, making game development fun.

