
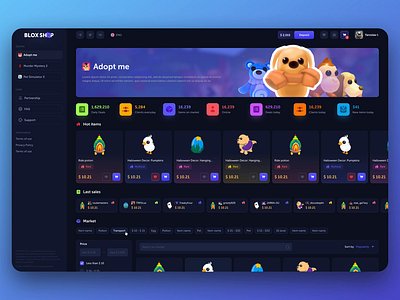
A successful Roblox in-game shop system design requires a user-friendly interface, clear item presentation, and secure transaction handling using Roblox’s API.
Creating an engaging experience within your Roblox game often hinges on how well you structure your in-game shop. A well-thought-out Roblox in game shop system design not only enhances player engagement but also affects your monetization strategy. Players appreciate a shop that is easy to navigate and clearly presents purchasable items. A poorly designed shop can lead to frustration. Consider how you can make the purchase process smooth and trustworthy for everyone.

Roblox In-Game Shop System Design
Alright, let’s dive into the exciting world of creating awesome in-game shops for your Roblox games! A good shop can make your game more fun and engaging, plus it can help you earn Robux. But designing a shop that players actually want to use takes some thought. We’re going to break it down, step by step, so you can build a fantastic shopping experience.
Understanding the Basics of a Roblox Shop
Before we get into the nitty-gritty, let’s talk about what makes a good in-game shop. Think of it like your favorite store in real life. What makes it fun to visit? It’s probably easy to find, has cool stuff you want, and doesn’t feel confusing. That’s what we’re aiming for in our Roblox game too. A good in-game shop is:
Accessible: Players should easily find the shop. It shouldn’t be hidden in some hard-to-reach corner of the game.
Easy to Use: The interface needs to be simple to understand. Kids (and adults!) should be able to browse and buy items without any frustration.
Visually Appealing: A shop that looks good is more engaging. Use bright colors, clear images, and nice layouts.
Full of Great Stuff: Of course, the items you sell need to be things players actually want. Think about what fits with your game and what would make playing more fun.
Secure: The purchasing process needs to be safe and reliable, using Roblox’s built-in systems.
Choosing the Right Location
The first step to creating a great shop is picking the perfect spot for it. Where in your game makes the most sense? Here are some ideas:
Spawn Point: Placing the shop near where players first appear in the game ensures they see it right away. This is a good choice for many types of games.
Central Hub: If your game has a main area where players gather, that might be the best place for your shop.
Specific Area: Maybe your game has themed zones. You could place your shop within an area that relates to the type of items you’re selling. For example, a weapon shop in a fighting zone.
Menu Based: If you don’t want your shop to take up space in the game world, you could create an interface that appears when a button is clicked.
Basic Shop Interface Design
Okay, so you have your location figured out. Now, let’s talk about how the shop will actually look on the screen. Here’s what you’ll generally need:
Item Display: You need a way to show players what items are available. This could be with icons, 3D models, or a combination of both. The items should be clear and easily identifiable.
Item Names and Descriptions: Each item needs a name so that players know what they are buying, and a short explanation about what the item is or does.
Item Prices: How much does each item cost? Make sure prices are displayed clearly with a Robux symbol next to them.
Purchase Button: An obvious button or icon that players click to buy an item.
Category Navigation (Optional): If you have a lot of items, consider using categories (like “Hats,” “Weapons,” “Power-Ups”) to help players find what they’re looking for.
Advanced Shop Design Features
Now that we know the basics, let’s talk about some more advanced features that can make your shop really stand out.
Dynamic Item Loading
Instead of manually adding every single item to your shop, you could use scripts to load them automatically from a data source. This is really helpful if you have a lot of items or plan to add more in the future.
Data Stores: Roblox has a feature called Data Stores that you can use to keep track of your shop items. You can update your Data Store with new items and the shop will automatically update.
Configuration Tables: You can also create a configuration table within your script and store all your item information in there. Then, your script can read that table and display all the items.
Filtering and Sorting Options
Imagine trying to find a specific hat in a store with 200 different hats. It would be hard! Filters and sorting options make the shopping experience much better.
Category Filters: Let players filter items by category (hats, shirts, tools, etc.)
Price Filters: Allow players to view items within a certain price range (cheap, mid-range, expensive)
Sorting Options: Allow players to sort items by price, popularity, or release date
Previewing Items Before Buying
Nobody wants to buy an item without knowing what it looks like! Allowing players to preview items can significantly improve the shopping experience.
3D Model Preview: Let players see what items look like when equipped by using Roblox’s 3D avatar preview system.
Detailed Descriptions: You can add more information about each item in a description box, like the bonus it provides or its rarity.
Item Animations: If an item has an animation, display that too.
Visual Effects: For things like trails or special effects, it’s important to preview these as well.
Implementing a Secure Purchase System
This is a super important part! You need to use Roblox’s provided functions to make sure players can buy items safely, and that you actually get the Robux for those items.
MarketplaceService: This is the key service for handling in-game purchases. You need to use this service to prompt the purchase process to players.
ProcessReceipt Function: This function is called when a player makes a purchase. Here, you need to check if the purchase was valid and then grant the player their item.
Handling Errors: Sometimes purchases might fail. You need to have a system for handling these errors gracefully and letting the player know what went wrong.
Special Sales and Discounts
Sales and discounts can make your shop feel exciting and give players a reason to check it out regularly.
Time-limited Sales: These sales only last for a specific period, creating a sense of urgency.
Percentage Discounts: Offer a set percentage off the normal price.
Group Discounts: Give a discount to players that are in your Roblox group.
Daily Deals: Change the sales or featured items each day.
UI Design Considerations
Let’s look at making sure the shop interface is great.
Clarity and Simplicity: The interface should be clean and easy to navigate.
Consistency: Use consistent fonts, colors, and button styles to create a professional look.
Responsiveness: Make sure your interface works correctly on different screen sizes and devices.
Feedback: When a player makes a purchase, give them feedback (e.g., a pop-up message) that the purchase was successful.
Visual Hierarchy: Place the most important elements of your interface (e.g., prices, purchase buttons) in a way that will be seen first.
Using Scripting for Your Shop
All of this comes together with code. Let’s talk a little about how that works.
Basic Scripting with Lua
Lua is the programming language that Roblox uses. Here’s a little bit about it.
Variables: Variables are like containers that store values like numbers, strings, or objects.
Functions: Functions are blocks of code that perform a specific task. They make it easy to organize your code.
Events: Events are used to detect when something happens, like a player clicking a button.
Loops: Loops are used to repeat a block of code multiple times, this is useful for loading a whole list of items.
Scripting the Shop UI
Here’s a general idea of the kinds of scripts you’d write for your shop:
Button Click Handlers: Scripts will be needed to detect when a button is clicked and then perform an action.
Item Loading Scripts: You’ll need a script that loads the items into the shop UI.
Purchase Processing Scripts: When a player buys an item you’ll need a script that handles the purchase process.
UI Updating Scripts: When the players buy an item, or perform any actions you need a script that updates the interface.
Advanced Scripting Techniques
There are also a number of techniques that you can use to improve the shop even further.
Object-Oriented Programming (OOP): This is a way of organizing your code that makes it easier to maintain and improve.
Modules: Modules help you reuse your code in different parts of your game.
Asynchronous Operations: These are used for tasks that take time and allow your game to continue to run smoothly in the background.
Monetization Strategies
Now, let’s talk a little bit about how shops can help your game.
Selling Virtual Items
The main reason to have a shop is to sell virtual items that make your game more fun or give players an edge. Here are some popular ideas:
Cosmetics: Items that change the way a player looks.
Power-Ups: Items that give players a temporary boost.
Weapons: Different weapons with special abilities.
Special Abilities: Let players buy access to unique abilities.
Game Passes and Developer Products
Beyond selling virtual items, Roblox has a few other ways to monetize your game.
Game Passes: These are one-time purchases that give players permanent benefits in the game. This might be access to a new area, more experience points, or a unique ability.
Developer Products: These are purchases that are used to grant an item/benefit just once. This can be used for example, to buy a single-use boost.
Balancing Pricing
Balancing pricing is key to creating a good shop. You don’t want things to be too cheap or too expensive. Here are a few tips for balancing the prices:
Start Small: Introduce items at a lower price point.
Test Often: Observe how players interact with the shop and adjust your pricing based on that.
Consider Value: How much of an advantage does an item give? Price it based on that.
Offer Variety: Make sure you have a wide range of items at different price points.
In conclusion, building an effective in-game shop is a blend of smart design and careful scripting. By focusing on accessibility, ease of use, and engaging visuals, you can create a shopping experience that players enjoy. Remember to use Roblox’s built-in tools for secure transactions, and consider adding features like item previews, filters, and sales to keep things exciting. Experiment, iterate, and most importantly, keep your players in mind!
How to make a DEALER NPC SHOP in ROBLOX STUDIO! (MODEL IN DESC)
Final Thoughts
Effective roblox in game shop system design hinges on clear UI and intuitive navigation. Players should easily find and purchase items. A well-organized catalog reduces friction and improves user experience.
Consider item presentation carefully; include clear descriptions and appealing visuals. Developers must also think about secure transaction handling. These crucial elements contribute to a successful in-game economy.
Ultimately, thoughtful roblox in game shop system design drives player engagement. A positive purchasing experience boosts revenue and overall game satisfaction. This demands careful planning and implementation for best results.

