
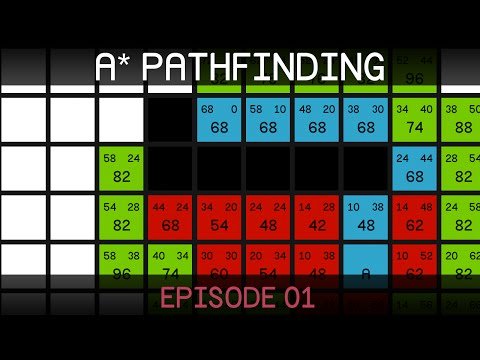
The Roblox pathfinding implementation uses a NavMesh system where you generate a walkable area, and then agents can navigate across that area using built-in functions.
Ever wondered how those NPCs in your favorite Roblox games seem to effortlessly move around? It’s all thanks to the clever work of pathfinding. Roblox pathfinding implementation allows you to create sophisticated movement for characters and objects. This makes games feel more alive and realistic, enhancing the player experience. We’ll dive into the core concepts next.

Roblox Pathfinding Implementation: Guiding Your Characters
Let’s dive deep into the exciting world of Roblox pathfinding! Ever wondered how those Non-Player Characters (NPCs) in your favorite games move so smoothly and intelligently around obstacles? That’s the magic of pathfinding at work. In Roblox, pathfinding helps your creations – whether they are friendly helpers, sneaky villains, or even a bouncing ball – navigate the game world. We will explore the core concepts, show you how to get started, and give you some extra tips to create amazing movement in your Roblox experiences.
Understanding the Basics of Pathfinding
At its heart, pathfinding is a way to figure out the best route between two points. Think about it like planning a trip to a friend’s house. You don’t just walk through every building or wall; you take the roads and sidewalks. Roblox pathfinding works the same way for your characters, determining the most efficient way to move around obstacles and reach their goals. It works on a grid system behind the scenes, and this system helps the computer understand the traversable areas.
How Roblox Pathfinding Actually Works
Roblox uses a system called “navigation meshes,” often referred to as “navmeshes.” These navmeshes are essentially invisible maps of where characters can walk. When you create a Roblox game, the engine automatically calculates these areas. The pathfinding service uses this information. Here is how the process typically works:
1. Defining the Start and Goal: First, you need to tell the pathfinding system where the character starts and where it needs to go.
2. Analyzing the Navmesh: The system analyzes the navmesh to find all the available routes to get to the desired destination.
3. Calculating the Best Path: The system uses a special algorithm (like A) to find the shortest and most efficient path within the navmesh. This algorithm looks at all possible paths and picks the best one.
4. Moving the Character: The character then moves along the path that the system has calculated.
Getting Started with Roblox Pathfinding
Now that you know the basics, let’s learn how to implement pathfinding in your Roblox games. Roblox has built-in tools and scripts that make this process surprisingly easy.
Using the PathfindingService
Roblox provides a service called PathfindingService, which is your primary tool for creating paths. This service contains several important functions:
PathfindingService:CreatePath(): This function creates a new pathfinding object. This path is where the calculated path will be stored.
Path:ComputeAsync(): This calculates a path between a starting point and an endpoint.
Path:GetWaypoints(): This gets a table of waypoints to follow along the calculated path.
Path:Status: Check the status of the path. For example, a path may be complete or not possible.
Writing Your First Pathfinding Script
Let’s take a look at a basic script to make a character follow a path:
lua
— Get the PathfindingService
local PathfindingService = game:GetService(“PathfindingService”)
— Character we want to move
local humanoid = script.Parent:WaitForChild(“Humanoid”) — Assuming the script is inside a character
— Destination we want our character to reach
local destinationPart = workspace:WaitForChild(“Destination”)
— Create a new pathfinding object
local path = PathfindingService:CreatePath({
AgentRadius = 2,
AgentHeight = 5,
AgentCanJump = true,
})
— Function to move character to destination
local function moveToDestination()
— Compute path to destination
path:ComputeAsync(script.Parent.PrimaryPart.Position, destinationPart.Position)
— If path successful
if path.Status == Enum.PathStatus.Success then
— Get waypoints from computed path
local waypoints = path:GetWaypoints()
— Loop through each waypoint and move towards it
for i, waypoint in ipairs(waypoints) do
if waypoint.Action == Enum.PathWaypointAction.Walk then
humanoid:MoveTo(waypoint.Position)
humanoid.MoveToFinished:Wait() — Wait until character arrives at waypoint
end
end
end
end
— Start movement
moveToDestination()
— Make character start moving again when a player clicks
local clickDetector = script.Parent:FindFirstChildOfClass(“ClickDetector”)
if clickDetector then
clickDetector.MouseClick:Connect(moveToDestination)
end
Ensure you have a ‘Destination’ part in your Workspace and that the script is a child of a Character with a Humanoid.
Here’s a breakdown of what the code does:
First, we get the PathfindingService.
We define the character that will be moving and a destination point or part where we want them to move to.
Then, we create a path object using PathfindingService:CreatePath(). Notice that it has a few properties, AgentRadius, AgentHeight and AgentCanJump, which we will talk about in the Agent Parameters section later.
The moveToDestination function is made to calculate path to destination, move the character through each waypoint, using humanoid:MoveTo().
Finally, we also have a clickDetector to trigger the movement.
This simple script makes your character move towards the target. You will notice that the character uses the path that the service has calculated for it. This is a simple method for a basic pathfinding implementation.
Advanced Pathfinding Techniques
Pathfinding is a powerful tool, and you can do much more than basic movement. Let’s explore some advanced techniques that will make your pathfinding implementations even more efficient.
Using Agent Parameters
When you create a path, you can set agent parameters that affect how the path is generated. These parameters are like telling the system the physical characteristics of the characters you are controlling. The most important ones are:
AgentRadius: This parameter specifies how wide your character is. A larger radius will make the system avoid tighter spaces.
AgentHeight: This sets the character’s height. If your characters are very tall, you need to increase this to make sure the generated path does not take them under low obstacles.
AgentCanJump: If the characters are able to jump over small obstacles, then you should enable this parameter so the system calculates paths with jumping.
Here is an example of how to set these parameters:
lua
local path = PathfindingService:CreatePath({
AgentRadius = 3,
AgentHeight = 6,
AgentCanJump = true,
})
Adjusting these values helps create paths that are more appropriate for your characters’ actual size and capabilities.
Handling Obstacles with Path:ComputeAsync
The Path:ComputeAsync function not only calculates the path, but it also takes into account obstacles or the current environment. If an obstacle blocks the path, your character will have to move around it. You can also tell the PathfindingService to respect certain obstacles or ignore certain areas. This allows you to create very complex environments where characters act very realistically.
Here is an example of computing paths, also while considering the location or position of a certain obstacle:
lua
local pathToDestination = PathfindingService:CreatePath({AgentRadius = 2, AgentHeight = 5})
local function moveCharacterTo(destination, obstaclePosition)
— Compute the path, avoiding the given obstacle
pathToDestination:ComputeAsync(script.Parent.PrimaryPart.Position, destination, {obstaclePosition})
— if the path is successful, move along the path
if pathToDestination.Status == Enum.PathStatus.Success then
local waypoints = pathToDestination:GetWaypoints()
for i, waypoint in ipairs(waypoints) do
if waypoint.Action == Enum.PathWaypointAction.Walk then
humanoid:MoveTo(waypoint.Position)
humanoid.MoveToFinished:Wait()
end
end
end
end
In this example, we see that when computing the pathToDestination, we use the {obstaclePosition} to guide the system to compute paths that avoid this point.
Path Following with Waypoints
The Path:GetWaypoints() function returns an array (list) of points called waypoints. Your character then needs to move to each of these points to follow the calculated path.
Each waypoint has a Position property that tells you where the waypoint is located, and an Action that tells you how the character should get there. Enum.PathWaypointAction.Walk means they should just walk normally and Enum.PathWaypointAction.Jump means the character should jump to get to that point.
By looping through the waypoints, your character will go through the path that Path:ComputeAsync() has computed for it.
Custom Pathfinding: Combining With Custom Movement
While humanoid:MoveTo() works for most cases, sometimes you want to have more precise movement. You can customize your own path following code and use the waypoints that Path:GetWaypoints() returns. You can use tools like TweenService or even your own logic to move characters.
For instance, you could use TweenService to make the movement very smooth:
lua
local tweenService = game:GetService(“TweenService”)
local tweenInfo = TweenInfo.new(0.2, Enum.EasingStyle.Linear, Enum.EasingDirection.Out)
for i, waypoint in ipairs(waypoints) do
if waypoint.Action == Enum.PathWaypointAction.Walk then
local tween = tweenService:Create(script.Parent.PrimaryPart, tweenInfo, {CFrame = CFrame.new(waypoint.Position)})
tween:Play()
tween.Completed:Wait()
end
end
This code uses TweenService to create a smooth transition from the current position to the position of the current waypoint. This allows very natural looking movement of the character.
Troubleshooting Pathfinding
Sometimes, things don’t go as planned. Let’s take a look at common problems and how to solve them.
Path Status Errors
When you use Path:ComputeAsync(), the Path.Status property tells you the result of the calculation. Common errors include:
NoPath: This means that there is no possible path from the starting point to the destination. This usually means that the start and end points are not connected through the navmesh.
Failure: This means that something went wrong during path calculation. It can occur if something is wrong with your agent parameters, or there is an issue with the environment.
Always check the Path.Status and debug accordingly to make sure that your path calculations are working. For example:
lua
if path.Status == Enum.PathStatus.Success then
print(“Path found!”)
elseif path.Status == Enum.PathStatus.NoPath then
print(“No path possible!”)
else
print(“Path calculation failed!”)
end
Character Sticking or Not Moving
If your character gets stuck or fails to move along the path correctly, check:
Navmesh Problems: Ensure that your game’s navmesh is properly generated. Sometimes, complex map designs might result in incomplete or incorrect navmesh generation.
Agent Radius: Verify that the AgentRadius is not too large, which might prevent the character from fitting through narrow paths.
Humanoid Settings: Check if the character’s Humanoid settings like WalkSpeed and JumpPower are set to reasonable values.
Optimize Your Pathfinding System
Pathfinding can be a bit expensive, so make sure to not overuse it. Consider these optimizations:
Only compute paths when needed: Don’t keep recalculating the path constantly, especially when the character is already moving towards its goal.
Use caching: If you have many characters moving toward the same point, compute the path once, and then tell the others to follow it.
Simplify your map design: Try to avoid complex geometry when generating walkable areas. The simpler the area is, the faster the path calculation will be.
Practical Uses of Pathfinding
Pathfinding is not just for making characters walk, you can use it for many creative things in your Roblox game:
NPC Behavior: Make your NPCs patrol around specific areas, or approach players.
Monster AI: Create monsters that chase players through complex areas.
Puzzle Solving: Design puzzles where players need to navigate mazes or obstacles.
Interactive Storytelling: Create a narrative where characters move according to the story’s path.
Guiding projectiles: Make arrows, bullets, or other projectiles to find their target by following calculated path.
Special Effects: Make other objects travel from one place to another, not just characters.
Pathfinding adds a layer of depth to your Roblox games, making the world feel more alive and responsive.
Pathfinding in Roblox is a very powerful tool that you can use to bring your game worlds to life. You can use PathfindingService and a few basic lines of code to enable your characters to intelligently navigate complex environments. When you understand how the pathfinding service works, you can start using advanced techniques to create very precise, smooth and optimized movements for your characters. With all these tips, you are now prepared to add complex pathfinding systems to your Roblox games, and create better experiences for your users. Remember to start simple, and then improve your designs using all that we have learned here, to create even better gameplay experiences.
Advanced Roblox Scripting Tutorial #21 – Pathfinding (Beginner to Pro 2019)
Final Thoughts
In short, effective Roblox pathfinding implementation boils down to choosing the right service for your needs. Roblox offers a great built-in system, but you can also create custom solutions. Understanding these options allows developers to create smarter, more dynamic game environments.
Careful consideration of performance is key when implementing any pathfinding solution. Path requests, especially on large maps, can be costly. Optimize your code and avoid unnecessary calculations for the best result.

