
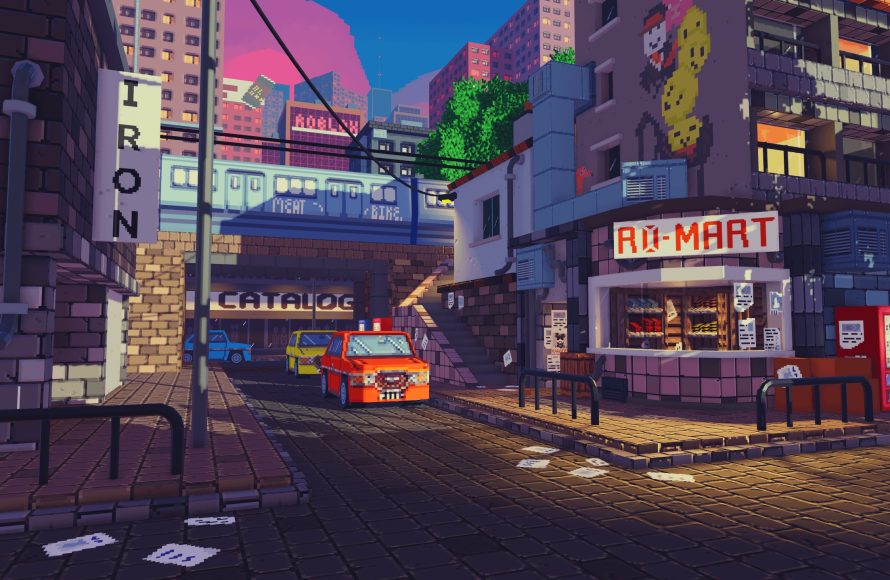
Creating Roblox pixel art often involves using small, individual blocks to form larger images, employing tools like Studio’s part placement and color options, and paying close attention to detail and scale.
Ever wanted to make your Roblox builds pop with retro charm? Maybe create that perfect 8-bit landscape within your game? Learning some basic Roblox pixel art techniques can be a game-changer for your creative projects. These methods allow for amazing detail by using a simple approach. You will make detailed designs using individual blocks placed with care. This way, you will create pixel-perfect artwork in Roblox.

Roblox Pixel Art Techniques
So, you love Roblox and you’re fascinated by pixel art? That’s fantastic! Creating pixel art in Roblox is a fun way to express your creativity and build amazing things. Think of those cool retro video games – that’s the kind of look we’re going for. But how do you actually do it in a game like Roblox? Don’t worry; it’s not as tricky as it might seem. Let’s dive into the nitty-gritty of pixel art techniques specifically tailored for the Roblox environment.
Understanding the Basics of Pixel Art
Before we jump into Roblox, let’s make sure we’re all on the same page about pixel art itself. Pixel art is basically creating images using individual blocks, or “pixels”. Each pixel is a tiny square of color, and when you put many of these together, they make a picture! The smaller the pixel, the more detail you can add. But in Roblox, we’ll be working with relatively large “pixels” since we’re using the game’s building blocks.
The Grid System
Imagine graph paper. That’s how pixel art works! Everything is organized on a grid. Each square on the graph paper is like a single pixel. When you’re building in Roblox, you’ll be using the game’s grid system as your pixel grid. Keep this in mind because it will help you design your pixel art more easily. Think of every block you place as a big, chunky pixel.
Color Choices
Colors are very important in pixel art. Limited color palettes are common, especially in retro styles. This means you have a set number of colors you use and don’t go crazy with too many shades. Roblox has a set palette of brick colors. You will want to stick with it or think of using part properties to make more of a shade. Some parts have a different coloring and can also be combined to make your image more detailed. When choosing colors, you’ll be thinking about things like:
- Contrast: How different are your colors from each other? Good contrast helps your art stand out.
- Harmony: Do the colors work well together? You want colors that look nice side by side.
- Purpose: What are you trying to show? Certain colors can represent different feelings, like bright red for danger or cool blue for calmness.
Roblox Building Tools for Pixel Art
Now, let’s get into the Roblox side of things. Roblox Studio has some very helpful tools for pixel art. It isn’t exactly pixel art software, but we can treat it that way. These tools will help you place and manage your pixel “blocks” effectively:
The Move Tool
The Move tool allows you to move blocks around after you’ve placed them. You can nudge them up, down, left, or right. Use this tool to make small adjustments to your pixel art design without placing extra blocks.
The Scale Tool
While not directly for pixel art, the scale tool can be used to create different sized pixels if you want your project to have different pixel densities. Keep in mind you may have to adjust your image based on how big you scale your pixel art.
The Rotate Tool
The rotate tool is helpful if you want to angle your project or make unique pixel art. If you’re wanting more complex designs, the rotate tool will be your best friend.
The Color Picker and Material Selection
Use the color picker to quickly change the color of any blocks that you select. This makes it easier to fill large areas with the same color. Roblox materials such as smooth plastic work great as they show the color you choose very well. If you want a more matte, darker texture, you can change the material of the block to something like fabric, but be cautious that this material can change the look of your color.
Copying and Pasting Blocks
Want to reuse a piece of your pixel art? Don’t build it all over again. Use Ctrl+C to copy and Ctrl+V to paste blocks. This will save you a lot of time.
Pixel Art Techniques in Roblox
Here comes the fun stuff. Now that we’ve learned about the tools and basics, let’s look into specific techniques you can use to make great pixel art inside Roblox.
Starting with a Simple Design
If you’re just starting out, choose a very simple object or character. A heart, a smiley face, or a simple shape is perfect. Don’t start by trying to create the Mona Lisa with blocks. Starting with small projects will allow you to quickly practice your skills without getting overwhelmed.
Planning Your Pixel Art
It is important to plan your pixel art before starting. One great tip is to use graph paper to plan out your design. This is very helpful if you don’t know where to start. You can also use a pixel art editor online or an app to plan out what you’ll build. Once you have planned everything out, it’s much easier to create your pixel art in Roblox.
Working with Outlines
Outlines make your pixel art pop! Use a darker color to create a border around your shapes. It makes your art look more defined and easier to see. For instance, if you are making a red heart, using a black block outline can make it look much better. This is one of the key pixel art techniques that you should always keep in mind.
Dithering for Color Blending
Dithering is a fancy word for making your art look like it has more colors than it really does. In Roblox, you can create a dithering effect by placing different colored blocks next to each other in a checkerboard pattern. This makes your colors look like they’re blending a little bit, which can add more depth to your artwork. Dithering is a bit more of an advanced technique but is helpful if you want your color to look smoother.
Let’s say you want to blend a light blue with a dark blue. Instead of just placing them side-by-side, you would do something like this:
| Light Blue | Dark Blue | Light Blue |
| Dark Blue | Light Blue | Dark Blue |
| Light Blue | Dark Blue | Light Blue |
When you step back, you’ll see that the two colors appear to blend and have an extra tone to them.
Creating Depth with Shadows and Highlights
Adding shadows and highlights can make your pixel art look three-dimensional. Use darker blocks for shadows and lighter blocks for highlights. Imagine where the light would be shining on your object, and put the lighter blocks there. On the opposite side, place the darker blocks to make it look shadowed. This will make your art appear less flat. This technique is very effective for characters and items.
Using Transparency (Part Properties)
Certain materials in Roblox Studio can look transparent when you adjust the transparency property in the part settings. This can be helpful for making shading effects and other pixel art ideas. You can use this to create cool effects like a ghost or translucent objects.
Building in Layers
Sometimes it’s easier to build your pixel art in layers. Start with a background layer, then add a middle layer with your main design, then add a layer for highlights, and so on. This way you can make sure everything looks organized and you can easily fix a layer if something is wrong.
Planning for Different Angles
If you are making something that needs to be viewed from different angles, like a building, make sure you plan it out from each direction. Think of the front, back, left, right, and top. This helps to ensure it will look good from any angle. If you are making a character, you can try to make them from the front, back, and side as well.
Using References
It can be very useful to use references for your pixel art. This can be something like pictures of other people’s pixel art, or it can be real-world objects that you want to make pixel art out of. Using references can help you get the proportions and color choices right. You can get inspiration online from other pixel artists or from games with pixel art, or real-world objects around you.
Practice Makes Perfect
Like any art form, practice makes perfect in pixel art. Don’t get frustrated if your first try isn’t what you hoped for. Keep experimenting with different techniques and designs, and you’ll improve. Keep building, and soon enough, you will be a pixel art expert.
Tips and Tricks for Roblox Pixel Art
Here are a few extra tips to help make your Roblox pixel art journey even smoother:
- Start Simple: Don’t try to make masterpieces right away. Begin with easy designs.
- Use a Reference Image: Having an example picture makes it much easier to create pixel art.
- Count Your Blocks: If you are following a pixel art reference, count out each block, so you get the right amount for the picture you are making.
- Zoom In: Zooming in close will help you see where you need to place each block.
- Don’t Be Afraid to Erase: Sometimes you need to remove blocks and change the design. That’s okay!
- Take Breaks: Step away from your art for a few minutes. When you come back, you may see things you want to adjust.
- Share Your Art: Show off your creations to friends and family. Feedback can help you improve!
Creating pixel art in Roblox is a rewarding experience. Remember to take it step by step. Start with simple designs, learn the basics, and don’t be afraid to try new things. With practice and patience, you will be able to create amazing pixel art in Roblox that you can share with everyone!
By learning the different pixel art techniques and ways to create pixel art within Roblox, you will be an expert before you know it. Start practicing today!
How To Pixel Art In 10 Minutes | Pixel Art Tutorial
Final Thoughts
In essence, achieving great roblox pixel art relies on careful planning and execution. Using a reference image and selecting appropriate colors greatly improves your build. Start with a basic outline and then fill in details.
Experiment with different block types to create varying textures and effects. Remember practice will sharpen your skills, which will help you improve in roblox pixel art techniques. Keep refining your work for the best results.

