
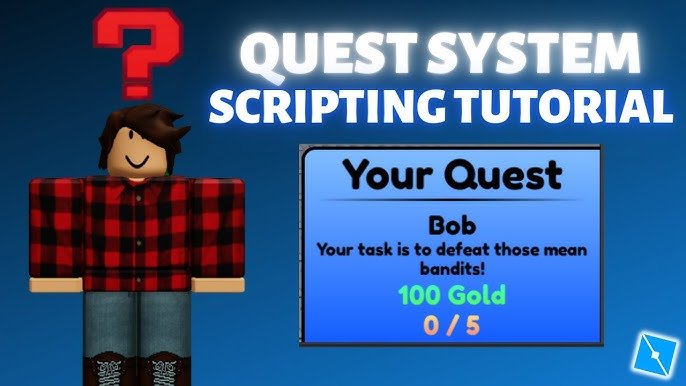
Implementing a Roblox quest system involves creating scripts to define quests, track player progress, and reward players upon completion.
Want to add engaging goals to your Roblox game? This tutorial shows you how to build a basic quest system. Many games use this method to guide players and provide a sense of accomplishment. Creating your own system isn’t as difficult as you might think. We’ll go through the steps for making a simple roblox quest system tutorial, focusing on key elements that you can modify for your own game. Let’s jump right in and get started building!

Roblox Quest System Tutorial
Hey there, future game developers! Ever played a Roblox game and thought, “Wow, that quest was so cool!”? Well, get ready because we’re about to dive deep into creating your very own quest system. This isn’t as tricky as it sounds, and by the end of this guide, you’ll be able to add fun and engaging quests to your Roblox games. We will cover everything from basic quest setups to more advanced techniques, making it easy to understand for everyone.
Why Are Quests Important in Roblox Games?
Before we jump into coding, let’s talk about why quests are so awesome. Quests give players a clear goal to work towards. This can keep them playing for longer and enjoying your game more! Think about it – do you like wandering aimlessly, or do you prefer having missions to complete? Most players love having quests to guide them, reward them, and make them feel accomplished. Quests can:
- Provide Structure: They give players a specific thing to do, which is especially important in open-world games.
- Increase Player Engagement: Working towards a goal keeps players invested in the game.
- Offer Rewards: Who doesn’t love getting a prize for finishing something? Rewards make quests feel worthwhile.
- Guide Players: New players can learn how to play a game by completing quests that teach the controls and mechanics.
- Tell a Story: Quests can unfold a story, making the game more immersive and fun.
Understanding the Building Blocks of a Quest System
Every quest system, whether basic or advanced, has the same core components. Let’s understand what these are:
Quest Definition
First, we need to define what our quests will actually be. This includes things like:
- Quest Name: A short, descriptive name (e.g., “Find the Lost Teddy Bear”).
- Quest Description: What the player needs to do (e.g., “Look around the park for a teddy bear missing its left ear”).
- Objective: The specific action the player has to complete (e.g., collecting a specific item, reaching a location).
- Rewards: What the player receives after completing the quest (e.g., coins, a new item, experience points).
- Conditions: Any specific requirements before a quest can be started or finished (e.g., player level, having another item).
Quest Tracking
This part keeps track of the player’s progress on quests. It includes:
- Quest Status: Whether a quest is active, completed, or not yet started.
- Objective Progress: How far along the player is in the objective. For example, if they need to collect 5 apples, how many do they have?
User Interface (UI)
The player needs a way to see their quests. A good UI can make a big difference! This can be:
- Quest Log: A list of all current and completed quests.
- Quest Markers: Arrows or indicators that point towards quest objectives.
- Notification Messages: Pop-up messages to inform players about a quest being started or completed.
Setting Up a Basic Quest System
Now, let’s get into the fun part – making it happen! We’ll start with a very basic system to understand the fundamentals.
Creating a Simple Quest Script
First, create a new script in ServerScriptService. Let’s name it “QuestManager”. This script will be responsible for managing our quests.
Here’s the code for a basic quest:
-- QuestManager Script in ServerScriptService

local Quests = {}

-- Define our quest
local questName = "Find the Shiny Rock"
local questDescription = "A shiny rock is hidden somewhere in the park. Find it and bring it back!"
local targetItemName = "ShinyRock"

Quests[questName] = {
    Description = questDescription,
    TargetItem = targetItemName,
    Completed = false
}

game.Players.PlayerAdded:Connect(function(player)
    -- Create a folder to hold player quest data
    local playerData = Instance.new("Folder")
    playerData.Name = "Quests"
    playerData.Parent = player

    -- Initialize the player's quest status
	for questName, questData in pairs(Quests) do
        local questStatus = Instance.new("BoolValue")
        questStatus.Name = questName
        questStatus.Value = false -- Initially the quest is not done
        questStatus.Parent = playerData
	end
end)

-- Listen for when a player picks up an item
game.Workspace.ChildAdded:Connect(function(item)
	if not item:IsA("BasePart") then
		return -- check if it is a base part, if not, do not continue.
	end

	local itemName = item.Name
    local player = game.Players:GetPlayerFromCharacter(item.Parent)
    if not player then
        return -- if not a player just stop.
    end

    local playerData = player:FindFirstChild("Quests")
    if not playerData then
        return -- If no quest folder for player, just stop.
    end

    for questName, questData in pairs(Quests) do
        if questData.TargetItem == itemName then
			local questBoolValue = playerData:FindFirstChild(questName)
			if questBoolValue and not questBoolValue.Value then
				questBoolValue.Value = true
                print(player.Name .. " finished quest: " .. questName) -- print to console
				item:Destroy()
			end
		end
	end
end)
How this code works:
- It defines a quest in a Quests table with a description, target item, and completion status.
- When a player joins, it creates a folder in the player named “Quests” and creates a BoolValue for every quest, setting it to false.
- It checks if an item is added into workspace, and if it is, checks if it has a name which matches the target item in the quest and check if the parent is character model.
- If the item is found, then it will change the quest bool value to true and destroy the item from workspace.
Creating the Quest Item
Now, let’s create the “Shiny Rock” in your game world. Follow these steps:
- Add a part into the workspace, change its name to “ShinyRock”.
- Change the color to shiny grey and modify the shape if you want.
- Move it to somewhere in the game world, where the player will find.
Now, when a player touches this “ShinyRock”, they finish the quest, and the rock disappears. Open the output window (View > Output) to see the print message when you finish the quest!
Adding a UI for Quest Tracking
Let’s add a basic UI so the player can track their quests. We will make this in a LocalScript. Create a ScreenGui inside the StarterGui, and inside that add a Frame, and inside that add a TextLabel. Finally add a LocalScript into the Frame. You can modify the look of the UI using the TextLabel, and positioning of the Frame
Here is the code for LocalScript in the Frame:
-- Local Script Inside the Frame in ScreenGui
local player = game.Players.LocalPlayer
local questFrame = script.Parent
local questTextLabel = questFrame:FindFirstChild("TextLabel")

if not questTextLabel then return end -- Stop if there is no text label.

local function updateQuestUI()
    local playerQuestData = player:WaitForChild("Quests")
	local text = ""

    for questName, questData in pairs(playerQuestData:GetChildren()) do
		if questData.Value == true then
			text = text .. questName .. " (Completed)\n"
		elseif questData.Value == false then
			text = text .. questName .. " (Not Completed)\n"
		end
    end
	questTextLabel.Text = text
end

player.ChildAdded:Connect(function()
    updateQuestUI()
end)

-- Initially update the UI
updateQuestUI()

-- Also update on every frame, this is not good for performance but is used for simpler solution.
game:GetService("RunService").RenderStepped:Connect(updateQuestUI)
How this code works:
- Gets player, quest frame, and text label
- It loops through all the quests and creates a string and sets the text of the textlabel based on the string
- It also update the UI every frame for the quest system to correctly work.
Now, when you play the game, you’ll see the “Find the Shiny Rock” quest status on the screen. It should change to “Completed” when you get the rock.
Expanding the Quest System
That was a basic start, but let’s make things more interesting! We can add different types of quests, rewards, and make the quest system more interactive.
Different Quest Types
Not all quests need to involve picking up an item. Let’s add support for quests like reaching a location or talking to an NPC.
Reaching a Location
Let’s add a new quest where the player has to go to a certain spot.
In the QuestManager script, add this quest definition:
local questName2 = "Explore the Cave"
local questDescription2 = "Go inside the cave."
local targetLocationName = "Cave"

Quests[questName2] = {
    Description = questDescription2,
	TargetLocation = targetLocationName,
    Completed = false
}
Create a part and rename it to Cave. In the ServerScriptService add a new script and rename it to LocationChecker and add the following code:
-- LocationChecker in ServerScriptService
local Quests = require(game.ServerScriptService:WaitForChild("QuestManager"))
game.Workspace.ChildAdded:Connect(function(item)
	if not item:IsA("BasePart") then
		return -- check if it is a base part, if not, do not continue.
	end
    local player = game.Players:GetPlayerFromCharacter(item.Parent)
    if not player then
        return -- if not a player just stop.
    end

    local playerData = player:FindFirstChild("Quests")
    if not playerData then
        return -- If no quest folder for player, just stop.
    end
    for questName, questData in pairs(Quests) do
		if questData.TargetLocation and item.Name == questData.TargetLocation and item.Parent:IsA("Model") then
			local questBoolValue = playerData:FindFirstChild(questName)
			if questBoolValue and not questBoolValue.Value then
				questBoolValue.Value = true
                print(player.Name .. " finished quest: " .. questName) -- print to console
			end
		end
	end
end)
In the QuestManager add this line to initialize it in player data
	for questName, questData in pairs(Quests) do
        local questStatus = Instance.new("BoolValue")
        questStatus.Name = questName
        questStatus.Value = false -- Initially the quest is not done
        questStatus.Parent = playerData
	end
Now, when a player enters the part called “Cave,” the “Explore the Cave” quest will be completed. The LocationChecker will check if a base part is touched which a character, if yes it will go through all quests and check if the target location matches. If both the location and parent of the part match then it will mark the quest as done.
Also make sure to add this to LocalScript
player.ChildAdded:Connect(function()
    updateQuestUI()
end)
Talking to an NPC
Talking to an NPC is another fun quest idea. You will need to add an NPC, so add a block or model in the workspace and call it NPC. You will also need to create a Script inside this block/model and add the following code into it. Here is the code that should be placed into the script inside the NPC model.
local Quests = require(game.ServerScriptService:WaitForChild("QuestManager"))
local touched = false
script.Parent.Touched:Connect(function(part)
	if touched then return end
	touched = true
	local player = game.Players:GetPlayerFromCharacter(part.Parent)
    if not player then
        touched = false
        return -- if not a player just stop.
    end

    local playerData = player:FindFirstChild("Quests")
    if not playerData then
        touched = false
        return -- If no quest folder for player, just stop.
    end

	for questName, questData in pairs(Quests) do
		if questData.TargetNPC and script.Parent.Name == questData.TargetNPC then
			local questBoolValue = playerData:FindFirstChild(questName)
			if questBoolValue and not questBoolValue.Value then
				questBoolValue.Value = true
                print(player.Name .. " finished quest: " .. questName) -- print to console
			end
		end
	end
	wait(1)
	touched = false
end)
In the QuestManager script, add this quest definition:
local questName3 = "Talk to the NPC"
local questDescription3 = "Find the NPC and talk to them."
local targetNPCName = "NPC"

Quests[questName3] = {
    Description = questDescription3,
	TargetNPC = targetNPCName,
    Completed = false
}
In the QuestManager add this line to initialize it in player data
	for questName, questData in pairs(Quests) do
        local questStatus = Instance.new("BoolValue")
        questStatus.Name = questName
        questStatus.Value = false -- Initially the quest is not done
        questStatus.Parent = playerData
	end
Now, when a player touches the “NPC,” the “Talk to the NPC” quest will complete. The script inside NPC will look for the “NPC” quests, and complete it if the player touches it.
Also make sure to add this to LocalScript
player.ChildAdded:Connect(function()
    updateQuestUI()
end)
Adding Rewards
Quests should reward players! Let’s add a simple coin reward system.
First, create a leaderstats script in ServerScriptService and add the following code in it.
-- leaderstats script in ServerScriptService
game.Players.PlayerAdded:Connect(function(player)
	local leaderstats = Instance.new("Folder")
	leaderstats.Name = "leaderstats"
	leaderstats.Parent = player

	local coins = Instance.new("IntValue")
	coins.Name = "Coins"
	coins.Value = 0
	coins.Parent = leaderstats
end)
This will create a leaderboard in the top right, with a coin value that is initialized to 0.
In the QuestManager script, let’s add reward to the quest and modify the previous scripts.
Modify the quests like this:
local questName = "Find the Shiny Rock"
local questDescription = "A shiny rock is hidden somewhere in the park. Find it and bring it back!"
local targetItemName = "ShinyRock"
local questReward1 = 10

Quests[questName] = {
    Description = questDescription,
    TargetItem = targetItemName,
    Completed = false,
	Reward = questReward1
}
local questName2 = "Explore the Cave"
local questDescription2 = "Go inside the cave."
local targetLocationName = "Cave"
local questReward2 = 20

Quests[questName2] = {
    Description = questDescription2,
	TargetLocation = targetLocationName,
    Completed = false,
	Reward = questReward2
}
local questName3 = "Talk to the NPC"
local questDescription3 = "Find the NPC and talk to them."
local targetNPCName = "NPC"
local questReward3 = 15

Quests[questName3] = {
    Description = questDescription3,
	TargetNPC = targetNPCName,
    Completed = false,
	Reward = questReward3
}
And modify the scripts to add coin rewards
Here is the updated ServerScriptService/QuestManager code:
-- QuestManager Script in ServerScriptService

local Quests = {}

-- Define our quest
local questName = "Find the Shiny Rock"
local questDescription = "A shiny rock is hidden somewhere in the park. Find it and bring it back!"
local targetItemName = "ShinyRock"
local questReward1 = 10

Quests[questName] = {
    Description = questDescription,
    TargetItem = targetItemName,
    Completed = false,
	Reward = questReward1
}
local questName2 = "Explore the Cave"
local questDescription2 = "Go inside the cave."
local targetLocationName = "Cave"
local questReward2 = 20

Quests[questName2] = {
    Description = questDescription2,
	TargetLocation = targetLocationName,
    Completed = false,
	Reward = questReward2
}
local questName3 = "Talk to the NPC"
local questDescription3 = "Find the NPC and talk to them."
local targetNPCName = "NPC"
local questReward3 = 15

Quests[questName3] = {
    Description = questDescription3,
	TargetNPC = targetNPCName,
    Completed = false,
	Reward = questReward3
}

game.Players.PlayerAdded:Connect(function(player)
    -- Create a folder to hold player quest data
    local playerData = Instance.new("Folder")
    playerData.Name = "Quests"
    playerData.Parent = player

    -- Initialize the player's quest status
	for questName, questData in pairs(Quests) do
        local questStatus = Instance.new("BoolValue")
        questStatus.Name = questName
        questStatus.Value = false -- Initially the quest is not done
        questStatus.Parent = playerData
	end
end)

-- Listen for when a player picks up an item
game.Workspace.ChildAdded:Connect(function(item)
	if not item:IsA("BasePart") then
		return -- check if it is a base part, if not, do not continue.
	end

	local itemName = item.Name
    local player = game.Players:GetPlayerFromCharacter(item.Parent)
    if not player then
        return -- if not a player just stop.
    end

    local playerData = player:FindFirstChild("Quests")
    if not playerData then
        return -- If no quest folder for player, just stop.
    end

    for questName, questData in pairs(Quests) do
        if questData.TargetItem == itemName then
			local questBoolValue = playerData:FindFirstChild(questName)
			if questBoolValue and not questBoolValue.Value then
				questBoolValue.Value = true
                print(player.Name .. " finished quest: " .. questName) -- print to console
				item:Destroy()
				local leaderstats = player:WaitForChild("leaderstats")
				if leaderstats then
					local coins = leaderstats:FindFirstChild("Coins")
					if coins then
						coins.Value = coins.Value + questData.Reward
						print("Received Reward " .. questData.Reward .. " Coins!")
					end
				end
			end
		end
	end
end)
Here is the updated ServerScriptService/LocationChecker code:
-- LocationChecker in ServerScriptService
local Quests = require(game.ServerScriptService:WaitForChild("QuestManager"))
game.Workspace.ChildAdded:Connect(function(item)
	if not item:IsA("BasePart") then
		return -- check if it is a base part, if not, do not continue.
	end
    local player = game.Players:GetPlayerFromCharacter(item.Parent)
    if not player then
        return -- if not a player just stop.
    end

    local playerData = player:FindFirstChild("Quests")
    if not playerData then
        return -- If no quest folder for player, just stop.
    end
    for questName, questData in pairs(Quests) do
		if questData.TargetLocation and item.Name == questData.TargetLocation and item.Parent:IsA("Model") then
			local questBoolValue = playerData:FindFirstChild(questName)
			if questBoolValue and not questBoolValue.Value then
				questBoolValue.Value = true
                print(player.Name .. " finished quest: " .. questName) -- print to console
				local leaderstats = player:WaitForChild("leaderstats")
				if leaderstats then
					local coins = leaderstats:FindFirstChild("Coins")
					if coins then
						coins.Value = coins.Value + questData.Reward
						print("Received Reward " .. questData.Reward .. " Coins!")
					end
				end
			end
		end
	end
end)
Here is the updated NPC/Script code:
local Quests = require(game.ServerScriptService:WaitForChild("QuestManager"))
local touched = false
script.Parent.Touched:Connect(function(part)
	if touched then return end
	touched = true
	local player = game.Players:GetPlayerFromCharacter(part.Parent)
    if not player then
        touched = false
        return -- if not a player just stop.
    end

    local playerData = player:FindFirstChild("Quests")
    if not playerData then
        touched = false
        return -- If no quest folder for player, just stop.
    end

	for questName, questData in pairs(Quests) do
		if questData.TargetNPC and script.Parent.Name == questData.TargetNPC then
			local questBoolValue = playerData:FindFirstChild(questName)
			if questBoolValue and not questBoolValue.Value then
				questBoolValue.Value = true
                print(player.Name .. " finished quest: " .. questName) -- print to console
				local leaderstats = player:WaitForChild("leaderstats")
				if leaderstats then
					local coins = leaderstats:FindFirstChild("Coins")
					if coins then
						coins.Value = coins.Value + questData.Reward
						print("Received Reward " .. questData.Reward .. " Coins!")
					end
				end
			end
		end
	end
	wait(1)
	touched = false
end)
Now, when you finish the quests, you should also see coins being added to your leaderboard! The code checks for a reward and gives coins to the player when they complete the quests.
Advanced Quest Features
If you are up for a challenge, here are more advanced ideas:
- Multiple Objectives: A single quest can have several things the player needs to do.
- Sequential Quests: Players must complete one quest before they can begin another one.
- Conditional Quests: Quests are only shown based on if the player meets a certain requirement.
- Quest Givers: NPCs or signs that offer quests to the player.
- Time-Based Quests: Quests that expire after a set amount of time.
- Player Choice: Give the player different options for quests or rewards.
Making a quest system can take some time but can make your Roblox game more enjoyable. Start simple, and then make it more complicated when you feel comfortable. The most important thing is to play and enjoy the process!
Creating a great quest system can really help to make your game fun and attract more players! Start with the basics and try out new ideas. Remember, the best games are those that are most fun for you to make!
Roblox Quest System Tutorial | Roblox Studio
Final Thoughts
Successfully creating a quest system involves understanding core concepts. This ‘roblox quest system tutorial’ covered essential elements. These include quest triggers, progress tracking, and rewards.
Implementing these steps lets you add interactive gameplay. Players can now engage with goals you set. You can also adjust this system for different game genres.
Ultimately, the provided ‘roblox quest system tutorial’ helps you build a better experience. It makes games much more engaging. This also gives players clear paths to follow and earn rewards.

