
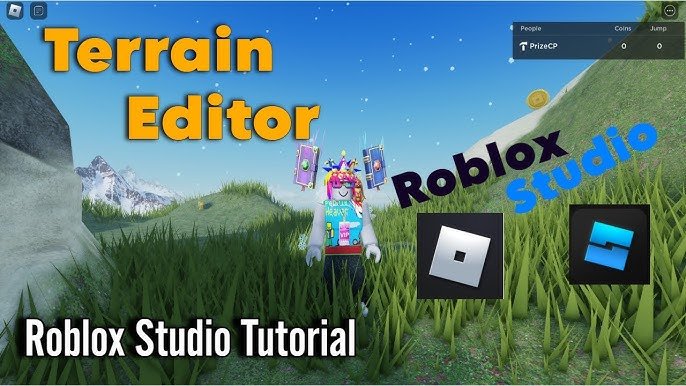
The Roblox terrain editor guide empowers you to sculpt landscapes by using tools to raise, lower, paint, and smooth terrain, creating unique virtual environments.
Ever dreamt of crafting your own worlds in Roblox? The Roblox terrain editor guide is your key to shaping those digital landscapes, going beyond just simple building blocks. This powerful tool lets you mold mountains, carve valleys, and paint textures with ease.
You’ll find many options in the editor, perfect for making any biome imaginable. Imagine building snowy peaks, lush forests, or arid deserts, all within your Roblox creation. With a little practice using this roblox terrain editor guide, your virtual worlds become wonderfully unique.

Roblox Terrain Editor Guide: Sculpting Your Dream Worlds
Alright, future world builders! You’re here because you want to learn about the Roblox Terrain Editor, and you’ve come to the right place. This amazing tool lets you create all sorts of incredible landscapes – think rolling hills, deep canyons, sparkling lakes, and even towering mountains. It’s like being a digital sculptor, and the best part? It’s super fun and not as hard as it might seem. Let’s dive in and get your creative juices flowing!
Getting Started with the Terrain Editor
First things first, you need to find the Terrain Editor within Roblox Studio. When you open a new or existing place, look for the “View” tab at the top of your screen. Click on it, and then you’ll see a button that says “Terrain Editor.” Click that, and ta-da! The magic tool appears.
Understanding the Terrain Editor Interface
The Terrain Editor has different sections, but don’t worry, we’ll go through each one:
- Tools: This is where you’ll find different brushes and actions. You have tools to add, subtract, smooth, paint, and more.
- Region: Here, you can select specific areas on your map to edit. This is helpful for making big changes quickly.
- Material Palette: This allows you to choose the different materials for your terrain. Think grass, sand, water, rock, and more. Each material has its own properties, affecting how your terrain looks and behaves.
- Settings: This section lets you adjust settings like the brush size and strength.
Take some time to look around the interface and get comfortable with where everything is. Don’t be afraid to click buttons – that’s how you learn!
Basic Terrain Editing Tools
Now, let’s explore the main terrain editing tools. This is where the real fun begins!
Add Tool: Building Up Your World
The “Add” tool is like a magic wand for creating terrain. It takes the material selected in the “Material Palette” and adds it to your world. This tool is good for making hills, mountains, and other raised areas.
- Brush Size: Changing the brush size lets you add big chunks or small details.
- Strength: Adjusting strength lets you control how much material you add with each click. A higher strength adds more terrain quickly.
- Shape: You can choose different brush shapes such as round, square, or even custom shapes for more specific designs.
Try adding some random hills and bumps to get the feel for this tool.
Subtract Tool: Digging Deeper
The “Subtract” tool is the opposite of the “Add” tool. It takes away the existing terrain. Use it to carve out valleys, dig trenches, or create caves. It follows the same rules as the “Add” tool regarding brush size and strength.
- Creating Caves: Try making a small hole with the “Subtract” tool and gradually enlarging it to form a cave entrance.
- Designing Rivers: Use a thin brush with a lower strength to carve winding riverbeds into your terrain.
Smooth Tool: Blending It All Together
The “Smooth” tool is essential for making your terrain look natural. It blurs and softens the edges of your creations. Imagine taking a rough lump of clay and smoothing it out with your fingers – that’s what the “Smooth” tool does. Experiment with different strength settings and brush sizes to achieve varied results.
- Gentle Slopes: Use the “Smooth” tool to create smooth transitions between hills and valleys, avoiding sharp, unnatural angles.
- Refining Details: This tool can soften sharp edges around mountains, creating a more realistic mountain range.
Paint Tool: Adding Colors and Textures
The “Paint” tool lets you change the material of your terrain. Instead of adding or removing, you’re simply changing its appearance. This is where you’ll bring your world to life with different textures like grass, rock, and sand.
- Material Variety: Experiment with different material combinations to see how they interact. For example, try painting the slopes of a mountain with rock and the base with grass.
- Creating Paths: Use the “Paint” tool with a sandy or rocky material to make paths that guide your players through your world.
Erode Tool: Adding Wear and Tear
The “Erode” tool simulates the effects of natural erosion, making your terrain look aged and weathered. You can erode edges of cliffs, hills, and dunes, and create interesting shapes by eroding the selected regions. Remember to use this tool with finesse, as too much can wash away your beautiful terrain.
- Realistic Cliff Faces: By eroding the sharp edges of cliffs, you can achieve a more natural looking and worn-down appearance.
- Textured Hills: Gentle erosion applied to the sides of hills and mountains can create interesting textures and ridges.
Flatten Tool: Making Flat Areas
The “Flatten” tool allows you to level your terrain to a specific height. This is useful if you need to create a large flat area for building, or creating platforms. You can select a region and then flatten it to an average height or a height you specify.
- Creating Building Platforms: Flatten large areas to make a suitable base for building structures or cities.
- Creating Roadways: Level a strip of land to create flat areas for roadways or pathways.
Region Tool: Selecting and Editing Areas
The “Region” tool is essential for making large-scale edits to your terrain. Instead of working with a brush, you are selecting large volumes of terrain. You can move, copy, paste and delete these selected regions.
- Copying Sections of Terrain: If you’ve created a hill or mountain you want to use elsewhere, copy it using the “Region” tool and then paste it into a new location.
- Deleting Large Areas: Use “Region” tool to delete all terrain in the selected area and have an empty space.
Working with Materials
The “Material Palette” is your toolbox for changing how your terrain looks. You have a variety of materials, each with its own look and properties. Here’s a quick overview of some common materials:
- Grass: Perfect for meadows, fields, and grassy hills.
- Sand: Great for beaches, deserts, and dunes.
- Water: Use this for lakes, rivers, and oceans.
- Rock: Ideal for mountains, cliffs, and rocky terrain.
- Ground: A basic, earthy material, suitable for many kinds of landscapes.
- Snow: For snowy peaks and arctic landscapes.
- Brick: A great choice for building materials like foundations, paths, or stairs.
Experiment with combining different materials to see how they look together. You’ll be amazed at the variety you can create!
Practical Tips for Terrain Creation
Here are some practical tips to keep in mind while working with the terrain editor:
Start with a Plan
Before jumping into the terrain editor, have a basic idea of what you want to create. Sketch it out on paper or even just picture it in your head. This helps you stay focused and avoid creating a messy, chaotic landscape.
Use Reference Images
Looking at real-world landscapes can inspire you and give you an idea of how to create realistic terrain. Search for images of mountains, beaches, or forests, and try to recreate them in Roblox.
Don’t Overdo It
Sometimes, less is more. Don’t add too many details at once. Start with the big picture and then gradually add smaller features. This can prevent your terrain from looking cluttered and unnatural.
Save Your Work Often
This is super important! Roblox Studio can sometimes have glitches, so make sure to save your progress frequently. There’s nothing worse than losing a lot of hard work because you forgot to save.
Experiment and Have Fun!
The most important thing is to experiment and have fun! Try out different tools, materials, and techniques. Don’t be afraid to make mistakes – they’re part of the learning process. The more you play around, the better you’ll become at using the Terrain Editor.
Advanced Terrain Techniques
Once you’ve grasped the basics, you can explore more advanced techniques to further add to the complexity of your terrain:
Creating Realistic Mountains
Mountains aren’t just big blobs of rock. They have ridges, valleys, and different textures. Use the “Add” tool to build the basic shape, then switch to the “Smooth” and “Erode” tools to create a more realistic mountain range. Use different materials like rock and snow to give depth and height to the mountain.
- Use Reference Images: Study real mountain pictures to observe how they’re formed, with sharp peaks, ridges, and valleys.
- Mix Materials: Add snow near the top of the mountain and rocks further down to create a realistic transition.
Generating Lakes and Rivers
Creating water bodies that fit naturally into your terrain involves a mix of using “Subtract” and the “Paint” tool. Use the “Subtract” tool to create a hole or depression in the ground for your lake or riverbed. After, use the “Paint” tool to fill it with the water material.
- Winding Rivers: Use the “Subtract” tool with a smaller brush size to carve winding and natural looking rivers into your landscape.
- Varied Depths: For lakes, consider varying the depth by making certain areas deeper than others. This makes your lake more dynamic.
Making Caves and Tunnels
Creating complex cave systems and tunnels adds a whole other layer of exploration. Use the “Subtract” tool to dig into a hill or mountain. Use smaller brushes to carve out the passage ways and smooth to soften the edges. Remember to create different sizes and shapes in the cave.
- Adding Light: Remember to add lighting into your caves, so it is not just a dark hole. This can be achieved using light sources in Roblox Studio.
- Varying Sizes: Create small crawlspaces and larger chambers to add to the realism of your cave.
Creating Plateaus
Plateaus are large, flat areas that are usually found high up in mountainous regions. To create a plateau, create a large, flat area using the “Flatten” tool, then build up its sides to make a flat top surface.
- Different Heights: Create plateaus at different heights to add variety to your terrain.
- Using the “Smooth” Tool: Smooth out sharp edges and angles to give the plateau a more natural and rounded look.
Troubleshooting Common Issues
Sometimes, things might not go exactly as planned. Here are some common problems and how to fix them:
- Rough and Jagged Edges: If your terrain looks rough, use the “Smooth” tool to blend edges and make them look more natural.
- Accidentally Deleted Terrain: If you accidentally delete too much terrain, use the “Add” tool to add it back, or use “Ctrl+Z” to undo your last action.
- Water Not Filling Correctly: If the water material isn’t filling the area correctly, make sure the area is completely enclosed.
Practice and patience are key to mastering the Roblox Terrain Editor. Don’t be discouraged if your first few attempts aren’t perfect. Keep experimenting, and you’ll be creating stunning worlds in no time! Remember to use all the features to your advantage and have fun. You now have a good idea of how to use the Roblox terrain editor, so go now and create your wonderful world!
The EASIEST Guide to Making Amazing Terrain (Roblox Studio)
Final Thoughts
This roblox terrain editor guide equips you with essential knowledge. You can create diverse landscapes by understanding its tools and features. Experimenting with paint, sculpt, and region tools leads to unique builds.
Remember practice makes perfect in using the editor. Applying these tips enhances your map creation skills. This roblox terrain editor guide will assist greatly in your development journey.

