
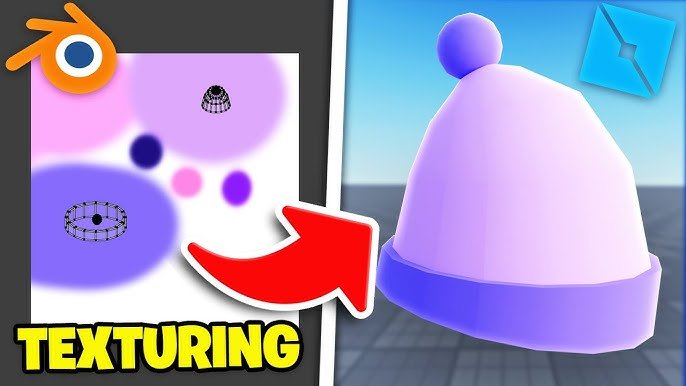
Creating Roblox textures involves using image editing software to design patterns and surfaces, then uploading those images to Roblox and applying them to in-game objects.
Ever wanted to make your Roblox creations truly stand out? The secret lies in custom textures. This Roblox texture creation tutorial will guide you through the process. You’ll learn how to design unique looks for your builds. We’ll cover everything from basic image editing techniques to the steps for uploading your work.
Applying your created textures to your in-game objects adds a personal touch. This guide will empower you to make items with your own unique style. Let’s start creating those special textures!

Roblox Texture Creation Tutorial
So you want to make your Roblox games look awesome? Textures are a big part of that! They add detail and make everything look more interesting. Think of textures like the clothes your game characters wear – they change how they look and feel. In this guide, we’re going to walk you through creating your own textures for Roblox, step-by-step. Don’t worry if you’ve never done this before; we’ll make it easy and fun!
Understanding Roblox Textures
Before we dive in, let’s talk a little about what Roblox textures actually are. They’re basically images that get wrapped around 3D objects (like blocks or characters). Roblox uses image files to create these textures, so we need to learn how to make them. These images, most often, are in formats like .png, .jpg or .jpeg. Understanding how these image formats work is pretty essential for making great textures that work in Roblox. Let’s check a few things.
Different Image Formats
Here are some common image formats you’ll see:
- PNG (.png): These are excellent for textures because they support transparency (meaning parts of the image can be see-through). This is super useful for things like leaves, fences or anything with complex edges. PNG files usually have a bigger file size than JPEGs.
- JPEG (.jpg or .jpeg): These files are great for photos and images with lots of color gradients. However, JPEGs don’t support transparency, so they’re not ideal for many Roblox texture applications. JPEG file size is generally lower than PNG.
- BMP (.bmp): BMP files are very common on windows. They are not ideal for uploading to roblox or any other platform because they are uncompressed files and have a really large file size.
Important Texture Properties
When working with Roblox textures, you need to consider a few important properties:
- Tileable: A tileable texture can be repeated seamlessly to cover a surface. This is important for things like walls or floors, so you don’t see any obvious repeating patterns.
- Transparency: Textures can have parts that are see-through, allowing you to create intricate designs that aren’t just blocky. This is the purpose of using .png files mostly.
- Resolution: This refers to how detailed your texture is, usually measured in pixels (like 512×512 or 1024×1024). Higher resolution textures look better but can also take longer to load. Roblox recommends keeping textures under 1024×1024 for better performance and faster loading.
Tools for Making Roblox Textures
Now, let’s talk about the tools you’ll need. There are many options, from free to paid. Here are some popular choices:
Free Options
- GIMP (GNU Image Manipulation Program): GIMP is a powerful free image editor that’s fantastic for creating textures. It has many of the same features as paid programs and there are lots of free tutorials available online for learning how to use it. It is available for Windows, macOS and Linux.
- Paint.net: Paint.net is another excellent free option for Windows users. It’s easier to learn than GIMP but still very capable for texture creation.
Paid Options
- Adobe Photoshop: Photoshop is the industry standard for image editing. It is very powerful with tons of features, but it can be expensive. It works on windows and macOS. If you are serious about creating high-quality textures, this is the choice most professionals would opt for.
- Affinity Photo: A good alternative to Photoshop, Affinity Photo is a powerful and more affordable program. It works great for making textures and is also available on Windows, macOS and iPad.
For this guide, we’ll be using GIMP because it’s free and widely available. If you are using any other program, the concept will remain the same.
Step-by-Step Texture Creation Using GIMP
Alright, let’s jump into creating our first texture! We’ll make a simple brick texture that you can use for your Roblox walls. Don’t worry, this is just the beginning, you will learn lots of things with each step!
Setting up your Canvas
- Open GIMP: Launch GIMP and go to ‘File’ > ‘New’.
- Create New Image: This is the most important step. It will open the ‘Create a New Image’ dialog. For our texture, set the width and height to 512 pixels. Make sure to select pixels from the drop down menu. Select the image type as RGB color, and fill with white color. Click ‘OK’. A new white canvas will appear. It’s important that the width and height of the texture are of equal size, such as 256×256, 512×512, 1024×1024, etc. This is because textures are usually square and will appear stretched if the dimensions are not uniform.
- Zoom In: Use the zoom tool to get a closer look at your canvas. This will make it easier to draw your bricks.
Drawing the Bricks
- Select the Rectangle Select Tool: On the Toolbox Panel, click on the rectangle select tool.
- Draw a Brick: Using the rectangle select tool, draw a rectangle. This will be your first brick.
- Fill with Color: Select the Paint Bucket tool and choose a brick color from the color palette. Click inside the selected rectangle to fill it with the chosen color.
- Duplicate Bricks: Use the rectangle selection tool to select the filled brick. Then copy the selection (Ctrl+C on Windows, Cmd+C on Mac) and paste it (Ctrl+V on Windows, Cmd+V on Mac). You will see a floating selection. Now drag this selection using the move tool to position it next to the first brick. You may need to click on the ‘new layer’ button in the layers panel before moving the copied brick. Repeat the above step to create a row of bricks. This will help you make a seamless brick pattern.
- Create More Rows: Repeat the above steps to create new rows of bricks below the first row. Try to be consistent with the sizes of the bricks.
- Add Mortar: Now we have a plain brick pattern. We need to add mortar between the bricks. Use the rectangle tool to select the area between the bricks and use a light gray color for the mortar with the paint bucket tool.
Adding Details
Your basic brick texture is ready! But to make it look more realistic, let’s add a few more details.
- Adding Noise: To make the bricks look less uniform, we can add a small amount of noise. Go to ‘Filters’ > ‘Noise’ > ‘HSV Noise’. Adjust the settings slightly and click ‘OK’. The noise filter adds a subtle variation to the color of each pixel, giving the texture a more natural feel.
- Adding Shadows and Highlights: This part can be a bit tricky but really adds a lot. Use the dodge and burn tools (these look like a light and a finger) to add highlights and shadows to the bricks. This gives them a 3D feel and makes the light fall on them more realistically. Remember to use a very small brush size for more control.
Making it Seamless
The most important part for a great texture is that is must be seamless and must look good when repeated. We must make sure that if our texture is repeated next to each other, it must create an illusion that it is a single long texture. If we make any mistakes here, we will be able to see a hard line on the places where each texture ends and begins.
- Use the offset tool: In GIMP go to ‘Filters’ > ‘Map’ > ‘Offset’. Offset your image horizontally and vertically by half of your texture’s dimension (256 pixels for a 512×512 texture). You will see that your texture now does not looks seamless and there is a pattern that is not repeating. Now adjust the patterns and shapes accordingly.
- Blending: Use the ‘clone’ tool (looks like a stamp) and ‘blur’ tools to make any visible seams less obvious. It takes some practice to get this right, but it makes a huge difference in the final look.
- Offset the image again: After fixing the seams, offset your image by the same amount again, so that it is in its original position.
Saving the Texture
Once you’re happy with your texture, it’s time to save it. This is a simple but important step.
- Go to ‘File’ > ‘Export As…’: Give your texture a name (like ‘my_brick_texture.png’). Make sure you select .png as the file type.
- Choose your Location: Select a location on your computer where you can easily find the file.
- Click ‘Export’: A dialog will popup, keep the default settings and click ‘Export’ again.
Uploading Textures to Roblox
Now that you have your texture file saved, let’s upload it to Roblox.
- Open Roblox Studio: Launch Roblox Studio and open or create a new place.
- Navigate to the ‘Game Explorer’: On the right panel of the studio, you will find an option named ‘Game Explorer’. Open it if not already open.
- Open ‘Image’: In the Game Explorer, click on the ‘Image’ dropdown. Then click the plus sign (+).
- Find your Texture: A file selection window will open, navigate to your texture image and select it.
- Upload: After selecting the image, click ‘Open’. Your texture will now be uploaded to roblox.
Applying the Texture to a Part
- Insert a Part: In the Roblox Studio, insert a part by going to ‘Home’ > ‘Part’.
- Select the Part: Select the part you just inserted.
- Find the texture setting: In the ‘Properties’ window, which can be found under the ‘View’ tab, scroll down until you find ‘Appearance’. Find a setting labeled ‘Texture’.
- Select Your Texture: Click on the ‘…’ button next to ‘Texture’. Then select your brick texture from the list.
- Adjust Texture settings: You may need to play around with the ‘StudsPerTileU’ and ‘StudsPerTileV’ values to make the brick texture look right on your part. These settings control how many times the texture is repeated on the part.
Advanced Texture Techniques
Now that you’ve mastered the basics, let’s take a peek at some more advanced things you can do with your textures!
Normal Maps
Normal maps are special images that make your textures look bumpy and detailed, without actually adding more geometry. They work by storing information about the surface direction, which creates the illusion of depth and highlights. The most common way to create normal maps is using a special software. GIMP also allows you to create normal maps using special plugins. If you are using Adobe Photoshop, there are built in normal map generating filters. Normal maps can really take your textures to another level.
PBR (Physically Based Rendering) Textures
PBR textures are a set of textures that help create more realistic materials in 3D environments. These textures include:
- Albedo (Base Color): This is the main color of your texture.
- Roughness (or smoothness): This texture controls how reflective or rough the surface is.
- Metalness: This tells the engine if the surface is metal or non-metal.
- Ambient Occlusion: This adds shadows where the surfaces are close together, making everything feel more grounded.
Creating PBR textures takes a bit more effort, but the results are very impressive. For a start, it’s not necessary that you create a normal map or a PBR texture for every model you make. You can still make good looking textures with the methods described above. Learning about PBR and normal maps will help you later on, if you decide to make your game textures more professional.
Using Photos as Textures
You can also take photos of real-world objects and use them as textures. Simply take a good quality picture with good lighting and remove any unnecessary objects from the image. If you want the texture to be seamless, you can use similar techniques that we described above to make any changes on the edges of the texture.
Tips for Success
Here are a few extra tips to help you become a texture-making pro:
- Start Simple: Begin with basic patterns and gradually move to more complex designs.
- Experiment: Don’t be afraid to try different colors, brushes, and filters.
- Use Reference Images: Look at real-world textures for inspiration and guidance.
- Practice: The more you create textures, the better you will get at it.
- Get Feedback: Ask other Roblox developers for their opinions on your textures.
- Pay Attention to Detail: Even small details can make a big difference.
Creating your own Roblox textures is a great way to personalize your game and make it stand out. With a little practice and some experimentation, you can design amazing textures and improve the look and feel of your game. Remember to take your time, have fun, and keep learning! This guide is just a start. There’s always more to learn and things that can be improved. The more you practice, the more great textures you will create!
How To Use Custom Textures! Roblox Studio Tutorial
Final Thoughts
Creating custom textures in Roblox elevates your builds. You learned to use image editing tools and import them correctly. You must apply textures effectively to enhance your game’s visual style.
This Roblox texture creation tutorial provides essential steps. Experiment with various techniques to achieve unique results. Practice regularly to refine your skills and design amazing virtual worlds.

