
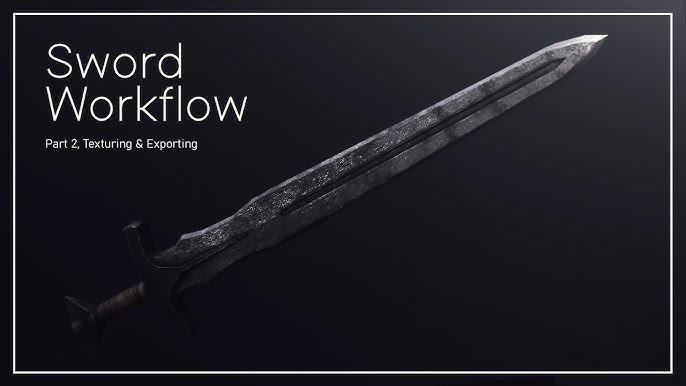
The Roblox texturing workflow generally involves creating or importing texture images, applying them to surfaces within Roblox Studio, and then adjusting properties to achieve the desired appearance.
Creating stunning visuals in Roblox games often relies on effective texturing. Many developers wonder how to get the precise surfaces and detailed finishes that make games stand out. Understanding the Roblox texturing workflow is key to this process.
This process involves importing images, applying them, and then tweaking the settings. It allows you to customize every facet of the 3d model. By learning simple techniques, anyone can enhance the quality of their Roblox builds.

Roblox Texturing Workflow: A Step-by-Step Guide
Alright, future Roblox creators! So you’re building awesome games and worlds, but they’re looking a little…plain? Don’t worry, that’s where texturing comes in! Texturing is like giving your creations clothes – it adds colors, patterns, and details that make everything look much more interesting. It’s like turning a plain gray block into a shiny metal wall or a smooth wooden table. This guide will walk you through the entire process of texturing in Roblox, step by step, so you can make your builds stand out.
Understanding the Basics of Texturing
Before we dive into the nitty-gritty, let’s understand what texturing actually involves. In the Roblox world, we use image files, called textures, that are wrapped around 3D objects like wrapping paper. These textures tell the game how the surface should look. We’ll talk about different kinds of textures, how they work, and where to find them.
Types of Textures You’ll Encounter
There are different texture types, each serving a specific purpose, but you’ll mostly encounter a few of these when starting out:
- Color Textures (Albedo): These are the most common. They control the base color of the object. Think of them as the main paint job. If you want a red brick wall, this is where the red color information lives.
- Normal Maps: These textures create the illusion of bumps, dents, and other surface details, without adding extra polygons. Imagine making a flat surface look like it has little bricks sticking out. That’s the magic of normal maps. They trick the eye into thinking there’s more detail than there really is.
- Roughness/Metallic Maps: These textures control how shiny or dull the object appears. Think of it like this: a mirror has high metallic and low roughness, while a piece of paper has low metallic and high roughness. These textures are often used to give objects a more realistic look and feel.
Where to Find Textures for Your Creations
So, where do we get all these textures? You have a few options:
- Roblox Asset Library: The Roblox Library has a lot of pre-made textures that you can use right away. This is perfect if you’re just starting out or want to quickly add some detail to your builds.
- Creating Your Own: You can create your own textures using image editing software like Photoshop, GIMP, or even free online tools like Photopea. This gives you complete control over the look and feel of your textures.
- Purchasing Textures: Online marketplaces have tons of professional-quality textures available for purchase, if you want something specific and high quality.
The Texturing Process: Step by Step
Now, let’s get into the actual workflow. We’ll cover everything from preparing your 3D model to applying the textures and making sure it looks just right.
Step 1: Preparing Your 3D Model
Before we get to the textures, it’s very important that our 3D model is ready. This is particularly true if you are importing it from external software.
Clean Geometry is Important
Make sure your model has clean geometry. This means getting rid of any unnecessary faces, extra edges, or other imperfections. This helps your texture wrap properly without distorting. Think of it like a perfectly smooth canvas for your art. If your canvas is bumpy and folded, your painting will not look its best.
UV Unwrapping
UV unwrapping can sound complex, but it is essential. Imagine you’re cutting a paper box open so it lays flat. That’s essentially what UV unwrapping does. It takes the 3D model and lays it out as a flat image that allows for texture to map correctly. If your model is from Roblox Studio’s built-in parts, the UV will usually be already good to go. When you import a custom 3D model it usually requires manual unwrapping in a 3D modeling program (like Blender), where each surface of the 3D shape is laid out in 2D in a way that is suitable for texturing. When a face of a model’s surface appears on this layout, it will show the part of the texture that is mapped to that area.
If you are using Blender, there are multiple tools available to get the UVs done right. The best method to use depends on the shape of your 3D model. For simple cube shapes or models made from cubes, simply selecting all of the model, and selecting the “Smart UV Project” tool, which is under UV Editing tab will be sufficient. Other shapes might require more complex methods such as manually marking the seams. Remember, good unwrapping is key for good texturing!
Step 2: Creating or Selecting Your Textures
Now that your model is set up, it’s time to pick our textures. We will go through different ways to find and prepare textures.
Using the Roblox Library
If you’re using pre-made textures from the Roblox library, you can search for them directly in Roblox Studio. In the Explorer window, select the part you want to texture, and in the Properties window, find the “Appearance” category and there you will find the texture option. Click the small folder icon and the asset picker will pop up. You can then select the appropriate texture. This is the easiest way to get started. If you are a beginner and you have no other idea where to start, start by picking the materials from Roblox Studio’s own library and try them out. You will see that many of the textures that Roblox Studio offers already have normal maps that work well, and they do not require external software.
Creating Your Own Textures
Creating textures gives you full creative control. Here’s a very basic process:
- Choose your software: Popular image editing software includes Photoshop, GIMP (free), or Photopea (free online).
- Start with a blank canvas: Create a new image with a good resolution, like 1024×1024 pixels or 2048×2048 pixels. Using powers of 2 makes things easier for your computer.
- Paint your colors: Use the paint tools to create your base color.
- Add details: Use brushes and other tools to add smaller details such as scratches, patterns, or any other interesting elements.
- Save your texture: Save your file as a PNG or JPG.
You can go into much greater detail while creating your own texture. Many artists work on high resolution canvases, then use tools to bake out lower resolution textures, for performance reasons.
Using Normal Maps
If you are looking to add depth to your model without creating more geometry, normal maps are what you are looking for. Normal maps are image files that look mostly purple, with some cyan and green elements. These colors are directions that control how light reflects off of the model. This creates the illusion of extra details on a model, while keeping the polygon count the same.
Some workflows require creating a high resolution sculpt and “baking out” the details onto the normal map texture. Other methods involve converting bump maps to normal maps in programs like Photoshop, using third party tools. You can also use premade normal maps available online, or create your own textures using tools like crazybump.
When creating your own normal maps from scratch, remember that the colors that point up are cyan, left is green, and right is red. Keeping these directions in mind will help you create a normal map that works well.
Using Roughness and Metallic Maps
Roughness and metallic maps can add a great deal of realism to your model. These maps are grayscale images where white means high roughness and black means low roughness. This controls how the object reflects light, where the light will scatter, or if there will be a reflection. A perfectly reflective mirror will have black roughness, and a white metallic map. A rock will have a white roughness map and a black metallic map. Many items will have a mix of these maps, creating more interesting looks and feels.
Remember, you do not need to use all maps. If you want a flat, non-shiny, non-bumpy look, you only need to use the albedo (color) map. This is usually what people start with when making textures for the first time.
Step 3: Applying the Textures in Roblox Studio
Time to put everything together! Follow these steps to apply the textures to your object.
- Select your Part: In Roblox Studio, select the 3D object you want to texture.
- Find the ‘Appearance’ properties: In the Explorer window, find the part you want to texture. Then look at the properties window and find the “Appearance” section.
- Add the texture: Click the little folder icon next to the “ColorMap” and “NormalMap” and “RoughnessMap”, where you can add the textures you want to use. This will open up your explorer where you can search for the textures that you uploaded.
- Adjust as needed: You can adjust the texture properties like transparency, brightness, and repeat settings in the properties window.
Troubleshooting Texture Issues
Sometimes textures don’t look right at first. Here are some common problems and how to fix them:
- Texture stretching: If your texture is stretched or distorted, double check your UVs. You might have to unwrap the model in your modeling software and reimport it.
- Texture seams: If you can see the edges of your texture, try changing the “WrapMode” of your texture in the properties tab, and change it to “wrap”, or re-do the model’s UVs.
- Incorrect colors: Make sure you are using the right type of maps in the correct map slots. You should not put a normal map in the color map, or you will not get the desired results.
Step 4: Iteration and Improvement
Texturing is an iterative process. You may not get it perfect the first time, and it will take practice. Don’t be afraid to experiment, try different textures, colors, and patterns, until you get the desired look. The more you work on texturing the better you will become. When your textures do not look as expected, go back to step one and ask yourself questions like:
- “Is my 3D model clean?”
- “Are my UVs unwrapped correctly?”
- “Do the textures that I am using look how I expect them to look?”
Asking yourself these questions will greatly help you figure out why the textures are not appearing as they should.
Tips and Tricks
Here are some additional tips that will help make your texturing journey more enjoyable:
- Keep it organized: Make sure you name your textures so that they are easy to find and use.
- Look for inspiration: Look at real-world items and try to recreate their textures in Roblox.
- Use texture packs: There are many online resources that offer free textures and packs, this is a great starting point for new creators.
- Practice: Like any skill, the more you practice, the better you will get at texturing. Don’t get discouraged if it does not look perfect the first time around.
- Watch tutorials: YouTube has tons of great resources where people explain the texturing process in detail.
Remember that creating excellent textures will elevate your Roblox game. Texturing is the final layer of detail, the icing on the cake, that will make your creations truly stand out. With practice, you can use textures to build unique, interesting, and enjoyable experiences for your players.
How I Texture my Swords for Roblox Studio
Final Thoughts
Efficient Roblox texturing workflow involves planning, creating textures, and applying them correctly. Good UV mapping is crucial for seamless results. Remember to optimize textures for performance.
Careful attention to detail during each stage significantly impacts the final visual quality. A well-planned Roblox texturing workflow saves time and improves your builds. Use proper texture formats for best results.

