
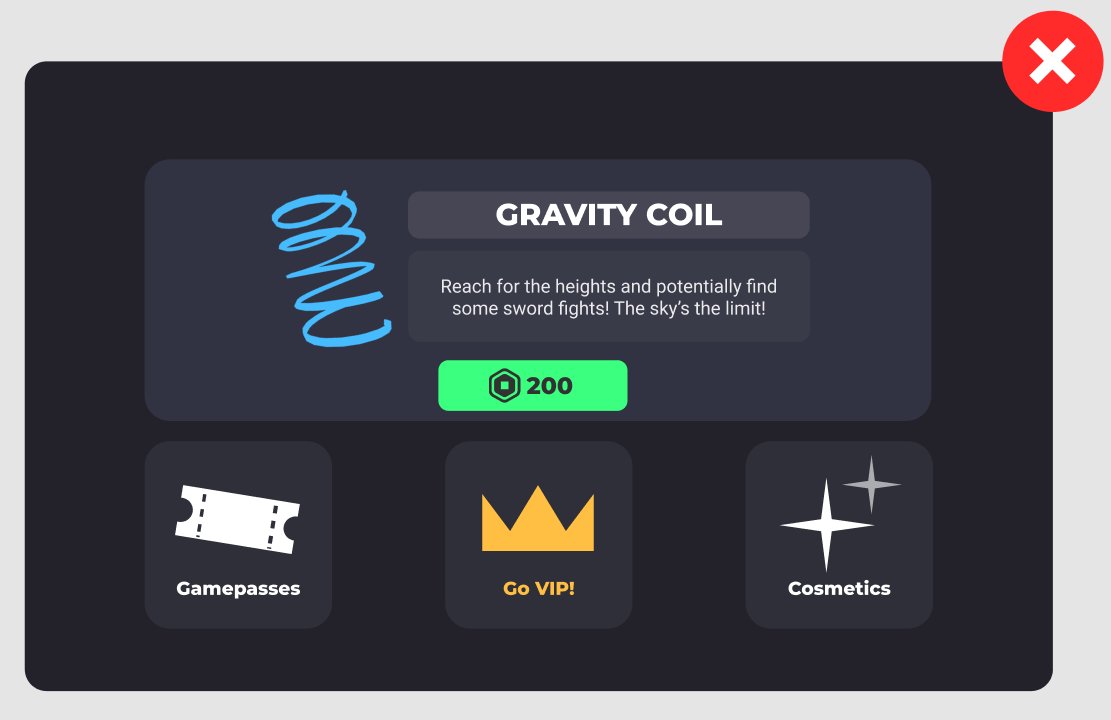
The Roblox UI development process typically involves planning the interface, creating the UI elements using Studio, scripting their functionality with Lua, and then testing and iterating on the design.
Creating user interfaces in Roblox can feel like a complex task, but it becomes easier once you grasp the fundamental process. The roblox ui development process is a cycle of design, creation, coding, and testing. It’s about more than just making things look good; you must make them work well too. You will start by sketching out what you want the UI to do and its place in your game. Next, you bring the designs to life using tools in Roblox Studio.

Roblox UI Development Process: A Step-by-Step Guide
Creating awesome user interfaces (UIs) in Roblox is like building with digital LEGOs! You get to decide how players see and interact with your game. But just like any building project, it helps to have a plan. This article will guide you through the whole process, from imagining your UI to making it a reality. We’ll explore each part in detail, making it easy to understand and follow along. So, let’s get started and build some amazing UIs!
Understanding the Basics of Roblox UI
Before we dive into the steps, let’s talk about the main things that make up a Roblox UI. Think of these as the building blocks you’ll be working with:
Frames
Frames are like the containers for other UI elements. They’re like the walls and floors of your digital buildings. You can put buttons, text, images, and other stuff inside frames. They help you organize and position things on the screen. They also have some neat properties like transparency, background color, and borders, you can modify these to create very unique look for your UI.
Text Labels
Text labels are how you display words on the screen. You can use them for titles, instructions, or any other information you want to share with players. You can change the font, size, color, and other properties to make the text look just how you want it.
Text Boxes
Text boxes are where players can type in information. They’re super useful for things like usernames, chat messages, or search queries. You can set limits on how much players can type.
Buttons
Buttons are how players make choices in your game. When someone clicks or taps a button, you can make something happen – like opening a menu or starting the game. They can have text or images on them, and you can program them with scripts to do different actions.
Images
You can use images to show pictures, icons, or other visuals in your UI. Images make your interface more interesting and easy to understand. You can import your own images and use them in your UI.
Planning Your Roblox UI
Before you even start dragging and dropping UI elements, it’s important to plan. This is where you figure out what your UI needs to do and how it should look. Think of this as drawing a blueprint before you build something.
Defining UI Requirements
First, ask yourself: What do I want this UI to do? Is it a main menu, a shop, an inventory, or something else? Figure out exactly what the UI needs to accomplish. Make a list, write it down, or make some notes on your computer.
- What information will the UI display?
- What will players be able to do with the UI?
- How will players move through the UI?
Sketching and Wireframing
Now that you know what your UI needs to do, it’s time to sketch it out. You don’t need to be a great artist! Just draw simple boxes, lines, and labels to show the main parts of your UI. This step helps you organize how things will be laid out and placed.
You can use paper and pencil, or a program on your computer for this step. It’s important to consider how everything will flow together. For example, if there’s a menu with several items, think about the order they’ll be displayed and how players will navigate them.
Example of a basic sketch: Imagine you’re making a game menu. You might draw a rectangle for the menu’s background and then other rectangles for the buttons labeled “Start Game,” “Settings,” and “Exit.” This simple sketch helps you figure out where things will go before you jump into building it in Roblox.
- Use basic shapes: Focus on placement and flow, not detail.
- Label everything: Make sure you know what each box represents.
- Think about flow: How will players move through the UI?
Building Your UI in Roblox Studio
Now, let’s open Roblox Studio and start building! This is where you take your plan and turn it into a working UI.
Adding UI Elements
In Roblox Studio, go to the Explorer window, and locate StarterGui. This is where all the user interface elements are going to be placed. Then, click the “+” button next to StarterGui and select ScreenGui. A ScreenGui is like a canvas that will appear on the player’s screen.
Inside the ScreenGui, you can add frames, buttons, text labels, and other elements. You can do this by clicking on the “+” button inside the ScreenGui. Select the type of UI element you wish to add. Now start adding frames first, and then adding buttons, text, and other things inside these frames.
Use the move and resize tools to position elements exactly where you want them. In the properties window, you can change the colors, fonts, sizes, and many other options for every element you added. Take your time and make things look just right.
Pay attention to the hierarchy of elements, frames go on top, and buttons, text labels and other things go inside frames. It helps to keep your workspace neat and organized.
- Add a ScreenGui to StarterGui.
- Add frames, buttons, and other UI elements inside the ScreenGui or inside frames to organize them well.
- Use the move and resize tools.
- Customize colors, fonts, and sizes.
Using Constraints
Constraints are very important in UI development. They are special tools in Roblox studio that help your UI look good on different screens and devices, like phones, tablets, and computers. They make sure that UI elements are positioned and sized correctly, no matter how big or small the screen is. Let’s understand what they are:
- UIAspectRatioConstraint: This constraint keeps the proportions of your UI elements correct. For example, if you have a square button, this constraint will ensure it always looks square and not rectangular, even if the screen size changes.
- UIPadding: This constraint adds space between UI elements and their parent frames. Use this to avoid UI elements being cluttered or touching the edges of a frame. It keeps things clean.
- UISizeConstraint: This constraint sets limits to the size of the UI elements. If you do not use this constraint, UI elements will resize according to the screens on the devices and will not look good. So it keeps the elements of your UI in the proper size even when the screen changes.
- UIListLayout: This layout will arrange the UI elements in a vertical or horizontal list. This helps to put the elements in a very organized list.
Example: Let’s say you have a button. Without constraints, this button might look very large on a small phone screen and very small on a big computer monitor. With UI constraints, you can make sure the button is always the right size, no matter what kind of device the player is using. Also you can make sure that all buttons in your game are positioned with same spaces from left and right using constraints.
Experiment with different constraints to see how they affect your UI. They can make your UI appear much better on all devices.
Scripting UI Interactions
Now that your UI looks good, it’s time to make it work. This is where scripting comes in. You’ll use scripts to make buttons respond to clicks, update text labels, and more. Let’s explore how to do it:
- Add a script to a button. When the button is clicked, the script will run.
- Use a script to make the button perform an action, for example: making it open or close another frame.
- Use scripts to change the texts of text labels. For example, to display the score of a player.
- Create scripts to hide or show UI elements when necessary.
Example: Imagine you have a button labeled “Start Game”. When you click this button, you want it to start the game. You’d attach a script to the button that tells the game to begin. The script will be activated every time a player clicks on the button and will tell the game to start.
You can use Lua scripting language to do this. Don’t worry if scripting seems hard at first, you will learn it if you keep trying. There are lots of tutorials online which can help you with Roblox scripting.
Testing and Iterating
After building your UI, you need to test it out! Click the “Play” button in Roblox Studio to enter your game and see your UI in action. Make sure everything works as expected.
- Check if all buttons work correctly.
- Check if everything is placed correctly in screen.
- Check that everything looks correct in different screen sizes.
- Try to use the UI elements, see if everything works as expected.
If something is not working as expected, or doesn’t look right, go back to the Roblox studio and adjust it. This process of testing, adjusting, and retesting is called iteration. It’s normal to make changes along the way and improve your UI. Keep testing and experimenting until everything is perfect!
Advanced UI Techniques
Once you’ve mastered the basics, you can explore more advanced techniques to make your UI even better.
Animations
Animations make your UI feel alive. You can make buttons move, fade in, or change colors when clicked or hovered over with mouse cursor. These little animations create better player experience. They make your UI look polished and cool.
- Use tweens to animate UI elements.
- Animate elements like buttons to highlight them, or animate UI elements for opening or closing.
UI Libraries and Modules
As you get more experience, you can make your own reusable UI libraries. These libraries contain pre-made UI elements and scripts that you can use in multiple games, saving you time and effort. You can also explore community-made libraries and modules that can help you with UI development.
- Create your own functions and reuse them in different projects.
- Explore community libraries to speed up development.
- Store and reuse custom UI elements.
Responsive UI Design
We already discussed constraints which help us to create responsive UI, meaning they work well on different screen sizes. Responsive design is super important. You should ensure that the game UI looks good and functions well on all devices. This means planning the layout, fonts, and spacing in such a way that everything remains readable and usable no matter the player’s screen size.
- Use constraints to make your UI scale well.
- Test your UI on different devices to make sure it looks great everywhere.
- Make sure fonts are readable on all devices.
Tips for Creating Great Roblox UIs
Here are some tips and best practices to keep in mind while building UIs. These tips can make a big difference in the experience of your players:
- Keep It Simple: Don’t clutter your UI with too many things. A clean and clear UI is easier for players to understand.
- Use Clear Labels: Make sure text labels are easy to read and understand. Choose fonts and colors that contrast well with the background.
- Be Consistent: Keep your style, colors, fonts, and button designs the same throughout your UI. This helps players get used to the UI and how to use it.
- Test Often: Test your UI on different devices and screen sizes. Ask your friends or other players to try it out and give you feedback.
- Get Inspired: Check out other games on Roblox, look at apps and websites, and learn from other people’s work, and look for inspiration! But try to be original and design your own ideas.
Creating Roblox UIs is a journey that can lead you to some amazing creations. By understanding the basic elements, planning carefully, and practicing regularly, you can make incredible user interfaces that make your games even better. Remember to test, iterate, and always try new things. Keep practicing, and you’ll become a UI expert in no time.
Roblox UI Design Tip: Fade Effect #roblox #ui
Final Thoughts
The Roblox UI development process involves careful planning, iterative design, and thorough testing. Developers first create mockups, then implement those designs in Roblox Studio. Iteration is vital for improving the user experience.
Testing ensures the UI works as intended across various devices and screen sizes. The process requires attention to detail and understanding of user needs. Ultimately, this allows for polished and functional interfaces.
The final goal of this entire Roblox UI development process is to make the game more engaging and enjoyable for players. Effective UI is fundamental for a great Roblox game experience.

