
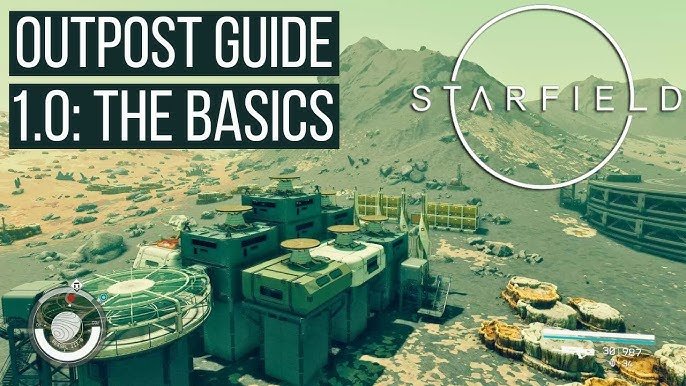
Early game outpost building in Starfield primarily focuses on resource extraction using basic structures like extractors, storage containers, and solar arrays to power them, often near specific resource deposits.
So, you’re eager to get started building your empire in the stars, but where do you even begin with Starfield early game outpost building basics? It can feel a little overwhelming at first, but understanding the fundamental pieces makes it much easier. You’ll be focusing on collecting the resources you need.
Initially, you’ll place extractors near mineral deposits, which then need power from solar or wind. Don’t forget containers to store all those raw materials. Once these basics are established, you can think about growing.

Starfield Early Game Outpost Building Basics
Okay, so you’ve jumped into Starfield and are itching to build your own little corner of the galaxy? That’s awesome! Outposts are a super cool part of the game, letting you gather resources, craft items, and even have a place to call home away from the hustle and bustle of the big cities. But where do you even begin? Let’s dive into the basics of early-game outpost construction and get you set up for success.
Why Bother with Outposts?
Before we get into the nitty-gritty, let’s talk about why outposts are beneficial in Starfield. Think of them as your own personal resource hubs and crafting workshops. They’re not just for show! Here’s a breakdown of their main uses:
Resource Gathering: This is perhaps the biggest benefit early on. You can set up extractors to pull valuable materials like iron, aluminum, and copper straight from the planet. This saves you time from having to constantly scavenge.
Crafting Station: Outposts allow you to set up various crafting stations like workbenches and industrial workbenches. These let you create weapon mods, spacesuits, health items, and lots of other useful stuff.
Storage: Space is precious in Starfield! Outposts provide safe storage for all those materials and items you collect.
Crew Stations: You can build crew stations to assign companions and specialists to your outpost to improve resource output and efficiency. These guys and gals are essential for a well-oiled outpost.
Trading Post: You can sell the resources that you are extracting. A trading post enables you to make some extra credits without flying around the galaxy.
Choosing Your First Outpost Location
Location, location, location! Just like in real estate, your first outpost’s location is super important. You want to pick a spot that’s useful and easy to manage. Here’s what to look for:
Identifying Resource Deposits
The most critical aspect of a good outpost location is the presence of resources. When you’re scanning a planet from orbit, you’ll see different areas highlighted. These show where different resources are concentrated. Look for areas with the resources you need the most.
Initial Needs: Early game, focus on common materials like:
Iron
Aluminum
Copper
Water
Scanning Tips: Make use of your scanner. It’ll show you the precise location of resource veins. Look for areas where different types of resources are close to each other. This allows you to build extractors and storage in one central location and keeps things organized.
Surface Scan: Once you’ve landed, don’t forget to scan the local area. Sometimes, even after scanning from orbit, small but useful resource deposits are only revealed when you scan at ground level.
Finding a Flat Area
Building on flat ground is much easier. It allows you to arrange buildings without the constant need to adjust for slopes or hills. Flat ground will save you headaches and time.
Visual Checks: Look for areas where the ground appears level. Use your scanner to get a good overview of the area.
Planning Ahead: Consider where you might want to expand in the future. Having a good, sizable flat area to start with makes future expansion less complex.
Considering Climate and Hazards
Some planets have extreme weather or dangerous conditions. These can impact your outpost if you are not careful.
Radiation: Some planets have radiation hazards that require you to build special structures and wear protective gear. This can be complicated at the start, so it is better to avoid such places.
Extreme Temperatures: Extreme hot or cold temperatures can affect how quickly your extractors and other machinery operate. Start with planets that have moderate weather to avoid such complications.
Dangerous Fauna: Avoid planets with aggressive creatures unless you are looking for a challenge. This could result in resources being wasted by having to maintain defenses.
Setting Up Your First Outpost
Okay, you’ve found the perfect spot. Now comes the fun part – building! Let’s get to it, with each step explained in detail.
The Outpost Beacon
The first thing you’ll need to do is place the Outpost Beacon. This beacon is the heart of your outpost. You will find the Beacon in the building mode menu.
Placement: Be sure to place it in the center of where you want your base to be. You can move it later, but it will help you build efficiently if it is in the right spot.
Radius: The beacon establishes the area where you can build. Keep this radius in mind when planning your outpost layout.
Building Extractors
Extractors are how you get those precious resources. They take raw materials straight from the ground.
Types: There are different types of extractors for various resources. Make sure you are placing the correct extractor for the resource you are targeting.
Power: Extractors need power to run. You’ll need to provide them with a power source, like a solar array or a generator.
Placement: Put your extractors directly over the resource veins. The scanner will show you where these are. Try to place them as close to each other as possible to make later connections simple and tidy.
Connecting Extractors: Use the wire tool to connect your extractors to your power source. This might look tricky the first time but becomes very simple with a bit of practice.
Creating Power Sources
Power is essential for all your machines to run. You will be using power for extractors, lights, and other buildings.
Solar Arrays: A great early game source of power, especially on planets with good sunlight. They require a clear view of the sky so place them accordingly.
Generators: These burn fuel to produce power. They are useful for planets with less sunlight, but keep in mind that you will need to keep them supplied with fuel.
Placement: Place power sources near your extractors and storage units to keep wires short and efficient.
Setting Up Storage
You will need storage to hold all the resources that your extractors are mining.
Types: There are different sizes and types of storage units. Start with the basic containers and add more as you expand your operation.
Placement: Put storage units close to your extractors. This makes it easy to see when they are full and collect the resources.
Linking Storage: You can link multiple storage containers together to create a larger storage capacity. This is a super helpful tactic as your base begins to grow and harvest more materials.
Automatic Transfer: Use transfer containers to automatically move extracted materials to your ship’s cargo hold. This saves a lot of time and effort.
Building Habitation Structures
Habitation structures provide a safe place for you and your crew to rest. They can also be connected and expanded as needed.
Basic Hab: Start with the basic habitat. It gives you a place to sleep and serves as your home base.
Adding Modules: Add modules like labs and research facilities as you progress. This way, your outpost can grow with your needs.
Furniture: Add a few items of furniture like benches, chairs, and storage containers to make your base comfortable and useful.
Connecting Your Outpost: Wiring and Linking
Getting all the different parts of your outpost working together is all about wiring and linking. Let’s take a closer look at how that works.
Power Lines
Wiring Tool: Use the wire tool to connect power sources to extractors, storage units, and other buildings that need power.
Connections: Click on the output of your power source and then click on the input of the structure you want to power. It’s that easy.
Short Runs: Keep your wires as short as possible. Long runs can be annoying to maintain.
Visual Check: Remember that all connections must be completed to have your machinery working. Check your power lines regularly to ensure everything is still properly connected.
Linking Storage
Linking: You can link storage units together to increase overall storage capacity and make collecting materials easier.
Input and Output: Make sure you are linking the correct input and output connectors to enable the flow of resources.
Transfer Containers: Link storage containers to transfer containers to automatically send resources to your ship.
Assigning Crew Members
As your outpost grows, you will want to assign crew members to help you manage it.
Crew Stations: Build crew stations to enable crew members to be assigned.
Skills: Choose crew members that have skills that are relevant to outpost management. Some have skills that improve extraction rates, and others have skills that improve defenses.
Managing Crew: Talk to crew members to ensure that they are happy and have all the resources that they need. Happy workers are productive workers.
Expanding Your Outpost
Once you have mastered the basics, it is time to think about expanding your outpost. There is a whole galaxy out there to explore.
Research and Development
Research: Explore new technologies to build advanced facilities that extract rarer resources.
Labs: Build labs to unlock new and exciting technologies.
Transportation
Landing Pads: Build landing pads to make it easy for ships to land and transport resources and crew.
Cargo Links: Use cargo links to connect multiple outposts. This is a very effective way to transport resources automatically between bases.
Security
Defenses: Use turrets and other defensive structures to protect your base from hostile creatures and pirates.
Scanning: Use scanning systems to detect incoming enemies and identify potential hazards.
Outpost Layout Tips
Here are some things to consider when planning the layout of your outpost:
Centralize Resources: Try to group extractors, storage, and power sources together. This makes it easier to maintain and monitor the operation.
Plan for Expansion: Leave some open space to add new structures and facilities.
Organized Connections: Use a logical wiring system to make it easy to troubleshoot any problems.
Use Pathways: Connect buildings and resource areas using pathways or walkways to make the base easier to navigate.
Verticality: Don’t be afraid to build up or down. Use multi-level structures to save space and make the base look more impressive.
Aesthetics: Add decorative items, like plants and flags, to give your base a unique look and feel.
Building your first outpost in Starfield is a journey of learning. Don’t be afraid to experiment with different layouts, resources, and techniques. The more you practice, the better you’ll become at making outposts that are both functional and stylish. You will find the process very rewarding as you gain more experience. You’ll be gathering resources, crafting epic gear, and building your own slice of the universe in no time! So get out there, set up your beacon, and start building. You’ve got this!
Starfield – The Beginner's Guide to Building Outposts
Final Thoughts
Prioritize landing pads, storage, and basic hab modules for efficient resource management. Start small and expand as needed, focusing on one or two key resource outputs. This approach simplifies the process initially.
Remember to link your storage containers for easier retrieval of materials. Regularly check your outpost for any necessary repairs or maintenance. It is crucial to keep your operations running smoothly.
Understanding these Starfield early game outpost building basics will significantly aid your progress. Effective resource management and smart planning ensure you can establish a good foundation for expansion.

