
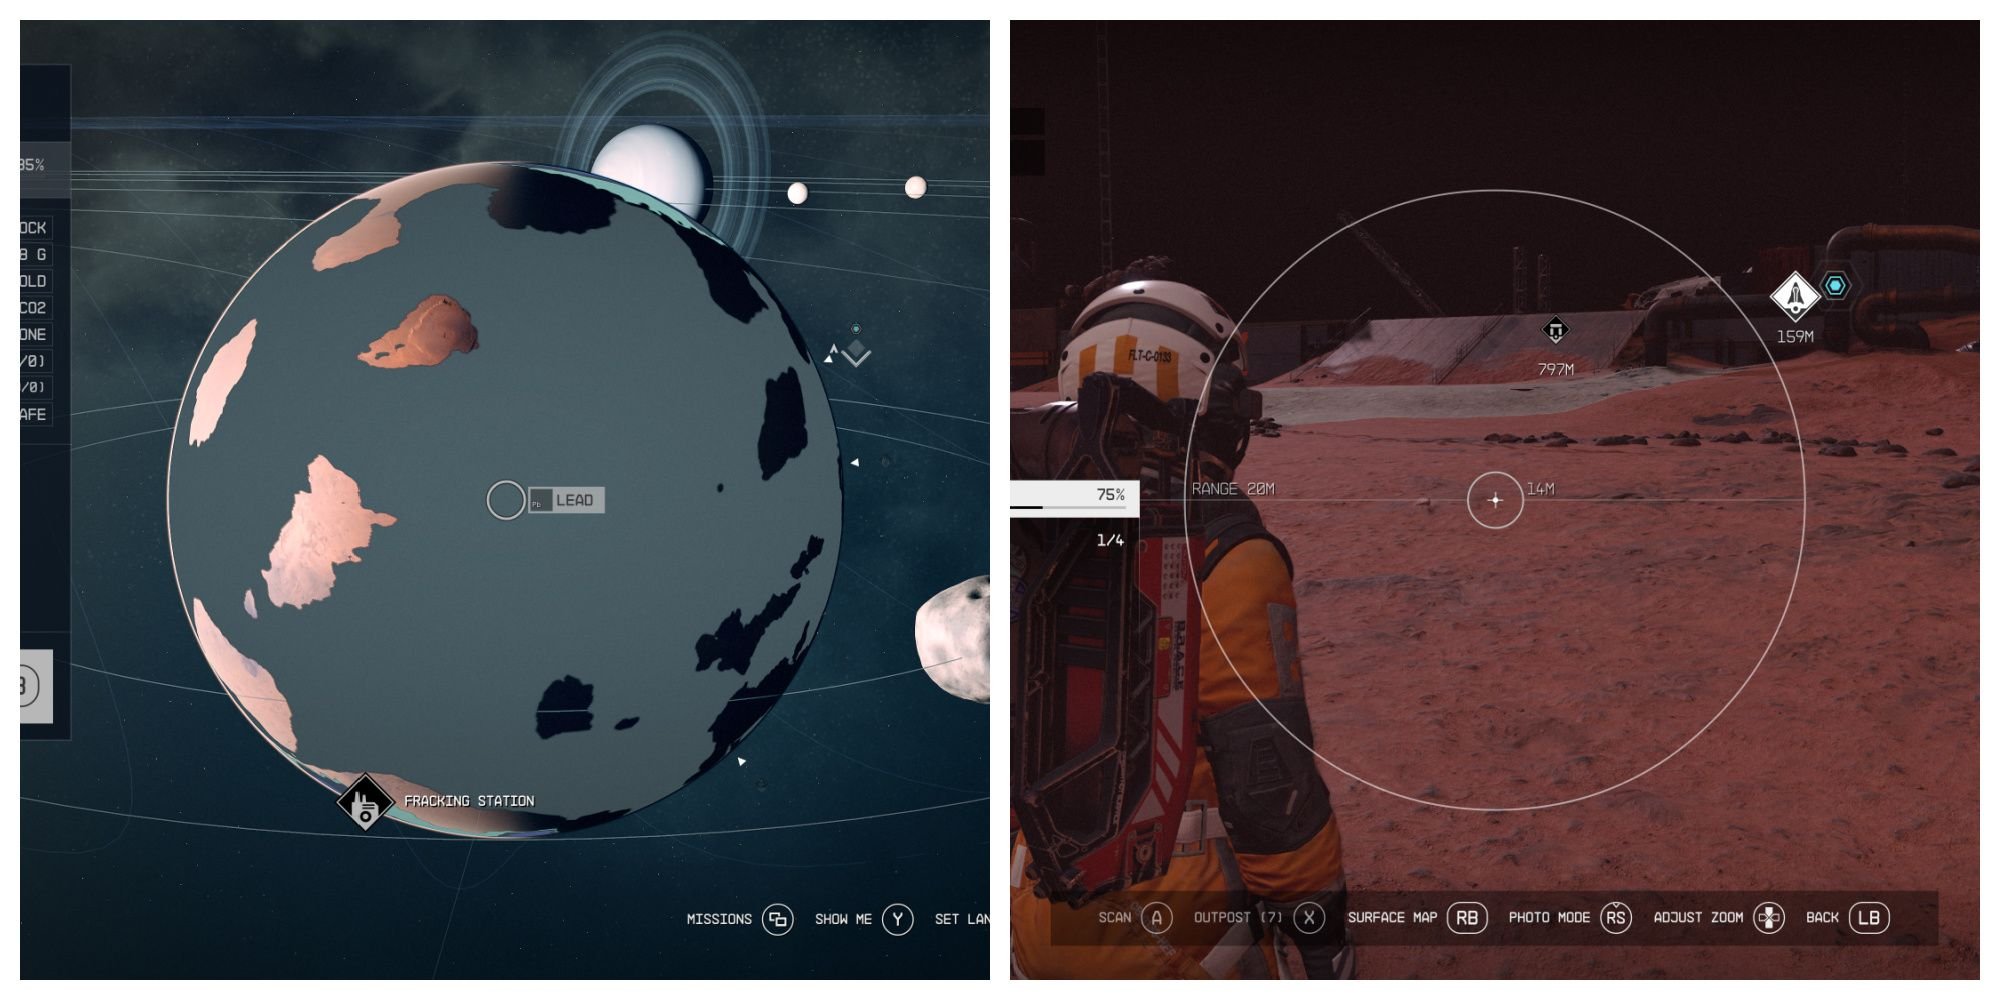
To effectively use the scan tool in Starfield, repeatedly activate it to register all elements on the screen. Focus on flora, fauna, and resources, gaining data and progressing in exploration.
So you are eager to get the most out of your space exploration? You’re not alone, many players jump right into Starfield, and they might not know exactly how to use the scan tool. This tool is actually central to progression.
It is more than just for spotting resources. It actually contributes to your overall understanding of the world. By using it often and paying attention to the details, you’ll find it essential in your galactic journeys. Let’s dive deep into maximizing its potential.

Starfield how to effectively use scan tool
The scan tool in Starfield is your best friend, a pocket-sized powerhouse that reveals the secrets of the worlds around you. It’s more than just a gadget; it’s your key to resources, enemy intel, and a deeper understanding of the vast Starfield universe. Using it well will make your adventures smoother and your progress faster. Let’s explore how to truly get the most out of your scan tool.
Understanding the Basics
First, let’s cover the basics. The scan tool is accessed by pressing a designated button (usually LB on Xbox controllers or ‘F’ on PC). Once activated, your viewpoint switches to a slightly different screen, showing a scan overlay. This overlay will highlight different things depending on what you’re looking at and what upgrades you have. This tool is not just for show, it gives you very important information you can use to your advantage.
The Initial Scan
When you first start using your scanner, you’ll notice that it shows things like:
- Resources: These appear as highlighted objects, whether they are plants, rocks, or even gases.
- Lifeforms: Animals and aliens show up as highlighted figures, usually with a bit of information.
- Structures: Buildings, ships, and other man-made objects will stand out.
At this point, the scanner gives a general view of what’s around. Think of it like a quick sweep of the surroundings, enough to understand the overall environment, but it goes deeper than that, very much deeper.
Scanning for Resources
Resources are the backbone of crafting and outpost building in Starfield. The scan tool helps you find them quickly and easily. Here’s what to look for:
- Resource Deposits: These are usually rocks or patches of ground that are highlighted with a specific color and icon. The icon will tell you what kind of resource is there. For example, iron has a different symbol than copper.
- Organic Materials: These include plants and creatures that can be harvested for materials. Scan these to know exactly what you’ll gain, sometimes there are hidden traits to discover.
- Gases and Liquids: Some planets have gases that you can extract. Scanning will show these, usually as highlighted areas with specific visual effects.
How to Efficiently Harvest Resources
Don’t just run around blindly hitting things with your cutter. Using your scan tool properly will help you prioritize what to harvest. Focus on the resources you need and use your cutter effectively. By using the scanner, you can pinpoint the most productive spots quickly. Scan first, cut second!
Scanning Lifeforms
Starfield is full of strange creatures, and the scan tool is your way to learn about them. Scanning these gives you crucial information which can influence how you behave or prepare for certain areas:
- Creature Info: Scanning an alien gives you its name, level, and sometimes a little about its behavior. Knowing if an animal is docile or aggressive is very helpful.
- Weak Points: With upgrades, the scan tool can reveal creature weaknesses. Knowing where to attack will make fights much easier. This is especially useful in tough combat situations.
- Scanning for Research: Scanning species contributes to your research progress. The more you scan, the more you learn, which can lead to other benefits.
Understanding Creature Levels
Pay close attention to the creature level on the scan display. Higher-level creatures are much tougher to deal with, so knowing what you are facing can be a lifesaver. If you’re low-level and you’ve just scanned a level 30 Terrormorph, you know to probably run away.
Scanning Structures and Points of Interest
The scan tool is not just for resources and creatures; it helps you navigate and interact with the environment. Here’s how it works for structures and other points of interest:
- Buildings and Outposts: When you come across a structure, scan it to learn what it is. Some will be friendly, others not so much.
- Ships and Shipyards: You can often scan ships to get details about them. This might include their name, type, and who they belong to.
- Points of Interest: Sometimes the scan tool will lead you to hidden locations or interesting spots in the game world. These places often have rewards, special challenges or just provide lore about the area.
Using Scan Data
The information you get from scanning isn’t just for show. Use it to make smart choices. For example, if you scanned a building and found it’s full of pirates, you can change your strategy. Information is power in Starfield!
Upgrading Your Scan Tool
Like any good tool in a Bethesda RPG, the scan tool can be upgraded. Upgrading your scanner makes it much more useful. Here are a few important upgrades to look for:
- Increased Scan Range: This allows you to see things that are far away, meaning you don’t have to walk as far to find things.
- Resource Highlighting: This upgrade makes it easier to pinpoint specific resources, making farming quicker and more efficient.
- Creature Weaknesses: As mentioned, this is invaluable during combat. Seeing weak spots turns tough fights into more manageable ones.
- Analysis Speed: An upgraded scanner analyzes things faster, getting you the information you need more rapidly.
How to Get Upgrades
Scan tool upgrades are often obtained by completing research projects and then crafting at a workbench. Make sure you regularly check your research menu and do the projects that improve your scanning. Look for the science category.
Advanced Scanning Techniques
Beyond the basics, some advanced techniques can greatly improve your exploration experience in Starfield. Knowing these will help you get the most out of your scanner:
Using the Scan Tool for Stealth
The scanner is a great tool for stealthy play. You can use it to scope out an area and identify enemy locations. If you are sneaky enough, you can scan your enemies to get the jump on them. It’s the perfect way to plan your attack or avoid a confrontation.
Scanning for Hidden Items
Sometimes, the scanner can reveal hidden items or containers. These might be tucked away or behind objects you wouldn’t normally see. Keep your scan tool active as you explore, you never know what you might find.
Scanning to Track Progress
The scanner keeps track of how many species, resources, and other unique spots you have found. This can help you complete planet surveys, which often lead to rewards. It keeps you moving forward and provides clear goals to chase.
Troubleshooting Common Issues
Sometimes, your scanner might not work as you expect. Here are a few common problems and their solutions:
- No Highlighted Objects: If nothing is highlighted, it may mean there are no scannable objects in the current range, or you have not upgraded your scanner enough. Try moving to a different area or getting some upgrades.
- Slow Scan Times: This can often be improved by upgrading your scanner. Scan speed upgrades are very helpful, especially if you like to get straight into the action.
- Scanner is Not Recognizing Certain Things: Some items and creatures might need to be scanned from specific angles or certain upgrades. Don’t give up, try moving around and see if that works.
The Scan Tool as a Tool for Knowledge
The scanner is a vital source of knowledge, not just a tool for gathering items or hunting creatures. By using it often you learn more about the universe, its lore, and its secrets. You learn by doing, the more you scan, the more you know.
Utilizing the Scanner in Different Environments
The scan tool has specific uses in various environments:
On Planets
Planets are where you will spend the most time using the scan tool to gather resources, scan alien life, and find hidden locations. Don’t go anywhere without it, and use it often.
In Space
In space, you use the scan tool to learn more about other ships, the resources in asteroids and find space stations. It is just as useful in the vacuum of space as it is on a planet surface.
In Cities and Settlements
The scan tool is less about resources and more about points of interest, and sometimes you can use it to identify certain people and their intentions. Knowing who the friendly NPC are from the bad guys is important in any town or settlement.
Putting it All Together
Using the scan tool is not just a side activity; it’s an essential part of the Starfield experience. If you understand the basics, scan regularly, and improve your scanner, you can explore faster, stay safe, and find everything you need. Don’t underestimate the power of a good scan!
By using the scan tool effectively, you can truly get the most out of the Starfield universe. It’s an amazing tool to help you on your journey, so use it wisely and explore everywhere!
Starfield Exploration! How to use your Scanner to scan Fauna, Flora, Resources and Mining
Final Thoughts
Effectively using the scan tool in Starfield involves a few key elements. Prioritize scanning new flora and fauna for research data. Use the tool often when you land on a new planet, this will boost your progress.
Target valuable resources to ensure you gather what you need. Remember, ‘Starfield how to effectively use scan tool’ is vital for crafting. Efficient scanning makes your journey much more rewarding in the vast universe.

