
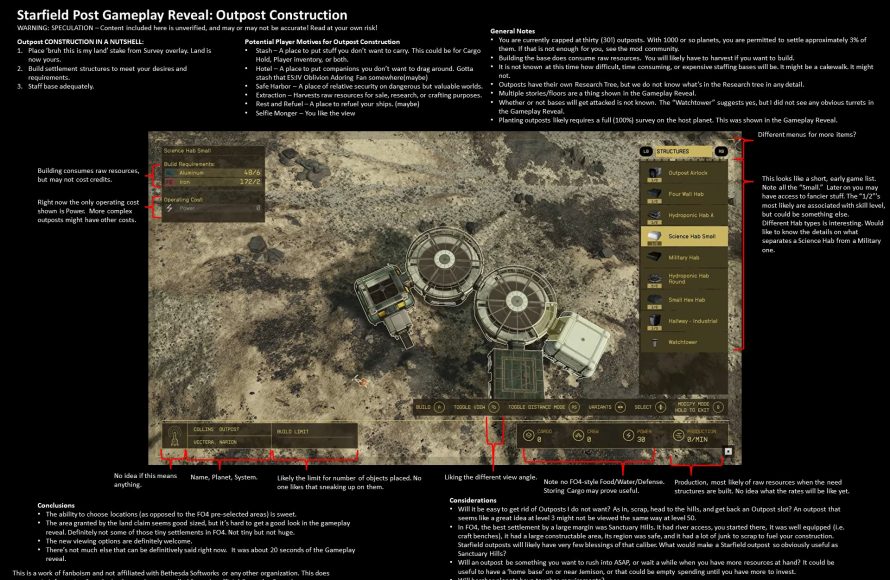
To effectively manage outpost defense in Starfield, build turrets and hire crew with security skills. Regularly check for incoming threats and repair any damaged defenses promptly.
Having trouble with raiders attacking your hard-earned Starfield outposts? It’s a common problem many players face. Understanding how to manage outpost defense effectively can make a big difference in preserving your resources. This guide will provide key strategies and insights to secure your Starfield bases from unwanted visitors.
Don’t let your outpost get overrun. We’ll cover the essential steps you need to take in order to protect your investment and ensure its continued operation. Applying these methods will help you control those challenging situations.

Starfield: How to Manage Outpost Defense
So, you’ve decided to build your very own slice of the galaxy in Starfield? That’s awesome! Building outposts is a ton of fun, letting you mine resources, craft goodies, and even create a cozy home away from your spaceship. But these outposts aren’t just sitting there peacefully – they can get attacked! That’s why understanding outpost defense is key to keeping your hard work safe. Let’s dive into how you can manage your defenses and keep those pesky critters or pirates away.
Understanding the Threat: Who (or What) is Attacking?
Before you can build a fortress, it’s important to know who you’re defending against. In Starfield, your outposts can come under attack from a few different sources, primarily:
- Wildlife: Depending on the planet you’re on, you might encounter hostile creatures. These can range from small, annoying critters to big, dangerous beasts that can cause some serious damage. Knowing your planet’s fauna is the first step.
- Pirates: Space pirates aren’t just looking for ships to plunder; they also like to target outposts for resources and, well, because they’re pirates. These guys will usually come in groups and can pack a punch with their laser weapons.
- Other Factions: Occasionally, you might have problems with other factions, depending on your choices in the game or your standing with those groups. This adds another layer of challenge to outpost defense.
Identifying Risk Factors
Not all outposts are created equal. Some are more prone to attacks than others. Several factors contribute to the risk:
- Planet’s Hostility: A planet teeming with dangerous wildlife is naturally going to have a higher risk than a quiet, barren moon.
- Proximity to Pirate Systems: If your outpost is near a system with a lot of pirate activity, expect to see more raids.
- Resource Richness: Outposts with valuable resources are attractive targets. The more you have to offer, the more likely you are to get targeted.
- Your Level: As you level up, the game scales the difficulty so you will see more difficult opponents and attacks more often.
Essential Defensive Structures and Tools
Now that you understand the potential threats, let’s talk about how to defend against them. The game provides several tools for setting up a good defense.
Turrets: Your Primary Line of Defense
Turrets are your bread and butter when it comes to outpost defense. They are automated weapons that will engage hostile targets. You can find a few different types, each with unique strengths and weaknesses:
- Basic Turrets: These are your starting point. They are decent against standard wildlife and lightly armored pirates. Think of them as your general-purpose defense option.
- Laser Turrets: Effective against shields and can do good damage to most enemies. Great to use against pirates, or anything with energy armor.
- Ballistic Turrets: These turrets will fire physical projectiles, great against unshielded and unarmored enemies. Good to have on hand against those pesky wildlife creatures, or even pirates if they are not well shielded.
- Missile Turrets: These are the heavy hitters, capable of doing massive damage to multiple enemies. They are perfect for dealing with large groups of attackers or stronger enemy types. But they require a good amount of power to operate.
When choosing a turret consider these factors:
- Damage Type: What type of enemies are common in the area and which weapon type is more effective for them.
- Range: The radius in which they are effective.
- Power Needs: Will you have enough power to run them reliably.
Building Placement Strategies for Optimal Defense
Simply placing turrets isn’t enough. Strategic placement is essential for making the most of your defenses. Here are some tips to make sure your outpost is well-defended:
- Perimeter Coverage: Place turrets around the perimeter of your outpost to create a defensive ring. This is your first line of defense and should be the focus of your defensive efforts.
- Elevated Positions: Put turrets on top of buildings or structures. This allows them to fire over obstacles and reach enemies easier. It will also improve their range.
- Choke Points: Place turrets at narrow entrances or passageways. This will create a kill zone and make it harder for enemies to reach your central outpost area.
- Overlapping Fields of Fire: Make sure your turrets cover each other’s blind spots. This ensures no part of your outpost is left unprotected and offers redundancy if one turret fails.
- Consider the Terrain: Take advantage of the natural landscape. Hills, cliffs, or ravines can provide additional defensive advantages.
Powering Your Defenses
Turrets need power to operate. Don’t expect them to work without connecting a reliable power source to them. Here are some options for outpost power generation:
- Solar Arrays: Work well on planets with plenty of sunlight. But are less efficient in cloudy or night environments.
- Wind Turbines: Best for planets with strong winds, but you’ll have to check the wind speed on your planet to see if they are an effective power solution.
- Fuel Generators: Require fuel to operate but are a reliable option in all environments. Requires careful monitoring of fuel levels for consistent output.
- Nuclear Reactors: Most powerful option, but come with a high cost and are not available early game.
Tip: Always have backup generators to avoid turrets shutting down mid-attack. You can link multiple power sources, giving you a robust power grid.
Crew Stations and Their Role in Defense
While not directly defensive structures, crew stations play a supporting role in defense. Crew members assigned to these stations will contribute to the defense of the outpost through support and maintenance. When an attack occurs, they will automatically man the turrets and defend the base. More crew members mean more support, and an increased survivability.
Advanced Defensive Strategies
Once you have the basics down, you can try some advanced strategies to make your defenses even stronger:
Layered Defenses
Don’t rely on a single line of defense. Create multiple layers to make your outpost more difficult to breach. Think of it like an onion, each layer making it harder for enemies to get to the core. For example, set up a perimeter with automated turrets, have elevated turrets overlooking your base, and have crew members manning turrets and additional weaponry within the outpost.
Using Traps and Obstacles
While Starfield doesn’t have conventional traps like spikes or pits, you can use structures to slow down or funnel enemies. Consider building walls or barriers to guide them into kill zones with turrets. Try using structures to create choke points to slow down attacking enemies. Also try to use structures to force attackers to approach from a predictable direction, allowing your turrets to be more effective.
Regular Maintenance and Upgrades
Just like your ship, your outpost needs regular maintenance. Damaged turrets, low power, and outdated defenses won’t be very effective. Take the time to inspect your outposts often. Repair any damaged defenses and keep them running in top shape. As you advance in the game, research and upgrade your turrets and defensive systems. This will allow you to have access to more powerful defenses to manage the stronger attackers that appear.
Utilizing Companion Skills
Some of your companions have skills that will help you with outposts. You can use those skills to improve the outposts. For example, a crew member with the outpost management skill will help increase efficiency and production output. Or a crew member with combat skills will help with defense and maintenance. Make sure you keep the skills in mind when assigning your crew members to various outpost tasks.
Dealing with Attacks
No matter how well prepared you are, attacks are bound to happen. Here’s how to handle them:
Early Warning Systems
Try to pay attention to the world around you. When an attack is about to occur, the game will give you an indication in the game’s UI, giving you time to react. Check your map frequently to see if any attacking parties are near you or are on their way to your outpost. When the attacks happen, the turrets should automatically activate, so be on standby if you are near the outpost or if you are inside it.
Responding to the Attack
- Be Ready to Fight: Don’t expect your turrets to do all the work. Be prepared to jump into the fight yourself. Bring appropriate weapons and armor to deal with a variety of enemies.
- Repair Your Defenses: After the attack, assess the damage. Repair any turrets that were destroyed and replenish any resources that were used in the process.
- Adjust Strategies: If your outpost was breached, analyze what went wrong. Adjust your strategies to address those weaknesses.
Tips and Tricks for Effective Outpost Defense
Here are a few extra tips and tricks that will help you manage your outposts and keep them safe.
- Start Simple: You don’t need to make a massive fortress right away. Begin with a small and basic outpost and gradually expand and improve it over time. Focus on building a strong base with a solid core first, and then add layers over time.
- Experiment: Try different turret types and placements to see what works best for your style and the planet you’re on. Experimentation is key to finding the most efficient setup.
- Plan Ahead: Before setting up an outpost, try to survey the planet to know what threats you will face. If a planet has a lot of wildlife, plan for that. If it is near a pirate system, plan for that.
- Use the Environment: Use the surrounding terrain and environment to your advantage. Use cliffs and valleys as natural choke points to better defend your outpost.
- Pay Attention: Don’t leave your outpost unattended for long periods. Check on them often to make sure they are safe.
Outpost defense is an important part of the game and is very important to keeping your resources and hard work safe. It might seem complicated at first, but the process becomes more manageable as you progress in the game and become more comfortable with the process of building and defense. By following these guidelines, you’ll be able to create outposts that can withstand any threat the galaxy throws at them.
Starfield: How to Defend Your Outposts – The Outpost Fortress
Final Thoughts
Effectively managing outpost defenses in Starfield requires careful planning and resource allocation. Turrets are your primary defense, so place them strategically around your perimeter. Assigning crew members with security skills improves your outpost’s overall defense significantly.
Regularly monitor your resources and repair structures promptly. Starfield how to manage outpost defense ultimately comes down to proactive management, keeping you safe from attacks. You must prioritize these steps to successfully fend off invaders.

