
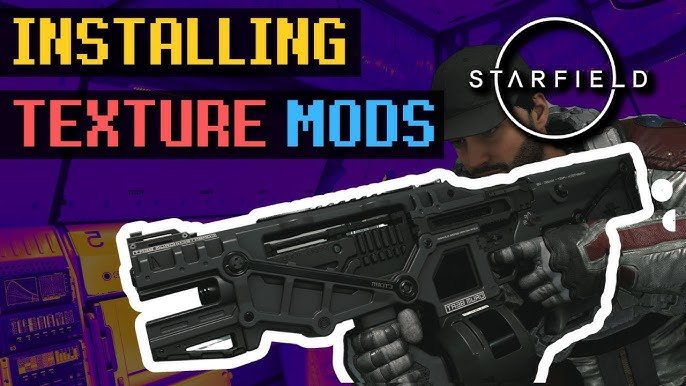
Starfield texture mods installation typically requires placing downloaded mod files into the game’s “Documents/My Games/Starfield” folder, often within a “Data” subdirectory if it exists. Some mods also need additional setup using plugins.
Improving the visual experience of Starfield is possible through texture mods. Starfield texture mods installation can significantly enhance the game’s appearance. Many players want to make their game look even better and that’s where mods help. Knowing the right steps are crucial for an effective implementation. This ensures that all the graphic improvements work seamlessly within the game.

Starfield Texture Mods Installation: A Simple Guide
Okay, space explorers! Ready to make Starfield look even more amazing? Texture mods are like giving the game a fresh coat of paint, making everything from planets to spacesuits look sharper and more detailed. But, sometimes installing them can feel a little tricky. Don’t worry! This guide will walk you through it step-by-step, making the process easy and fun. We’ll cover everything from finding the right mods to making sure they work smoothly in your game.
Understanding Texture Mods
Before we jump into installation, let’s talk about what texture mods actually do. Imagine the game’s visuals like a picture. The texture is like the paper or canvas that the picture is printed on. A better texture means the picture looks clearer and more vibrant. Texture mods do the same thing for your game. They replace the game’s existing textures with higher quality ones, leading to:
- Sharper Details: You’ll see more details on everything, from the cracks on rocks to the stitching on your character’s clothing.
- Vibrant Colors: Colors will look richer and more lifelike, making the game more visually appealing.
- More Realistic Surfaces: Textures can make surfaces look more realistic, like metals that shine or fabrics that appear soft.
Keep in mind that using very high-resolution textures might require a good computer, it will require more resources, so make sure that your system is capable of handling the load.
Finding the Right Texture Mods for Starfield
Now that you know what texture mods can do, let’s find some good ones! Here’s how you can go about it:
Where to Look
- Nexus Mods: This website is a popular hub for game mods and it’s usually the best place to find Starfield mods.
- Other Modding Communities: You can find other places where Starfield modders share their creations, like some forums or subreddits. But, be sure that the source you’re using is reliable and safe.
What to Look For
When choosing a texture mod, consider these factors:
- Compatibility: Make sure the mod is compatible with your current version of the game. A mod made for an older version of the game might not work correctly.
- Resolution: Texture mods often come in different resolutions like 2K or 4K. Higher resolution means better detail, but it also requires more computing power. Think about what your system can handle before downloading a very high-resolution pack.
- User Reviews: Check what other players are saying about the mod. If most people are happy with it, that’s a good sign. You can also see if there are common issues that you need to look out for.
- Specific Areas Covered: Some mods only improve certain textures, like planets or weapons. Make sure it covers the areas that are important to you.
Preparing for Installation
Before we start installing, let’s get everything ready:
Back Up Your Game Files
This is really important. Making a copy of your game files means that you can get back to normal if something goes wrong with the mods. It’s like having a safety net.
Here’s how you can do it:
- Find your Starfield game folder. Usually, it’s in your Steam folder, like:
C:\Program Files (x86)\Steam\steamapps\common\Starfield. - Copy this folder and paste it to a different place on your computer. For example, you can place it on your desktop, and name the folder as “Starfield Backup”.
Download a Mod Manager
Mod managers can make installing and managing mods much simpler. They automatically move the files to the right place, and keep track of which ones you have. A couple of popular mod managers for Bethesda games are:
- Vortex: This is a user-friendly mod manager made by the people at Nexus Mods, it integrates well with their website.
- Mod Organizer 2 (MO2): It is an advanced mod manager that is very popular among experienced modders, because it can install the mods without touching the original game files.
For this guide, we will use Vortex, because it’s easier for beginners.
- Download and install Vortex from its official website.
- Run Vortex, and follow the first setup instructions. Vortex will ask you to find your Starfield game folder.
- Once it is done, you will be ready to start downloading mods directly through Vortex.
Installing Texture Mods with Vortex
Now that everything is set up, let’s dive into the actual installation process using Vortex. This is where the fun begins!
Downloading the Mod
- Go to the Nexus Mods website and find the Starfield texture mod that you want to install.
- Go to the mod’s page, and click the “Files” tab, there you will see multiple files. Choose which resolution of the texture mod that you prefer.
- Click on the “Mod Manager Download” button. This will automatically start the download via Vortex.
Installing the Mod
- Vortex will notify you about the download. Click on “Install” in the notification to start installing the mod.
- Vortex will place the mod into the correct folder, and this will take some time.
- Once it is done, the mod will be in the “Disabled” list in Vortex. Click on the “Enable” button to activate the mod.
Checking for Conflicts
Sometimes, two mods will try to change the same textures, causing the game to behave strangely. Vortex will notify you if there are conflicts between mods. Here’s what to do:
- Read the Warnings: Vortex will tell you which mods are conflicting. Read these warnings carefully.
- Mod Load Order: Vortex lets you change the order of mods. Sometimes, changing the order solves the conflicts, by making sure the preferred texture is loaded last.
- Check the Mod Descriptions: Mod creators sometimes say which other mods may conflict with theirs in the description.
- Do Some Research: If conflicts remain, do some internet searches or go to the mods page to see if other users have faced similar problems, they might have solutions that could help you.
Troubleshooting Common Issues
Even with careful preparation, sometimes you might encounter some issues. Here’s how to deal with some common problems:
Game Crashing
If your game keeps crashing after installing texture mods, try these steps:
- Check for Compatibility: Make sure the mod is compatible with your current game version.
- Reduce the Resolution: Try a lower resolution version of the texture mod, or uninstall some other texture mods if you’re using multiple of them.
- Disable Recently Installed Mods: Turn off the most recent mods you added to see if the crashing stops.
- Revert to the Backup: If nothing else works, restore your game to the backup version, and start again.
Textures Not Changing
If the textures don’t seem to be changing even after installing a mod:
- Make Sure the Mod is Enabled: Double-check that the mod is active in Vortex.
- Check the Load Order: Some mods might require a specific load order to work properly.
- Restart the Game: Sometimes, the game needs to be restarted for the textures to load correctly.
- Check for Conflicts: Check if the texture mod conflicts with other mods that you have installed, especially other texture mods.
Performance Issues
If the game is running slow or choppy:
- Lower the Resolution: Try using lower-resolution textures to reduce the demand on your computer.
- Close Background Apps: Close any unnecessary programs that might be using resources while you are playing the game.
- Upgrade your Hardware: If your computer barely meets the system requirements of the game, you might need to consider upgrading your video card or RAM to play with texture mods.
Tips for a Smooth Experience
Here are some extra tips to make your modding experience even better:
- Read Mod Descriptions Carefully: Mod creators often put important information in the description, like compatibility issues or special instructions.
- Start Small: Try installing a few texture mods at a time. This will make it easier to find the mod that’s causing problems.
- Join Modding Communities: If you have any questions, ask on modding forums or subreddits. There are often helpful users who can give you help.
- Keep Your Mods Updated: If a mod is updated, it is best to update it too, because it often includes bug fixes and improvements, and it also makes it compatible with the new updates of the game.
Advanced Modding
If you get comfortable with the basics, you can begin to experiment with more complex modding methods. Here are some things that you may want to look into:
Manual Installation
If you want to avoid mod managers, you can install mods manually. This involves placing the mod files directly into the game folder. But, this is a more complex method, and we only suggest doing it if you have some modding experience.
Creating Your Own Textures
For the truly adventurous, you can create your own custom textures for Starfield, using tools like image editors and game texture tools. This is a very advanced method, and it takes time and study to learn, but it can bring you even more freedom and customization.
By carefully installing and managing your texture mods, you can make your Starfield experience unique and visually amazing. Have fun exploring space with your enhanced game visuals!
How to CORRECTLY Install Texture Mods for STARFIELD
Final Thoughts
Ultimately, improving visuals with mods greatly enhances the Starfield experience. Players can achieve this by carefully following mod instructions. Remember to back up game files before implementing any changes.
Successfully completing Starfield texture mods installation leads to a more immersive game. Experiment with different options and find what works best for your setup. This process greatly personalizes your gaming.

