Understanding the best controller settings for Tekken 8 greatly improves your gameplay and allows for quicker, more precise inputs during combat.
Frustrated with those dropped combos? Are your rage arts not quite connecting when you need them? A well-configured controller is essential to excel in Tekken 8. This Tekken 8 controller mapping guide will walk you through how to optimize your button layout for peak performance. We’ll explain the functions of all the buttons and give you some tips on popular and effective mappings.
Having a control setup that matches your fighting style is very important. It is an often overlooked component to improving at fighting games. Experiment with different setups to find what works best for you.

Tekken 8 Controller Mapping Guide
Okay, so you’re ready to dive into the action-packed world of Tekken 8, right? Awesome! But before you start landing those awesome combos, let’s talk about something super important: your controller. Having the right button setup can make a huge difference in how well you play. We’re going to explore different ways to map your controller so you can play your best Tekken 8 game.
Understanding the Basics of Tekken Controls
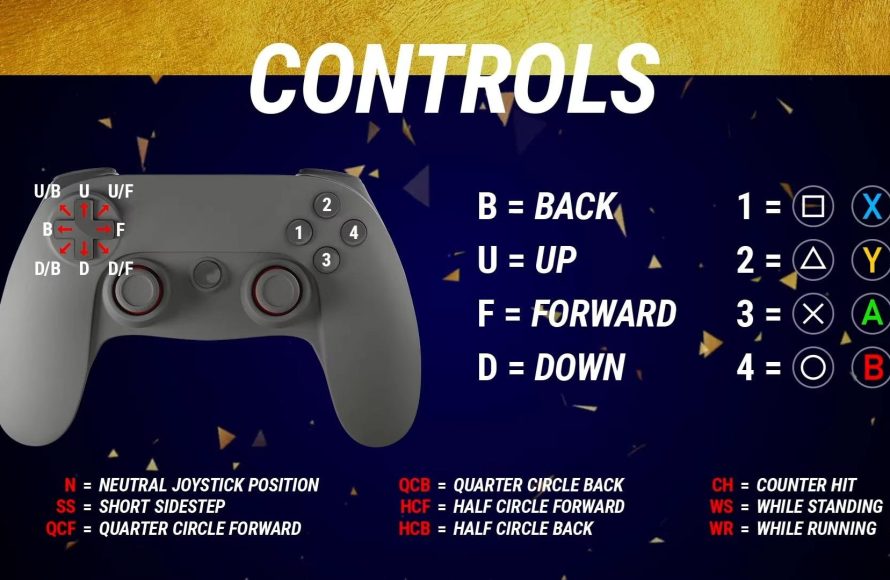
Tekken 8 uses a system that might seem a bit tricky at first, but once you get the hang of it, you’ll be a combo machine! The main buttons you’ll be using are your four limbs: left punch, right punch, left kick, and right kick. These are typically mapped to the face buttons on most controllers (like the X, Circle, Square, and Triangle on a PlayStation controller, or the A, B, X, and Y on an Xbox controller). But here’s the thing – you can change them around to whatever feels best for you!
Default Button Layouts
Let’s take a look at the standard setups. These are what you’ll find when you first start the game, and they’re a good starting point for many players:
- PlayStation:
- Left Punch: Square
- Right Punch: Triangle
- Left Kick: X
- Right Kick: Circle
- L1 : Left Punch + Left Kick (Often used for throws)
- R1 : Right Punch + Right Kick (Often used for rage art)
- L2 : Heat (Used to activate heat moves)
- R2 : Right Punch + Left Kick (Often used for special moves)
- Xbox:
- Left Punch: X
- Right Punch: Y
- Left Kick: A
- Right Kick: B
- LB : Left Punch + Left Kick (Often used for throws)
- RB : Right Punch + Right Kick (Often used for rage art)
- LT : Heat (Used to activate heat moves)
- RT : Right Punch + Left Kick (Often used for special moves)
These default setups work well enough, but they might not be perfect for everyone. Some people might find that having their punches and kicks in different locations makes it hard to pull off those rapid combos. That’s where controller mapping comes in!
Why Customize Your Controller Mapping?
So, why bother changing the buttons? Here’s the deal: everyone has their own style, and what feels good for one person might not feel good for another. Here are some reasons why you might want to think about controller remapping:
- Comfort: Having buttons in positions that feel natural for your hands makes playing more comfortable, especially during long gaming sessions. If your fingers are constantly reaching for awkward positions, you’ll get tired and might make mistakes.
- Faster Input: Reaching buttons faster means you can perform moves faster. When you customize your controller to better suit your fingers, you reduce the extra time it takes to press buttons. This speed can be the difference between winning and losing.
- Complex Combos: Some of Tekken’s combos can be tricky. If your buttons aren’t in the right places, you might struggle to input the correct sequence quickly enough. A good controller setup can make these combos easier to perform consistently.
- Personal Preference: Maybe you prefer to use your index fingers more, or maybe you want a certain type of move on an easily accessible button. Customizing allows you to adapt the game to your own preferences.
Key Mapping Strategies and Ideas
Now let’s jump into some specific strategies for remapping those buttons. These are just ideas, and you should experiment to see what works best for you, but these tips should help you find your perfect setup. These strategies are commonly used by many Tekken players and may give you a competitive advantage.
The “Claw” Grip and Controller Mapping
Some players use a specific way of holding the controller called “claw.” It involves using their index finger to press face buttons instead of the thumb. If you use a claw grip or want to try it, you might benefit from setting your punches and kicks on the shoulder buttons. This can make it easier to do moves where you have to hit several different limb buttons quickly.
Button Combinations for Easier Access
Tekken 8 also has button combinations, such as ‘left punch + left kick’ (often used for throws) and ‘right punch + right kick’ (often used for rage arts), and ‘right punch + left kick (often used for some special moves). By default, these combinations are often mapped to shoulder buttons (L1/LB and R1/RB), but you can change this! If you have smaller hands or find it hard to reach the shoulder buttons, consider these options:
- Mapping Combinations to Face Buttons: You could map the combo buttons (like left punch + left kick) to another unused face button.
- Mapping Combinations to Triggers : You can also map these combinations to the trigger buttons.
Mapping Heat Activation Button
Tekken 8 introduces the heat mechanic, and you’ll need quick access to the Heat Activation button (L2 or LT by default). If you find yourself struggling to activate heat in time, consider mapping it to another convenient button, like a face button.
Specific Button Mapping Examples
Let’s get more specific and talk about some mapping setups that players have found useful. Remember, you can modify these ideas to fit your unique style.
Example 1: Prioritizing Quick Punches and Kicks
If you like playing characters that use fast and close moves, then you may prioritize your punch and kick mapping as mentioned below:
- PlayStation:
- Left Punch: L1
- Right Punch: R1
- Left Kick: Square
- Right Kick: Triangle
- L2 : Left Punch + Left Kick (Throws)
- R2: Right Punch + Right Kick (Rage Art)
- X: Right Punch + Left Kick
- Circle: Heat
- Xbox:
- Left Punch: LB
- Right Punch: RB
- Left Kick: X
- Right Kick: Y
- LT: Left Punch + Left Kick (Throws)
- RT: Right Punch + Right Kick (Rage Art)
- A: Right Punch + Left Kick
- B: Heat
In this configuration, the shoulder buttons L1/LB and R1/RB are used for quick punches, and the face buttons are used for kicks. The face button A or X and B or Circle is used for some special moves and heat activation, respectively. The combinations are on the triggers to keep the shoulder buttons available for punches.
Example 2: Focus on Throws and Special Moves
If your character relies heavily on throws and specials, then you may want to prioritize these options:
- PlayStation:
- Left Punch: Square
- Right Punch: Triangle
- Left Kick: X
- Right Kick: Circle
- L1 : Left Punch + Left Kick (Throws)
- R1: Right Punch + Left Kick (Special Moves)
- L2 : Right Punch + Right Kick (Rage Art)
- R2: Heat
- Xbox:
- Left Punch: X
- Right Punch: Y
- Left Kick: A
- Right Kick: B
- LB : Left Punch + Left Kick (Throws)
- RB: Right Punch + Left Kick (Special Moves)
- LT: Right Punch + Right Kick (Rage Art)
- RT: Heat
With this setup, you have your throws mapped to the L1/LB and special moves mapped to R1/RB, keeping your face buttons free for normal attacks. The heat activation is mapped to a trigger which is easier to press.
Experimenting and Finding Your Perfect Setup
The most important thing to remember is that there’s no single ‘best’ controller mapping. You need to try out different setups and see what works best for you. Don’t be afraid to spend some time in practice mode experimenting with different combinations of buttons. The game allows you to make changes and immediately try them out. Do that! After you test out different configurations, stick with what is comfortable and improves your performance.
How to Change Your Controller Mapping in Tekken 8
Changing the button layout is easy. Here’s how you do it:
- Go to the main menu.
- Select the “Options” or “Settings” menu.
- Look for something like “Controller Settings”, “Button Configuration,” or “Control Customization”. The name may be slightly different depending on the platform you are using.
- You will usually see a display of the default button mapping. From here you will be able to set each button to whatever action you like.
- Change the buttons as you desire. Remember, you can try out different configurations by experimenting in practice mode.
- Save your changes. If you change your mind later, you can easily adjust them again.
Practicing with Your New Mapping
Once you’ve made the changes, don’t expect to be a master right away. Spend some time in the practice mode getting used to the new layout. Start with basic moves and combos, and gradually work your way up to more difficult techniques. The key here is muscle memory. The more you practice with the mapping, the more natural it will feel. If you use your controller consistently, you’ll start executing your moves much faster and more accurately.
Controller mapping in Tekken 8 is all about making the game work best for you. By understanding the basic controls, exploring different mapping strategies, and spending time practicing, you will certainly improve your game. So get out there, try out some different setups, and become the Tekken champion you were meant to be!
BEST Controller settings for Tekken 8🔥🔥#tekken8 #rtfiscool #settings
Final Thoughts
Experimenting with different button setups can significantly impact your gameplay. Find what feels comfortable and efficient for your specific play style. This guide provides a starting point for creating a personalized setup.
Proper Tekken 8 controller mapping is key to improving your performance. Consider your most frequent moves and assign them to accessible buttons. It’s essential for executing complex combos.
Ultimately, a good controller layout boosts reaction time and execution. Use the tips from this Tekken 8 controller mapping guide to find what works best for you. Practice makes perfect.

