
Repairing your Sims 4 game checks for and fixes corrupted or missing game files, which can resolve crashes, glitches, and other gameplay issues.
Ever found your Sims acting unusually strange, or perhaps the game just keeps crashing? It’s a frustrating experience, and that’s where the question, “what does repairing my sims 4 game do” comes into play. When you initiate a repair, the game’s files get a thorough check-up.
This process replaces any files that are broken or absent with healthy versions from the original game installation. Think of it as a quick cleanup for your digital neighborhood. It often fixes a multitude of problems, helping you get back to playing smoothly.

What Does Repairing My Sims 4 Game Do?
Okay, so you’re having trouble with your Sims 4 game. Maybe your Sims are walking through walls, or your game keeps crashing, or perhaps a new expansion pack is acting a little weird. Before you start panicking and thinking you need a whole new computer, there’s a super helpful tool you should try first: the “Repair” option! But what exactly does repairing your Sims 4 game do, and how can it make things better? Let’s explore it all in detail.
Understanding the Basics: What’s Really Going On?
Think of your Sims 4 game like a giant, complicated puzzle. All the different pieces – the game files, the expansion packs, the mods, the custom content, and even the saved game files – they all have to fit together just right for everything to work perfectly. Sometimes, these puzzle pieces can get a bit jumbled. They might get damaged or corrupted, which makes the game misbehave. It’s like when you accidentally bend a piece of a jigsaw puzzle – it doesn’t quite fit right anymore and causes problems! That’s where the repair function comes to the rescue.
When you use the repair option, the game checks to see if all these pieces are in place and doing their job correctly. If the game finds any pieces that are missing or damaged, it replaces them with fresh copies of the original files.
The Repair Process: A Closer Look
The game repair isn’t magic, even though it can certainly feel like it when your game is working smoothly again! The process involves a few key steps:
Verification: The repair tool first looks at all your game files and compares them with what they should look like. It’s like a librarian checking to see if all the books are on the right shelves and in good condition.
Identification: If any file is not as it should be, the repair tool identifies that file as problematic. It keeps track of all the game pieces that need to be replaced or fixed.
Replacement: Finally, the repair tool downloads new, clean copies of the bad files from the servers and puts them into your game folder, replacing the faulty ones. It is like getting a brand-new book to replace one that was torn and damaged.
This repair process is designed to fix common issues related to game files, helping you get back to playing with your Sims!
When Should You Repair Your Game?
So, how do you know when it’s time to hit that repair button? It is like knowing when a toy needs a little TLC! Here are some scenarios:
Game Crashing: Your Sims 4 game suddenly closes or freezes while playing.
Graphical Glitches: You see weird lines, distorted textures, or missing objects in your game world.
Strange Sim Behavior: Your Sims might be doing things they aren’t supposed to, like walking through objects, getting stuck in place, or forgetting how to eat.
Content Issues: New expansions packs, kits, or stuff packs don’t seem to work as intended, or they are not showing up in your game.
Mod Conflicts: Sometimes, mods can cause problems in your game. Repairing your game after removing mods is a good step to address these issues.
After an Update: If you’ve just updated the game and things seem a little off, a repair can sometimes resolve conflicts that arose during the update process.
Performance Problems: Your game feels slow or choppy, even when your computer is otherwise running fine.
If you encounter any of these issues, a game repair is a fantastic first step to troubleshooting the problem.
What Repair Doesn’t Fix
While the repair tool is very useful, it’s not a magic solution for everything. There are some situations where repairing your game won’t help. It’s like using a band-aid on a bigger cut; it might not be enough. Here’s what repairing does not address:
Custom Content (CC) Issues: If a piece of custom content – like a custom hairstyle or furniture – is causing the problem, the repair tool cannot fix it. This is because custom content is not part of the base game files. You’ll need to find and remove the faulty CC yourself.
Outdated Mods: Mods that are not compatible with the current game version can cause issues. The repair function can’t fix those, you’d have to update them or remove them if they aren’t updated.
Hardware Problems: If your computer is struggling to run the game because it doesn’t meet the system requirements, repairing won’t help. You may need to upgrade your computer or adjust your in-game graphics settings.
Save Game Corruption: While repairing can help prevent future issues with your save files, it cannot repair a save file that’s already badly corrupted. If a saved game is damaged, you may need to start a new game.
Internet Connection Issues: If your internet connection is unreliable, it might interfere with game updates or the download process of the repair function. The repair cannot fix your unstable internet connection.
Operating System Issues: Sometimes, issues within the computer’s operating system can affect how a game runs. Repairs won’t solve this problem, as that falls outside of the game’s file system itself.
It is important to understand that the repair function only addresses the game’s core files.
How to Actually Repair Your Game: A Step-by-Step Guide
Now that you know what repairing does, let’s look at how you actually do it. It’s super easy! Here’s a quick guide to help you through the steps.
1. Close the Game: First, make sure your Sims 4 game is completely closed. It is important to close it, because the repair process cannot be performed if the game is actively running.
2. Open the Origin or EA App: Launch the Origin client (for older versions) or the EA app. This is where you launch your game from.
3. Navigate to the Game Library: In the application, go to your game library, where you can see all the games you own.
4. Find Sims 4: Find The Sims 4 in your game library. If you have a lot of games, use the search box.
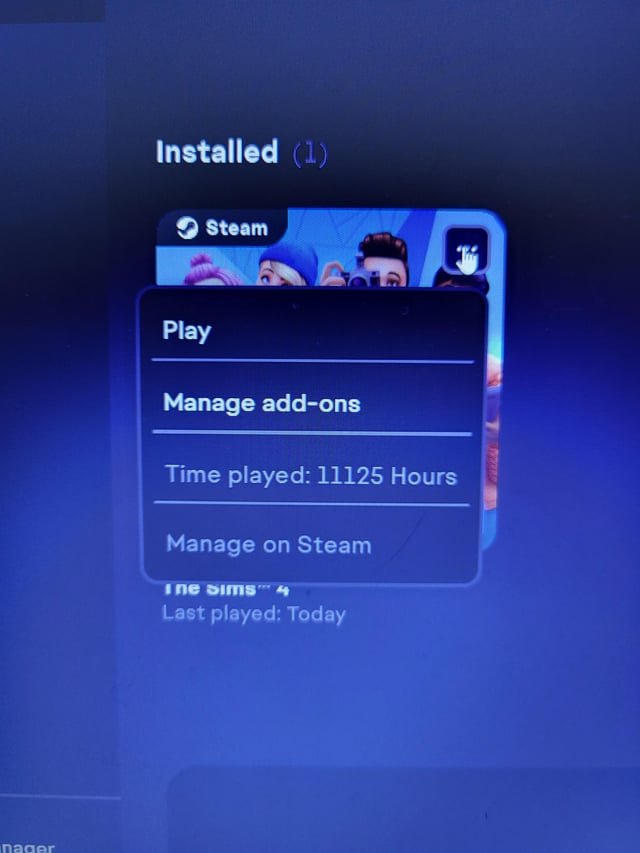
5. Click the Three Dots or Manage Button: Next to the Sims 4 game icon, you will see either a button with three dots (in the EA app) or a ‘Manage’ button. Click on that.
6. Select “Repair”: In the menu that pops up, find and click the “Repair” option.
7. Wait for the Repair Process: Once you start the repair, the application will check all of your game files. This process can take anywhere from a few minutes to a longer period depending on your computer and your internet speed.
8. Restart the Game: Once the repair is complete, start your game and check to see if the problems are gone.
It is very important to wait for the repair process to finish, don’t interrupt it before that.
Important Tips for Before and After a Repair
To get the most out of your game repair, follow these extra tips:
Backup Your Saves: Before repairing, make sure you back up your save game files to a safe place, just in case something goes wrong (though this is unlikely!). This is super easy! You can find your save files in your computer’s ‘Documents’ folder under the ‘Electronic Arts’ and then ‘The Sims 4’ folder. You can copy them to a safe location.
Disable Mods: Temporarily turn off any mods you have installed before you run the repair. This will help rule out mod conflicts that can cause issues during repair.
Restart Your Computer: After the repair is complete, restart your computer to ensure all changes take effect.
Check for Updates: After the repair, check to see if there are any new game or expansion pack updates available. You want to keep your game fully updated for the best experience.
Test in a New Save File: Create a new save file after repairing to make sure the issue is resolved. This also helps determine if the issue was specific to your previous save file.
Re-enable Mods One-by-One: If you have mods, turn them back on one at a time, playing the game briefly between each one. This can help you spot if a specific mod is the cause of your issues.
Be Patient: The repair process can take some time, especially if there are many files to fix or if your internet connection is slow. It is very important to let the repair function work.
Repairing Different Sims 4 Versions
The core repair process is the same for all versions of the game. Whether you are running the base game, playing with expansion packs or kits, the repair option in Origin or EA App remains the same. The most important thing is to make sure you are logged in with the correct EA account associated with your game.
Repairing and its Impact on Expansion Packs and DLCs
When you repair your Sims 4 game, it also checks the integrity of your expansion packs, game packs, stuff packs, and kits. Any damaged or missing files in these DLCs will be replaced. This means that you can often resolve issues you might face with your extra content by running a repair. It will ensure all the purchased content is properly installed and working with the base game, giving you a better, more consistent game experience.
Repairing vs. Reinstalling
You might be wondering, if repair replaces game files, what is the difference between a repair and a complete reinstall? Well, a repair is usually much faster. It is designed to target only the problematic files and doesn’t require you to uninstall the game. Reinstalling, on the other hand, removes all the game files and requires you to download and install the entire game and your purchased DLCs again. This takes a lot of time. So, repairing is the preferred option for most issues because it saves time and data usage. Try the repair function first, and if the issue persists, then a reinstall might be considered as the next step.
Common Errors During the Repair Process
Sometimes, errors may occur during the repair process. If you encounter an issue, make sure your internet connection is stable and you have sufficient space on your computer’s hard drive. Restarting your computer and launching the EA app as an administrator might help resolve common errors during the repair process. If the problem continues, reaching out to EA support for further assistance might be helpful.
In simple terms, repairing your Sims 4 game is like giving your game a quick check-up to make sure all its parts are working the way they should. It is a helpful tool that can fix many common problems and get you back to playing your game smoothly. It’s definitely worth trying before taking more drastic measures like uninstalling and reinstalling the game.
Using the repair tool is a straightforward process that most players can do. By understanding when to use it and how it works, you will be better equipped to deal with any issues that might pop up in your Sims 4 game. Remember to follow the steps carefully, back up your saves, and enjoy a smoother gameplay experience!
It’s always a good idea to start with a game repair if you have any problems with your Sims 4 game. It’s easy, it is safe, and it might just be the quick fix you need to get back to creating awesome stories for your Sims!
Sims 4 – How To Repair Your Game
Final Thoughts
Repairing your Sims 4 game fixes corrupted or missing files, often caused by mods or glitches. This action effectively restores the game to its original state, removing potential issues. It’s a must for troubleshooting when experiencing crashes or strange behavior.
Essentially, “what does repairing my sims 4 game do” is a process that checks game files against their official versions. This process replaces broken or modified files with fresh, working ones, which improves game stability. Repairing the game fixes many issues.

