For Razer Game Booster on PC, select the specific game you want to optimize and choose the ‘Boost’ option for that particular title. Then, you should select any unnecessary background apps and close those programs before starting your game.
Tired of lag and poor performance ruining your gaming experience? Many gamers wonder what to select for razer game booster on pc. The answer isn’t complicated, but knowing the right steps makes a difference.
You have to pick the game, and then enable its boost feature. Next, carefully close apps that use system resources, these actions will greatly improve your gaming performance. With these simple selections, you should notice a difference.

What to Select for Razer Game Booster on PC
Okay, so you’ve got Razer Game Booster, and that’s awesome! It’s like giving your computer a pep talk before a big game. But, there are lots of options in Razer Game Booster, and it can feel a bit like trying to choose your favorite candy in a giant store. Don’t worry, we’re going to go through it step-by-step to make sure you pick the best settings to make your games run smoother. We’ll talk about what each setting does, and why you might want to pick it. Ready? Let’s dive in!
Understanding the Basics: What Does Game Booster Actually Do?
Before we jump into the settings, let’s talk about what Razer Game Booster does. Think of it as a super-organized coach for your PC. It does a few key things:
- Closes Unnecessary Programs: Imagine you’re trying to focus on a game, but there’s a bunch of other apps and programs running in the background, like a noisy crowd. Game Booster quiets that crowd by closing those extra programs, freeing up your computer’s power.
- Optimizes Settings: It adjusts some of your computer’s settings to make sure your game gets the most juice. It’s like giving your game the first place position in line to get resources.
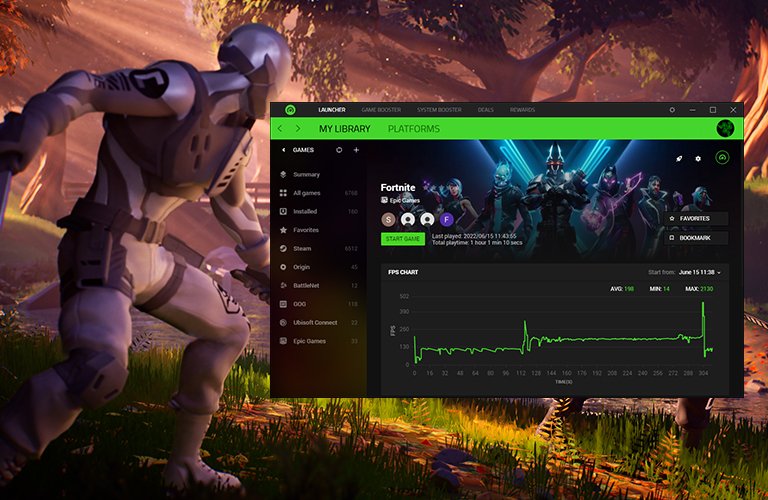
- Keeps Track of Performance: You can see how well your game is running with the FPS (frames per second) counter. This helps you know if the settings you’ve picked are working well.
So, essentially, Razer Game Booster makes sure your PC gives its all to your game, leading to smoother gameplay. Now, let’s get into the juicy bits: what settings should you select?
The “Boost” Tab: Your PC’s Power-Up
The “Boost” tab is where most of the magic happens. This section is all about making your PC faster while playing. Let’s go through the main parts of it:
System Boost Options
These options are like commands that tell your computer exactly how you want it to handle resources. Here’s what they mean and which ones to select:
- Boost CPU: Your CPU is like the brain of your computer. Selecting this option tells Razer Game Booster to focus all the brainpower on your game. Usually, it’s a good idea to keep this turned on, especially if you have a lot of background tasks running while gaming.
- Boost RAM: RAM is your computer’s short-term memory. Boosting it means it has more space to quickly handle game data. Turning this on can reduce lag.
- Boost GPU: Your GPU is responsible for the graphics you see on the screen. Boosting it gives your games the visual power they need. A definite yes to keep this on when gaming.
- End Unnecessary Processes: This is like the coach telling players that aren’t playing to sit on the bench. When turned on, Razer Game Booster will end all those extra programs. This is almost always a good thing to select, as it clears up resources for your games.
Recommendation: Keep all of the System Boost options turned on for best results.
Game Launch Options
These options determine how your game starts up with Razer Game Booster settings.
- Auto-Boost on Game Launch: This is the auto-pilot for your game booster. When enabled, Razer Game Booster will automatically apply the boost settings as soon as you start your game. Select this option on to have the game booster do it’s job without thinking about it.
- Close Background Processes on Game Launch: It’s pretty much the same as the system option to end unnecessary processes but it only applies when you launch a game. Select this option to on if you want to get the most optimal performance out of your game when launching.
Recommendation: It’s usually a good idea to select both of the Game Launch Options for the best performance.
Advanced System Boost
This is where you have a more granular control over your game boost. Let’s see what to pick here:
- Disable Windows Defender: Windows Defender is a security program that protects your computer. Disabling it can give a little performance boost but may also reduce your computer’s security. It’s generally recommended to keep this off unless you are facing very extreme performance problems.
- Disable Windows Updates: Windows Updates are important to keep your computer updated and safe. Selecting this option to disable them may result in performance gains, but it also leaves your computer vulnerable to security threats. It is almost always recommended to keep this off.
- Disable System Sounds: System sounds can cause small interuptions on your games. If you want your game experience to be as smooth as possible, select this on, otherwise keep it off.
- Disable Mouse Acceleration: Mouse acceleration means that the distance your cursor moves on the screen is affected by how fast you move your mouse. This can affect how you aim in games. If you want your mouse movement to be consistent, turn this on.
- Game-specific settings: This allows for settings to be configured per-game. If you want different boosts for different games, you can use this setting.
Recommendation: Leave the “Disable Windows Defender” and “Disable Windows Updates” options turned off for the best security. Turn “Disable System Sounds” on or off based on your preference. Keep “Disable Mouse Acceleration” on if you want consistent mouse movements while playing.
The “Diagnose” Tab: Checking Your PC Health
The “Diagnose” tab isn’t about settings you select, but it’s vital for understanding how your system is doing. Think of it as a doctor’s check-up for your PC. It helps you spot potential problems that can slow down your games. Here’s how to use it:
- Scan for Potential Issues: Click the “Scan” button. Razer Game Booster will check your system for things that might be causing issues like background processes that are taking up too much power, outdated drivers, or fragmented hard drives. It gives you a report of what it finds.
- Follow Recommendations: Once the scan is done, you’ll get a list of things you can fix. Follow the recommendations made by Razer Game Booster. For example, it might suggest closing a program that’s running in the background or updating a graphics driver.
Recommendation: Run a scan regularly, especially if your game performance isn’t great. Doing it after some big changes to your computer setup can also be beneficial.
The “Tools” Tab: Extra Helpers
The “Tools” tab has additional features that go beyond just boosting your game. Let’s see what they do and how to use them:
Game-Specific Tools
These tools are designed to help improve your gaming experience:
- FPS Counter: An FPS counter shows you how many frames per second your game is running at. This can help you make sure that your game is running smoothly. The higher the FPS, the smoother the game. Select this on if you want to keep track of your game’s performance.
- Screenshot/Recording Tool: If you are into making videos, you can use this tool to record your gaming sessions, or to take a quick screenshot when you made a cool play. The selection is purely based on your need to record or screenshot games.
Recommendation: It’s a great idea to keep the FPS counter selected on so you can track performance of your games. The other tools are optional, based on what you need.
System Tools
The system tools option gives you more control over your windows settings:
- System Settings Optimizer: This option helps you to improve some Windows settings. Running this will most likely have a positive effect on your game performance.
- Defragmenter: Think of your hard drive like a bookshelf. Over time, your computer stores files in different places, not in order. It’s like having books randomly spread out. The defragmenter puts them in order, making things faster. This can greatly improve loading times for games on mechanical hard drives.
- Driver Updater: Outdated drivers can cause many problems with game performance. The driver updater helps you to update your device drivers. Usually it is recommended to keep your drivers updated.
Recommendation: Run the system settings optimizer to make sure that everything is set correctly. Using the defragmenter regularly can also improve performance, especially if you use a mechanical hard drive. Keeping your drivers up to date using the driver updater is also a must.
Customizing Your Game List
Razer Game Booster automatically detects games on your PC. You can add them manually as well. This allows you to keep all your games in one place. You can also rename your games if you like!
Recommendation: Keep your game list updated so you can quickly launch games and have Razer Game Booster automatically optimize settings.
Advanced Settings: Diving Deeper
If you’re comfortable with advanced options, you can change some of the core behaviors of Razer Game Booster. However, these options are generally not needed to get good performance. They are useful if you understand them.
- Boost Profile: This is a setting where you can set up a profile that controls how Razer Game Booster handles performance. This is for more advanced users who want to fine-tune their system.
- System Tray Settings: The Razer Game Booster icon appears on your system tray. This allows you to control if it starts automatically, and if it minimizes when you start a game. Adjust these settings as per your preference.
- Notifications Settings: Razer Game Booster will sometimes display notifications. These can be warnings or errors. You can select what notifications you see. It is generally recommended to keep all notifications on, to keep you aware of any possible errors.
Recommendation: If you are a more advanced user, you can explore the more advanced settings. However, the default settings are usually good enough for most people.
Choosing the correct settings in Razer Game Booster doesn’t need to be difficult. By understanding each of the settings and turning on the appropriate ones you can make sure your computer is in top shape for gaming. Remember to keep your drivers updated, use the diagnose tab regularly and keep an eye on your FPS. With these tips, you’ll be having a great time playing your games in no time!
Razer Cortex Game Booster Best Settings For GAMING! (Best Game Booster For PC)
Final Thoughts
To optimize your gaming, prioritize closing background apps. Next, select the game you wish to boost. Focus on the game booster settings for enhanced performance.
Consider disabling unnecessary services. Adjust visual effects for smoother gameplay. Remember, less background activity means more resources.
Finally, what to select for razer game booster on pc ultimately depends on your game. Experiment with each setting for your best results. Adjust and refine to get maximum boost.

