
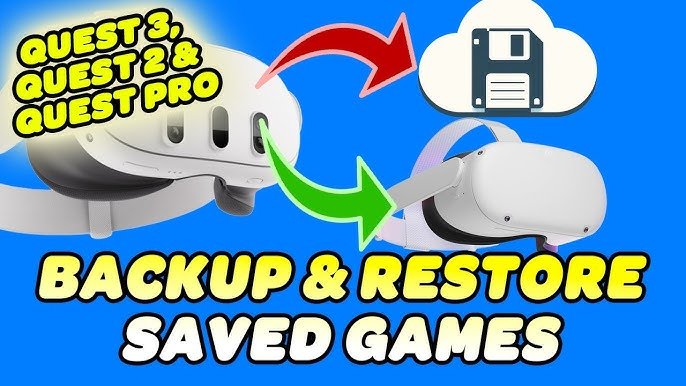
Yes, you can transfer games from Quest 2 to Quest 3; your purchased games are typically tied to your Meta account, not the specific headset.
So, you’re wondering, can you transfer games from Quest 2 to Quest 3? That’s a great question many are asking before making the upgrade. The good news is that generally, you won’t lose access to your digital library when switching between headsets.
Your purchases are linked to your Meta account, which means your games should be ready to download on your Quest 3 after setup. This makes the transition from one device to the other fairly straightforward, and you will be able to pick up right where you left off.

Can You Transfer Games from Quest 2 to Quest 3?
So, you’re excited about your brand new Meta Quest 3, and you’re probably wondering if you can bring all your favorite games with you from your old Quest 2. Good news! For the most part, the answer is a big, happy yes. Meta made it pretty simple to move your games, but there are a few things you should know. Let’s get into all the details so you can get back to gaming in virtual reality.
How Game Transfers Work
The great thing about the Meta Quest ecosystem is that your games aren’t tied to the specific headset. Instead, they’re linked to your Meta account. Think of it like this: your games are digital books on a digital bookshelf, and your Meta account is the bookshelf itself. You can use that bookshelf on different devices, including your Quest 2 and Quest 3. So, as long as you’re using the same Meta account, you generally can get your games on your new headset.
The Digital Library Concept
Your Meta account stores all the information about the games you’ve bought on the Meta Quest store. This “digital library” is key to accessing your games across different Meta VR headsets. It means you don’t need to repurchase games you already own when you upgrade. It is very convenient for players. It saves you money, and lets you start gaming with all your favorite titles immediately after setting up your new device.
Automatic Game Access
When you set up your Quest 3, and log in with the same Meta account that you used on your Quest 2, it will automatically identify the games you have purchased. You will see them in your library, ready for download on the new headset. This is very simple and user friendly. The process is designed to be smooth. It helps people move from one headset to another without extra hassle.
The Process of Transferring Your Games
Moving your games isn’t like physically moving something. It’s more like installing them again from your online account. Here’s a breakdown of how it typically works:
- Set Up Your Quest 3: First, you need to set up your brand new Quest 3. Follow the on-screen instructions, and connect it to your Wi-Fi network.
- Log into Your Meta Account: During setup, you’ll be asked to log in to your Meta account. Make absolutely sure you use the same account that you used on your Quest 2. This account is where all your game licenses are stored.
- Access Your Library: Once you’ve completed the setup and are logged in, you’ll see a menu to access your digital library.
- Download Your Games: Browse your library and start downloading the games you want to play on your Quest 3. Keep in mind that you need a stable Wi-Fi connection, and it might take time depending on the size of the games.
Step-by-Step in More Detail
Let’s walk through the steps with a little more detail so you’re super clear on the process:
- Power Up and Initial Setup: Turn on your Quest 3 and get through the basic setup prompts. This includes connecting to your WiFi, and setting up your play space.
- Log In With Your Meta Account: The most crucial step here is to log into your headset with the same email, and password that you used on the Quest 2. Verify that you have typed correctly. If you made a mistake, you should correct it. Otherwise, you won’t find your games.
- Navigate to Your Library: Once you’re on the home screen, look for the “Library” icon. It’s usually represented by a small bookshelf or collection of icons. Click on it.
- Browse Your Games: Within your library, you’ll see a list of all the games, and applications you’ve purchased. Those that are installed will have a ‘play’ button and those not installed will have an ‘install’ button.
- Install Games: Select the game or applications you wish to play, and hit the download or install button. The game will download to your headset. The process time will depend upon the size of the game.
A Note about Cloud Saves
Most games also utilize cloud saves. This means that when you download and play your games on your Quest 3, your progress, achievements, and any customized settings will generally carry over from your Quest 2. You might need to allow the game to sync with the cloud upon the first launch, but that’s usually very easy.
Exceptions and Potential Issues
While most games transfer smoothly, there are a few exceptions you might encounter. It’s helpful to be aware of these potential situations:
App Compatibility
While the vast majority of games work flawlessly on both Quest 2 and Quest 3, you might encounter some exceptions. Some developers might not make their older games compatible. However, this is rare. If you do find a game not working, check the Meta store or the game developer’s website for more information.
Cross-Buy Titles
Some games are labeled as “Cross-Buy” titles. This means if you bought it on the Rift store, you’ll get it on the Quest store for free, or vice versa. This can be helpful if you have the original PC VR version of a game. Double-check if your game is cross-buy. This way, if you own it on a different platform, it can be available for free on your Quest 3. This can save you some money.
Third-Party Apps and Sideloaded Content
If you’ve sideloaded any apps or games onto your Quest 2 using a PC, those might not automatically transfer. Sideloading is the practice of installing apps that are not from the official store. You’ll likely need to sideload them again onto your Quest 3 using a similar method. The process might be a little complex compared to the standard game transfer process. Keep in mind that this is a more advanced process and if not done carefully, it may cause issues.
Space on your Quest 3
You must make sure that you have enough space in your Quest 3. The size of each game will vary. Check the size of the games you intend to download and compare it with the remaining space on your new device. To install games, there should be enough space to accommodate them. Otherwise, the download or install process may fail.
Game Updates
Sometimes, after getting a new headset, you need to download updates for your games, to make them compatible with new hardware. So, if you encounter a situation where the game doesn’t start, then always check if there are any pending updates. Once you download these updates, your game will most probably start without any issues. This is a normal process, and it applies to all gaming platforms as well.
Understanding Different Meta Accounts
Using the same Meta account is extremely important. Let’s explore some of the situations that you need to be aware of, so that you have no issues in accessing your library.
Same Account is Key
If you accidentally create a new Meta account on your Quest 3 instead of logging in with the old one, you won’t see your existing games. It’s super important to double-check the email and password you’re using. Always log in with your correct account. This will save you headaches later. If you need to reset your password, you should do that instead of creating a new account.
Family Accounts
If multiple people in your family use Meta Quest headsets, you might have separate Meta accounts for each person. This means that games bought on one account cannot be transferred to another. Everyone needs to log into their own accounts to see their respective libraries. There are also options for family sharing on Meta platforms, but that is a different topic for discussion.
Tips for a Smooth Transfer Process
Moving your games to a new headset can be very simple. Still, we have included some extra tips that can make it even more hassle free for you.
Make Sure You Have Enough Wi-Fi
Downloading games can consume a lot of data. Make sure your Wi-Fi is fast and reliable before you begin. A good stable internet connection will prevent interruptions, and make the download process faster.
Be Patient with Downloads
Large games can take a while to download and install. The download time also depends on your internet speed. Be patient and don’t interrupt the process. You can always do something else in the meantime, while the installation continues in the background.
Check for Updates
After installing a game, check if there are any updates available before launching it. Updates can add new features and bug fixes. They can also optimize the game for your new headset. A well-updated game usually provides a better user experience.
Backup your Data
While the cloud saves are great, it doesn’t hurt to have local backups of your progress and important saves. This will ensure that your progress is never lost. If needed, you can always restore the data from your backup.
Keep your Quest 2
Before selling your Quest 2, or gifting it to someone else, it is best to have everything moved to your Quest 3. This helps you in ensuring that all the required information or data is moved to your new device without any loss. It is always good to have a backup plan.
Moving your games from Quest 2 to Quest 3 is straightforward for the most part, and with a little care you should have no issues. You can generally carry all your games over to your new device seamlessly by signing in with the same Meta account. Always be aware of app compatibility, make sure you have a stable wi-fi connection, and be patient with game downloads. If you follow the steps mentioned above, you can move to your new Quest 3 and continue playing your favorite games with no issues.
How to Share Quest Games Between Two Headsets! APP Share Gameshare setup guide.
Final Thoughts
Yes, you can transfer games from Quest 2 to Quest 3. Your purchased titles stay linked to your Meta account, not a specific device. This means you simply download them again on your new headset.
Therefore, the process is straightforward: log into your account on the Quest 3 and access your library. You can then re-download all compatible games. The transfer is a must for a seamless transition.
So, you absolutely can transfer games from quest 2 to quest 3 with very little effort.

