
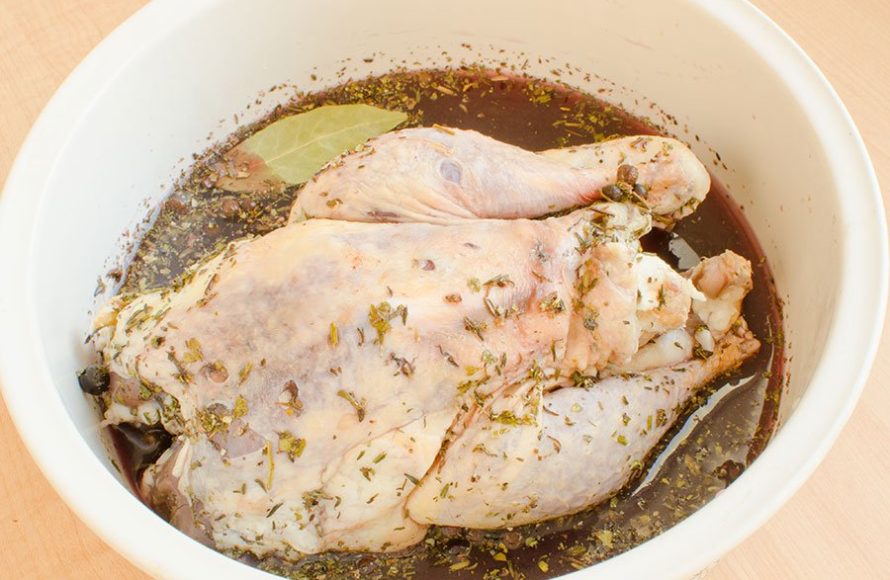
For best results, brine game hens for 4 to 8 hours in the refrigerator.
Want incredibly juicy and flavorful game hens? The secret lies in brining. But, many wonder, how long to brine game hens for that perfect result? Getting the timing right is crucial to avoid over-salting or under-seasoning.
Brining for too short a time may not allow sufficient moisture absorption. Leaving them too long can cause the meat to become unpleasantly salty. So aim for the sweet spot.

How Long to Brine Game Hens: A Complete Guide
Okay, so you’re ready to cook some delicious game hens, and you’ve heard that brining them is the secret to juicy, flavorful meat. You’re right! Brining is a fantastic technique, but figuring out how long to brine them can feel a little tricky. Don’t worry, we’re here to break it all down for you. We’ll go through the ins and outs of brining game hens, from why it works to the perfect timings for the best results. Let’s get started and make sure your game hens are the talk of the dinner table!
What is Brining and Why Do It?
Before we dive into timing, let’s quickly chat about what brining actually is. It’s basically a fancy way of saying we’re soaking the game hens in a saltwater solution (sometimes with other yummy flavorings added).
The Science Behind Brining: Think of it like this – when you soak the hen in saltwater, the salt goes into the meat. This helps the meat hold onto moisture while it cooks, resulting in a much juicier bird. This process is due to osmosis, where water moves from an area of low salt concentration to an area of high salt concentration, essentially plumping up the chicken.
Flavor Boost: Not only does it keep your game hens juicy, but brining also infuses them with flavor. The salt helps open up the pores of the meat, allowing it to absorb all those tasty herbs, spices, and aromatics you add to your brine.
Tender Meat: Brining also helps break down some of the proteins in the meat, making the game hens incredibly tender. This is particularly helpful for leaner birds like game hens.
Key Factors That Affect Brining Time
Now, let’s talk about the things that can change how long you should brine your game hens. It’s not just about throwing them in a saltwater bath and hoping for the best. Several factors influence the ideal brining period.
Size of the Game Hen
This is probably the most significant factor. A larger game hen will naturally need a longer brining time than a smaller one. Think of it like a sponge; a bigger sponge will take longer to soak through than a tiny one. Here’s a general guideline:
Small Game Hens (about 1-1.25 lbs each): These usually need less brining time.
Medium Game Hens (about 1.25-1.5 lbs each): These will require a bit more soaking.
Large Game Hens (over 1.5 lbs each): These will need the longest brining time.
Type of Brine (Wet vs. Dry)
There are two main types of brines: wet and dry. Each works a little differently.
Wet Brine: This is the most common type, where the game hens are fully submerged in a saltwater solution.
Dry Brine: This method involves rubbing the game hens with salt and other spices. It’s a different process and doesn’t require submersion in liquid, and the timing can be quite different.
Desired Saltiness
The length of brining can also impact the final saltiness of the game hen. Longer brining will result in a saltier bird, which may or may not be what you prefer. If you are new to brining, you may want to start with shorter brining times to avoid over-salting your game hens.
Temperature of the Brine and Refrigerator
Keeping your brine and your game hens cool during the brining process is crucial for food safety. Always ensure your brine is chilled before adding the hens and that your refrigerator is set at a safe temperature (around 40°F or 4°C). Warm temperatures can encourage bacteria to grow, which can make you sick.
Ideal Brining Times for Game Hens
Alright, now for the part you’ve been waiting for – the actual brining times! We’ll look at both wet and dry brines.
Wet Brine Timing
For a typical wet brine, here’s a table that can guide you. Remember, these are guidelines, and you might need to tweak them based on your personal preferences.
| Game Hen Size | Recommended Brine Time |
| —————————— | ———————– |
| Small (1-1.25 lbs) | 4-6 hours |
| Medium (1.25-1.5 lbs) | 6-8 hours |
| Large (over 1.5 lbs) | 8-10 hours |
The Sweet Spot: For most game hens, a brining time of 6-8 hours works well. This allows the salt to penetrate the meat without making it too salty.
Avoid Over-Brining: Never brine for longer than 12 hours. Over-brining can cause the meat to become too salty and mushy. It can also affect the texture of the meat in a negative way.
Dry Brine Timing
Dry brining is a bit different because it doesn’t involve a liquid soak. Instead, you are coating the game hens with salt and other spices.
Dry Brine Time: For dry brining, typically, you want to apply the salt rub at least 2-4 hours before cooking or up to 24 hours if you desire more depth of flavor.
The Importance of Rest: After applying the dry brine, the game hens need to rest in the refrigerator, uncovered. This will help the salt penetrate and the skin to dry out, resulting in crispier skin when cooked.
Step-by-Step Wet Brining Instructions
Let’s go through the actual steps for brining using a wet brine:
1. Choose Your Container: Select a non-reactive container (like glass, stainless steel, or food-grade plastic) that is large enough to hold your game hens and brine.
2. Make the Brine Solution:
For a basic brine, mix about 1/2 cup of kosher salt per gallon of water.
You can add other flavorings like sugar (1/4 cup per gallon), herbs (such as thyme or rosemary), spices (like peppercorns or garlic cloves), or citrus peels.
Heat some of the water with salt and sugar to dissolve it, then add the rest of the cold water to cool it down. It’s essential that the brine is cool before you add the game hens.
3. Submerge the Game Hens: Place the game hens in the container and pour the cooled brine over them, making sure they are completely submerged. If necessary, you can use a plate or a small weight to keep them submerged.
4. Chill in the Refrigerator: Put the container in the refrigerator and let the game hens brine for the recommended time, based on the table above.
5. Rinse and Pat Dry: After the brining time is up, take the game hens out of the brine and rinse them thoroughly under cold water. Pat them completely dry with paper towels before cooking.
Step-by-Step Dry Brining Instructions
And here are the steps for dry brining:
1. Prepare Your Dry Rub: In a bowl, combine kosher salt with other desired spices and herbs. You can use paprika, garlic powder, onion powder, black pepper, or whatever flavors you enjoy.
2. Apply the Rub: Thoroughly rub the salt mixture all over the game hens, making sure to get under the skin and into all crevices.
3. Refrigerate Uncovered: Place the rubbed game hens on a wire rack set over a baking sheet and put them in the refrigerator, uncovered. This step is important for drying out the skin.
4. Rest: Let them rest in the refrigerator for at least 2-4 hours or up to 24 hours. The longer they rest, the deeper the flavor and the crispier the skin will be.
5. Cook: After the resting period, cook the game hens as usual. You don’t need to rinse them, as the salt has already done its work.
Tips for Success with Brining
Here are some additional tips to help you get the best results:
Use Kosher Salt: Kosher salt is better for brining because it dissolves easily and doesn’t contain iodine, which can give a bitter taste.
Don’t Over-Salt: If you’re using table salt, use a little less because it is more concentrated than kosher salt.
Keep it Cold: It’s very important to maintain a consistent cool temperature for food safety reasons.
Don’t Brine Too Long: Always stay within the recommended brining times to avoid over-salting the game hens.
Pat Dry: Always make sure to thoroughly pat the hens dry with paper towels before cooking. This will make the skin extra crispy.
Experiment with Flavors: Feel free to experiment with different herbs, spices, and aromatics in your brine to find your favorite flavor combinations.
Consider Your Cooking Method: Adjust your brining time based on how you are going to cook the hens. For example, grilling or roasting may benefit from slightly shorter brining times, while slow cooking may benefit from longer brining.
Troubleshooting Common Brining Issues
Sometimes, things don’t go exactly as planned. Here are some common problems and how to fix them:
Game Hens are Too Salty: If your game hens are too salty after brining, it means they were brined for too long, the salt ratio was too high, or you used table salt instead of kosher salt. You can try soaking them in cold, fresh water for 15-30 minutes to pull some of the salt out. Next time, reduce brining time or the salt ratio.
Game Hens are Mushy: This can happen when the hens are over-brined, which breaks down the protein too much. Make sure to stay within the recommended brining times.
Uneven Brining: This occurs when all parts of the game hens are not completely submerged in the brine. Ensure the hens are fully submerged and that the brine is evenly distributed throughout the container.
Not Enough Flavor: If you feel like the flavor isn’t very pronounced, consider adding more flavorings to your brine (such as herbs, spices, citrus, or aromatics) and consider a slightly longer brining period (not to exceed recommended time).
Tough Meat: If you are not brining for long enough, you can end up with tough meat. Make sure to brine within the recommended timeframe.
Soggy Skin: If your skin is soggy, this is from not drying the hens well. Always ensure to pat the hens thoroughly with paper towels before cooking to get the best crispy skin.
So there you have it – a complete guide to brining game hens! Remember, it’s all about striking the right balance, and with a little practice, you’ll be making perfectly juicy and flavorful game hens every time. Happy cooking!
The Ultimate Guide to Cooking Cornish Hens like a Pro
Final Thoughts
For optimal results, brine game hens for 2 to 4 hours in the refrigerator. This timing allows the salt and flavors to penetrate, creating juicy and seasoned meat. A shorter brine of two hours works well; longer brining runs the risk of overly salty poultry.
Remember, “how long to brine game hens” depends on personal preference, but staying within this 2-4 hour range is ideal. It provides tender, flavorful game hens that everyone will enjoy.

