To add games to RetroPie, you primarily transfer ROM files to the appropriate system folders via USB, network, or directly through the RetroPie setup menu.
Want to play classic games on your Raspberry Pi? Then you’re probably wondering how to add games to RetroPie. It’s easier than you might think. This guide will quickly show you the common methods to get your favorite titles running on your RetroPie setup. We’ll cover the basic steps, ensuring you can start gaming in no time.

How to Add Games to RetroPie: A Complete Guide
So you’ve got your RetroPie setup humming, and you’re ready to play some games! That’s fantastic. But how do you actually get those games onto your system? Don’t worry; it’s easier than you might think. This guide will walk you through all the different ways to load up your RetroPie with all sorts of classic games. We’ll cover everything from the basic methods to some more advanced techniques. Let’s jump in and get those games playing!
Understanding ROMs and BIOS Files
Before we start loading up our RetroPie with games, it’s important to understand what ROMs and BIOS files are, because these are really necessary for games to work correctly.
What Are ROMs?
ROMs are basically digital copies of game cartridges or discs. Think of them as the game itself, but in a file format that your computer (and RetroPie) can understand. When you play a game on RetroPie, the system is actually reading these ROM files. They come in various file formats like .zip, .smc, .nes, etc., depending on the game system they are for. It’s really important to remember that you should only use ROMs from games that you legally own. Downloading ROMs of games that you don’t own is not legal, and we do not encourage that.
What Are BIOS Files?
BIOS files are a bit different. They are system-specific files that are often needed by some console emulators to work properly, especially for more modern systems like PlayStation or Dreamcast. They essentially contain the information the emulator needs to understand how the original system worked. For example, the BIOS file of a PlayStation tells the emulator what the PlayStation hardware did. Not all emulators need BIOS files, but if they do, your emulator won’t run well until you add the correct BIOS file. It is important to keep in mind that you should only use BIOS files from systems that you have legally owned. Downloading and using BIOS files from system that you don’t own is not legal, and we don’t encourage that. You need the correct BIOS file for the region of your game. For instance, a game that is from Europe might need different BIOS file from an USA game.
Different Ways to Add Games
Now that we understand ROMs and BIOS files, let’s explore how you can get those game files onto your RetroPie. There are several ways, and each has its own benefits and slight differences:
Using a USB Drive
This is probably the easiest method, and it’s great for beginners. Here’s how it works:
- Format Your USB Drive: First, make sure your USB drive is formatted with FAT32. If you don’t know how to do this, connect the drive to your computer, open “This PC,” right click on the USB drive and select Format. On this format settings window, set the File System dropdown to FAT32. Then start the format process.
- Create a “retropie” Folder: On the newly formatted USB drive, create a folder named “retropie”. This is important; RetroPie needs this folder name to find games that you are adding.
- Add Your ROMs: Inside the “retropie” folder, create more folders. Each folder will represent a different game system. Name each of these folder to match the system that you are adding games for. For example, you would name a folder “nes” for Nintendo Entertainment System games, “snes” for Super Nintendo games, “genesis” for Sega Genesis/Mega Drive games, and so on. Place your game ROMs inside the correct folder.
- Add Your BIOS files: If the game system needs BIOS files, create a folder named “bios” inside the “retropie” folder, and put the necessary BIOS files inside this folder.
- Insert the USB Drive into RetroPie: Safely remove the USB drive from your computer and plug it into one of the USB ports on your Raspberry Pi (or whatever device is running RetroPie).
- RetroPie Does the Work: RetroPie should now recognize the USB drive and automatically copy the ROMs and BIOS files to the right places. You should see a message that files are being copied on your screen.
- Restart EmulationStation: After all the files are copied you should restart EmulationStation. You can do this through the RetroPie menu or by pressing F4 and typing emulationstation then pressing Enter. Now you will see that your games are ready to play!
Using a Network Share (SMB)
If you prefer to not use a USB drive, you can add games by network share using SMB. Here’s how:
- Enable Samba Share: First, you need to enable network sharing in RetroPie. To do this, open the RetroPie menu, select “RetroPie Setup,” and go to “Configuration / Tools.” There, choose “Samba” and then “Install Samba.” This is a one-time setup that creates network shares to your RetroPie system.
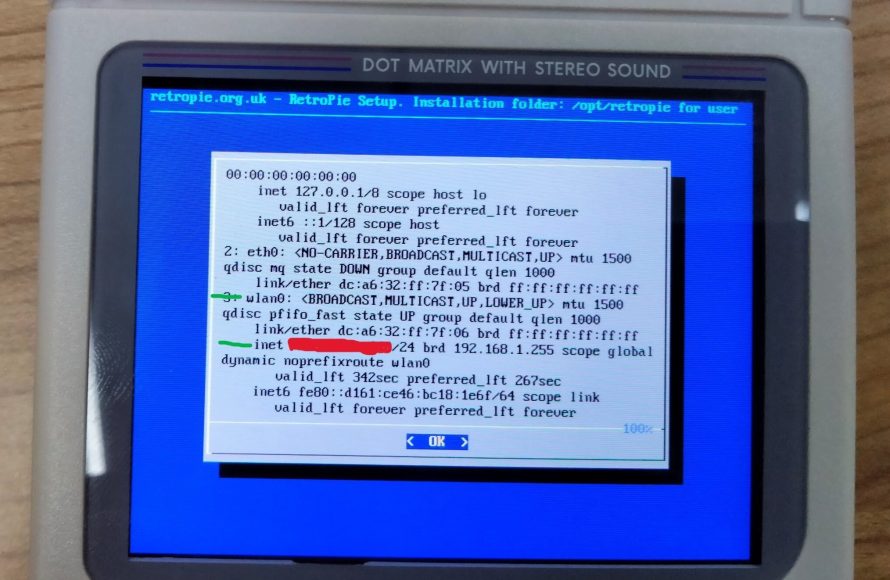
- Find Your RetroPie’s IP Address: In the main menu of RetroPie (the one that shows the game systems), go to RetroPie -> Show IP. Note this IP address, as you’ll need it later.
- Access the Network Share: Open the file explorer on your computer (Windows Explorer on Windows, Finder on macOS). In the address bar, type in two backslashes, your RetroPie’s IP address, and then press Enter. (For example: \\192.168.1.100)
- Add ROMs and BIOS files: You’ll see a bunch of folders. Go to the “roms” folder, and then select the appropriate system folder to add your ROMs. Similarly, if you need to add BIOS files you can go to the “bios” folder and add the BIOS files there.
- Restart EmulationStation: Just like with the USB method, restart EmulationStation to see your newly added games and to make the changes to take effect.
Using network share is a really convenient way to add and remove games, because you don’t need to unplug anything, or move your computer.
Using Secure Shell (SSH)
For more advanced users, SSH offers a direct command-line access to RetroPie. Here’s how to use SSH for adding games.
- Enable SSH: Make sure SSH is enabled in RetroPie’s settings. You can find this option in “RetroPie Setup” under “Configuration / Tools,” then “SSH.”
- Connect via SSH: Open a terminal or command prompt on your computer and use the command ssh pi@your_RetroPie_IP_address and then press Enter. (Replace your_RetroPie_IP_address with the IP address you found earlier). When prompted, type in raspberry as password.
- Navigate to the ROMs Folder: Once connected, use the command cd /home/pi/RetroPie/roms/ then press Enter. Then, use ls command to see available system folders and choose the correct one. For example, you could type cd nes to enter the folder for Nintendo games.
- Copy ROMs Using SCP or other command: Use the scp command to copy your ROMs. For example: scp /path/to/your/roms/your_game.nes pi@your_RetroPie_IP_address:/home/pi/RetroPie/roms/nes/ command will copy your_game.nes to the nes folder on RetroPie. (Replace /path/to/your/roms/ with your local path, and your_game.nes with the actual file). If you need to add BIOS files, you can use the same process and copy files to bios folder, which is located in the /home/pi/RetroPie/ directory.
- Restart EmulationStation: After all transfers, restart EmulationStation to see the games.
Using SSH is a bit more complicated, but it can be really useful if you’re more familiar with the command line interface and if you want to copy a lot of files at once.
Tips for Organizing Your Games
Adding games to RetroPie is just the first step. Here are some helpful tips to keep your game library organized:
Use Folders to Organize
In addition to using the correct system folders, you can use subfolders for specific series or categories of games. This will help you browse through your games more easily. For example, you might create a folder named “Mario” inside the “nes” folder, and then keep all the Mario games there.
Use File Names that make sense
Make sure that your file names are descriptive and easy to understand. If a game file is named something like “g123s.zip,” rename it so that it is easy to recognize. For example, you can rename “g123s.zip” to “Super_Mario_Bros.zip” or “The Legend Of Zelda.nes” or something that is easy for you to recognize.
Scrape Metadata for Beautiful Game Lists
RetroPie can automatically find and download information (metadata) about your games, such as game titles, box art, and descriptions. This makes your game lists look and feel much better.
- Access the Scraper Menu: From the main RetroPie menu, go to “Scraper.”
- Select Your Source: Choose a scraper source. The “ScreenScraper” is a popular choice.
- Scrape All Systems or Games: Pick if you want to scrape all games, or specific system or game, and then wait while it downloads the information.
- Enjoy the Enhanced Look: Once the scraper finishes, your game lists will be so much more visually appealing, and easier to navigate.
Common Problems and Solutions
Sometimes things don’t go as planned, and you might run into some problems. Here are some common issues and how to fix them:
Games Not Showing Up
If your games aren’t showing up in EmulationStation, double-check the following:
- File Format: Make sure that the ROM files are in the right format for the emulator. For example, NES games are typically .nes or .zip.
- Folder Location: Be sure you have placed your ROMs in the correct folder for the correct game system.
- Restart EmulationStation: Sometimes, just restarting EmulationStation is enough to solve this.
Games Running Slowly or Poorly
If games don’t run smoothly, here are some steps to try:
- Check for BIOS Files: Make sure you have the needed BIOS files for games that require it and that these files are correctly placed.
- Try Different Emulators: You can experiment with different emulators for the same system to see if one runs better. You can do this by going to “RetroPie” menu and then into “RetroPie Setup” and “Manage Packages” and choosing a different emulator to install.
- Overclock your system: If you have a Raspberry Pi, sometimes slightly overclocking can make it run smoother. Go to the RetroPie menu, then “RetroPie Setup,” then “Configuration / Tools,” then “Overclock.” But be aware that overclocking can make the system unstable and may cause it to overheat if you overclock it too much.
Game Crashes
If a game frequently crashes:
- Check the ROM: The ROM file itself might be faulty or corrupted. Try finding another ROM of the same game.
- Check the emulator: Try a different emulator, it is possible that one emulator runs better than other.
- Update RetroPie: Make sure RetroPie and its components are updated to the newest versions.
Using Specific Console Systems
Let’s look at some specific systems and their unique requirements, because some systems have extra things that you need to do to get them running.
PlayStation (PS1)
PS1 games require BIOS files. If you don’t have the right BIOS files, your PlayStation games won’t work correctly. Make sure to have these BIOS files in the bios folder.
Nintendo 64 (N64)
N64 emulation can be tricky. Certain games might not run very well because they are very demanding on the hardware, so performance can vary. Experiment with different emulators to see which works best for your particular games. Also some games needs special configuration to run well. N64 also has a lot of different file extensions so you might need to try different ROM types.
Dreamcast
Dreamcast games, just like PS1, require BIOS files to work properly. Also, be aware that Dreamcast games can be very large so they can take up quite some space.
Arcade Games (MAME and FBA)
Arcade games use different emulators (MAME and FBA are most common), and often require the correct version of a specific ROM set that goes with the specific version of MAME or FBA emulator that you are using. These games can be tricky because not all ROM versions are compatible with the emulator version, so you need to pay close attention to which emulator and romset you are using. You might have a lot of trouble trying to use an old ROM with a newer emulator or other way around.
By now you know everything you need to add games to RetroPie. If you are unsure of something, start with the USB method. Then you can move on to other more complicated methods if you feel confident. After trying things a bit, you will be able to load your RetroPie up with all your favorite games. Remember to keep your games organized, use a metadata scraper for a better experience, and troubleshoot any issues you might come across. And remember that using ROMs and BIOS files from games that you have legally purchased is legal, so remember to be fair to game developers! Now, go have some fun playing all your classic games!
How To Add Roms To RetroPie – Raspberry Pi Video Game Card Rom Tutorial – RetroPie Guy
Final Thoughts
Adding games to RetroPie involves transferring ROM files. You can achieve this via a USB drive, network share, or secure shell (SSH). Simply place your ROMs in the appropriate folder for each system.
After transferring, restart EmulationStation for the games to appear. Ensure the file extensions match the emulator and that you adhere to copyright guidelines. This explains how to add games to retropie effectively.

