
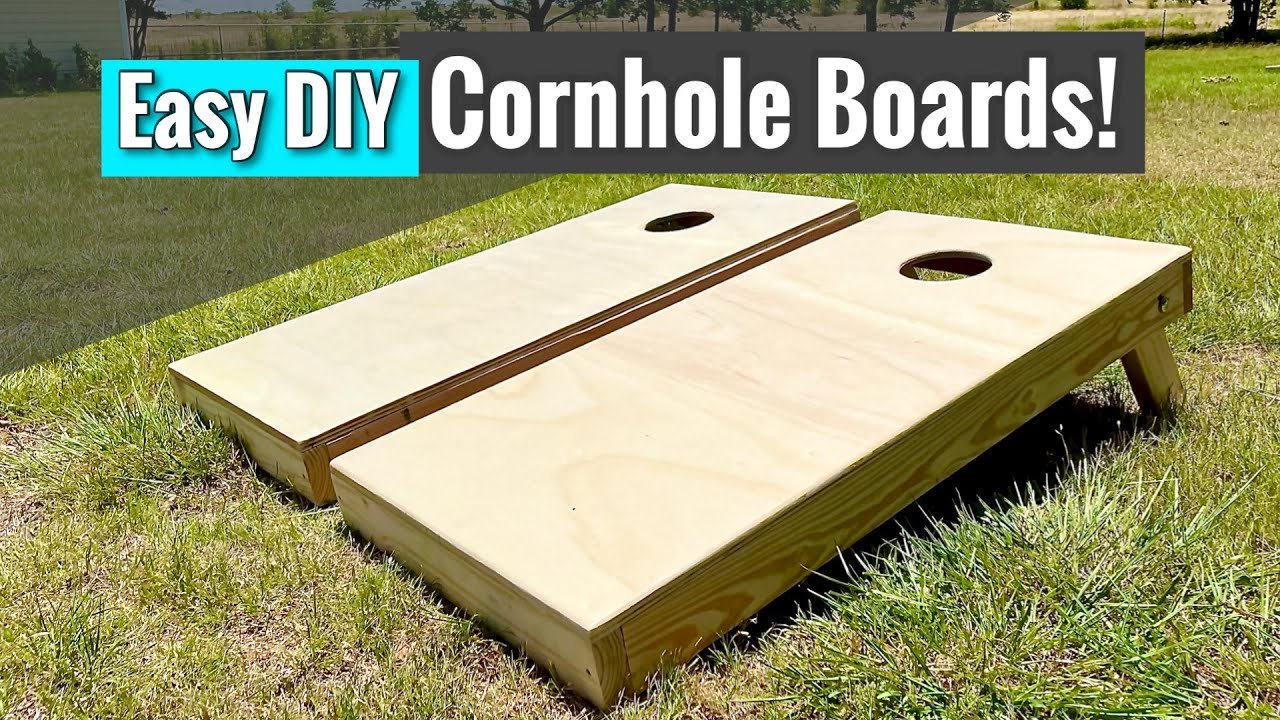
Building a cornhole game involves cutting wood to specific dimensions, assembling a frame, attaching a plywood top with a hole, and adding legs for support.
Want to add some fun to your backyard gatherings? Learning how to build a cornhole game is easier than you might think, even if you don’t consider yourself a woodworker. With just a few tools and materials, you can create your own custom set that will provide hours of entertainment for friends and family.
Building a cornhole set doesn’t require complex skills, making it a perfect project for a weekend. The satisfaction of playing on something you built yourself is truly rewarding. Let’s dive into the steps.

How to Build a Cornhole Game: A Step-by-Step Guide
Ready to get your game on? Building your own cornhole set is a fun project that you can enjoy with friends and family for years to come. This guide will walk you through each step, making it easy even if you’re not a master woodworker. We’ll cover everything from picking the right wood to painting your finished boards. Let’s jump in and start crafting your very own cornhole set!
Gathering Your Supplies
Before you begin, it’s important to have all the materials ready. This will help the project flow smoothly and avoid frustrating mid-project trips to the hardware store. Here’s a list of everything you’ll need:
- Wood for the Board Tops: You’ll need two pieces of 1/2-inch thick plywood, each measuring 24 inches wide and 48 inches long. Baltic birch is a great choice because it’s sturdy and smooth.
- Wood for the Frames: For the frames, you’ll need lumber that is 2×4 inches. You’ll need enough to make two rectangles, 24 inches wide and 48 inches long and the legs.
- Wood for the Legs: You will need more of your 2×4 lumber for the legs. Each leg will be about 12 inches long and have a rounded top.
- Fasteners: You’ll need wood screws (1 1/4 inch and 2 1/2 inch are good), wood glue, and possibly some nails or brad nails if you have them.
- Tools:
- Saw (circular saw, jigsaw, or handsaw)
- Drill
- Measuring tape
- Pencil
- Clamps
- Sander or sandpaper
- 2.5″ hole saw
- Safety glasses
- Finishing Supplies:
- Primer
- Exterior paint (in your chosen colors)
- Polyurethane or other sealant (optional, but highly recommended for outdoor use)
- Paintbrushes or rollers
Cutting the Wood
Now comes the fun part – turning that lumber into the parts for your cornhole boards. Let’s get to cutting! Accuracy is essential for a good playing surface so take your time.
Cutting the Plywood Tops
Start with the plywood. Measure and mark out two rectangles, each 24 inches wide and 48 inches long. Make sure your measurements are accurate! Using your saw, carefully cut along those lines. If you don’t have a saw, the hardware store may cut the wood for you when you purchase it.
Cutting the Frame Lumber
You need to cut the 2×4 lumber to create the frames. For each frame, you’ll need two 48-inch pieces and two 21-inch pieces. The two short pieces, that measures 21 inches, will fit in-between the two longer 48-inch pieces, resulting in the frame being 24 inches wide once assembled. Remember to use your measuring tape to mark the measurements accurately before cutting. Take it slow and use safety glasses.
Cutting the Legs
Now for the legs. Cut four pieces of 2×4 wood to 12 inches. To make them fold easily, we need to round one end of each leg. A simple way to do this is with a hole saw (2.5 inch). Start by making a mark on the center of one end of each leg. Then, use the hole saw and drill about halfway down into the wood. Now, just cut away the rest of the edges to create that rounded edge. This allows the legs to pivot smoothly when folded or extended.
Assembling the Frames
Now that we have the wood cut we can start to piece the frames together. Here’s how:
Joining the Frame Pieces
Now, let’s put the frame together. Apply wood glue to the ends of the 21-inch frame pieces. Place them between the two 48-inch pieces. Make sure to create a rectangle shape with equal lengths of wood on either side. It’s vital that the frame is square, so measure the diagonals (corner to corner). If both diagonals are the same, the frame is square. Once you are sure its square, use clamps to hold the frame pieces together and secure them using wood screws. Screw a couple of screws into each corner so the frames are strong and stable. This will serve as the foundation for your cornhole board. Repeat this process for the second frame.
Attaching the Plywood Tops
With the frames complete, it’s time to put the playing surfaces on. This part is pretty simple, but accuracy is still key.
Securing the Tops
Apply a generous amount of wood glue to the top of each frame. Carefully place a piece of plywood on top of each frame, making sure that it is flush with the frame all around. Use clamps to secure the plywood to the frames. Then, using your wood screws, secure the plywood to the frame, spacing screws every 6-8 inches around the perimeter and some in the center of the frame. Let the glue dry completely for a strong and secure top.
Creating the Cornhole
Now we create the hole! The proper placement of the hole is super important, and we’ll show you exactly where to put it.
Measuring and Cutting the Hole
To find the right spot, measure 9 inches down from the top edge, and 12 inches in from either side on the center line of the plywood. Mark that spot with your pencil. Now, take your hole saw, and using your drill, cut a 6-inch diameter hole at the mark. If you don’t have a hole saw, you can drill a pilot hole in the center and then use a jigsaw to cut the circle, following a line you’ve drawn. Be sure to go slowly and carefully when making your cuts.
Adding the Legs
Legs make our boards functional. Here’s how to attach them.
Attaching the Folding Legs
You will need to cut off the rounded edge of one side of each leg. On the inside of the frame, about 10 inches from the top of each frame, mark a location for each leg. Using your drill, create a pilot hole and secure one of the legs with one wood screw. This screw should be inserted tightly enough to hold the leg securely, but it should still be loose enough to allow the leg to pivot easily. Repeat this on the other side of the same frame and then repeat for the other board. Now that your legs are attached, test that they can fold and unfold properly. When the legs are folded they should sit snug inside the frame.
Sanding and Finishing
Before painting, it’s important to make sure the boards are smooth. Sanding makes the boards look nicer and helps the paint stick better. Let’s get those boards smooth.
Sanding the Boards
Take your sander (or sandpaper) and go over the entire surface of the cornhole board. Make sure you sand down any rough edges or splinters, paying extra attention to the edges and the edges of the cornhole. You want a smooth and even surface. Wipe off all the dust when finished with a damp cloth.
Priming and Painting
Now that your boards are smooth, it’s time to prime and paint. Start with a coat of exterior primer. This will help the paint adhere and give your boards a longer life. Let the primer dry completely. Then, paint your boards using your chosen exterior paint colors. You can do solid colors, designs, whatever your imagination can come up with. It’s a great time to let your creativity shine! Make sure the paint is completely dry before continuing to the next step.
Adding a Sealant
If you plan to leave your boards outside, or want to make them more durable, add a coat or two of exterior polyurethane. This creates a waterproof layer that protects the paint and wood from the elements. Again, let the sealant dry thoroughly. This ensures that your boards will look great for a long time.
Cornhole Bags
No cornhole set is complete without bags! You can buy them ready-made, or you can create your own. Here’s a little about both:
- Purchased Bags: You can find cornhole bags in many colors and designs online or in sports stores.
- Homemade Bags: If you want to make your own, you’ll need fabric, sewing supplies, and filling. Duck cloth works well and you can fill them with dried corn or plastic pellets. There are many great online tutorials that show you how to make a perfect cornhole bag!
Test Your Boards
Now that everything is done, it is time to put your finished boards to the test. Find a flat surface, set your boards up 27 feet apart (from front to front), and get your toss on! Make sure the legs are fully extended before you start.
Tips for Long-Lasting Boards
Follow these tips to keep your boards looking great for many years of play!
- Store them indoors: When not in use, store the boards in a dry place. This will prevent damage from the weather.
- Clean regularly: Occasionally wipe down your boards with a damp cloth to remove any dirt or grime.
- Touch up paint: If you see any scratches or chips, touch them up with a little extra paint to prevent further damage.
- Check the hardware: Keep an eye on the screws and hardware. Make sure everything is still tight and secure.
Building a cornhole game is a very rewarding project, providing countless hours of entertainment with friends and family. It might take a little time and effort, but the feeling of using something that you built yourself is unbeatable. With these instructions you’re now equipped to create your own fun and unique cornhole set. Grab your tools and get started!
How To Make Cornhole Boards! | Easy DIY w/ Free Plans!
Final Thoughts
To build your own cornhole game, gather plywood, lumber, screws, and paint. Cut the wood to the required dimensions for the boards and legs. Assemble the frame and attach the playing surface securely. Add legs with hinges for easy storage, then apply a finish of your choosing.
Remember to cut a six-inch hole centered nine inches from the top. Painting with your preferred colors and designs completes the build. This guide gives you the knowledge for how to build a cornhole game. Now you are ready for some backyard fun.

