
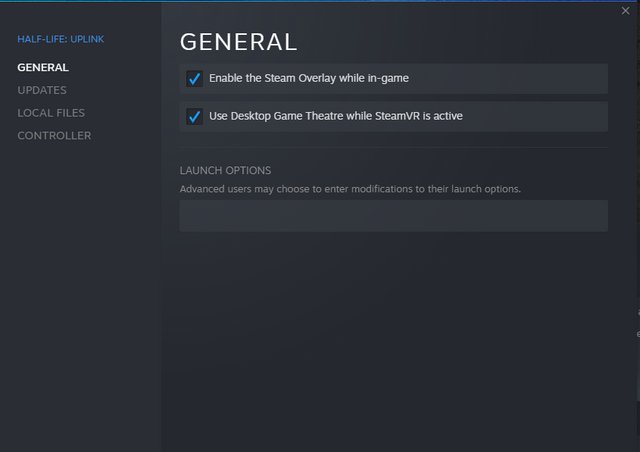
To change Steam icons for non-Steam games, you need to right-click the game in your library, select “Properties,” click “Choose Icon,” and then browse to your desired icon file.
Tired of generic-looking icons in your Steam library for those awesome non-Steam games? It’s a common gripe among gamers who like a clean, customized setup. You might be wondering how to change Steam icons for non Steam games to better reflect what they represent.
The process is pretty straightforward, and it can really enhance the visual appeal of your library. You can use custom images to help your library look organized and feel personalized. It’s a simple tweak but can make a significant difference in your gaming experience.

How to Change Steam Icons for Non-Steam Games
So, you’ve added a bunch of your favorite games to Steam, even the ones that aren’t actually from Steam. That’s awesome! It makes it super easy to launch everything from one place. But, let’s be honest, those generic, boring icons Steam gives non-Steam games? Not so awesome. They’re kind of a letdown, right? They don’t match the cool artwork of the games themselves. They make your library look a bit messy. But don’t worry! There’s a way to fix that. You can absolutely change those default icons and make your Steam library look fantastic. It’s not even that hard, and I’m going to show you exactly how.
Why Bother Changing Icons?
Before we dive into the “how,” let’s quickly talk about “why” it’s worth the effort. Think of it like this: Your Steam library is your personal gaming space. Just like you might decorate your room, changing those icons lets you personalize your game collection. It makes it more visually appealing and, honestly, it just makes it more fun to scroll through. Here’s a few reasons why it’s a good idea:
- Better Visual Appeal: Custom icons make your library look much neater and more organized.
- Easy Game Recognition: When you see the actual game art, it is much faster to pick the game you are looking for instead of looking at the default icon.
- Personalization: It’s a great way to put your own personal touch on your Steam account.
- Fun: It’s a small change, but it makes the experience of using Steam a whole lot more enjoyable.
Understanding Steam Icon Basics
Before we get our hands dirty, it’s important to know the kind of icons we’ll be dealing with. Steam uses a few different types, but for our purposes, we’ll be focusing on the .ico format for your library grid view. These are the small images you see in your list of games.
You can use other image formats such as PNG, JPG but they might not be compatible in all cases or Steam might show errors in those cases, so it is best to stick with .ICO format for game icons.
What is .ICO Format?
The .ico file is a file format used for icons, specifically on Microsoft Windows. They can store images of different sizes and color depths, making them perfect for icons. The best thing about .ico files is that they often have a transparent background. This means that when you change your game’s icon, it won’t look like a square image is awkwardly plopped on top of the background. It’ll blend in beautifully. When you use any other image format, it might not contain transparency and will look ugly on your Steam Library
Finding the Right Icons
The first step in changing your icons is finding the perfect image for your game. You have a couple of options here:
Using Game Art
Sometimes, the game’s own artwork or a high-quality screenshot is all you need. If you have the game installed outside of Steam, you might be able to find some good pictures inside the game’s folder. Look for things like:
- Game Logos: These are often perfect for icons, since they are designed to look good at a small size.
- Box Art: You might be able to find the official box art for the game online.
- In-Game Screenshots: If you find a good screenshot that shows the character or key features of the game, that can make a very good icon.
Remember to pick the image with good resolution, as the low resolution images do not look good as icons.
Websites with Custom Icons
If you don’t find a good image, there are plenty of websites out there that have pre-made custom icons. These are created by other gamers or graphic designers, and they often look fantastic. Here are a few places where you can find good icons:
- SteamGridDB: This site is a treasure trove of custom artwork for all kinds of games, including non-Steam titles. You can find icons, banners, and more.
- IconArchive: This is a site where you can find countless icons for almost anything, including games.
- DeviantArt: This site has a lot of fan-made content. You can find user-made icons with a little searching.
- Google Images: If you can’t find them in the above sites, you can find thousands of images in the Google images, just type the game name and you will see a ton of available images to use as icon.
Creating Your Own Icons
If you are feeling creative, you can make your own icons. This can be a good option if you have a specific vision or can’t find exactly what you’re looking for. You can use a basic image editor like:
- Paint.net: A free image editor that’s easy to use.
- GIMP: A powerful, open-source image editing tool.
- Photoshop: A very professional tool for image editing.
When creating your own icons, keep these tips in mind:
- Size: Steam icons are quite small, so you should create your image at a size that looks crisp in small sizes.
- Transparency: Save your icon with a transparent background for the best look (as discussed above).
- Clear Design: Make sure that the image is clear and easy to see even at small sizes.
Converting Images to .ICO Format
Once you have the image that you want, you’ll likely need to convert it to the .ico format. Here’s how to do it:
Online Converters
There are many online converters you can use. Here are some popular ones:
- Convertio: A fast and reliable online converter.
- OnlineConvertFree: This converter is very easy and you can also convert a bunch of images at the same time using this converter.
- IcoConvert: This site has been designed for icon conversion and has many useful features.
The process is usually pretty similar for these sites:
- Upload your image file (PNG, JPG, etc.).
- Choose .ico as the output format.
- Download the converted .ico file.
Using Image Editing Software
Image editing software like GIMP or Photoshop can also save images as .ico files, if you prefer to do it locally:
- GIMP: Open the image, then go to “File” > “Export As.” In the “Select File Type (By Extension)” dropdown, choose “Microsoft Windows Icon” and save your file.
- Photoshop: You’ll need a plugin to be able to save as .ico. Search online for “Photoshop .ico plugin” to find and install one. Once installed, you can save the file with the .ico extension.
Choose the method that is most comfortable for you. I recommend online converters because they are easy and fast and don’t need any software installation on your computer.
Step-by-Step Guide to Changing Your Steam Icon
Now for the fun part – actually changing the icon! Here’s how to do it:
- Launch Steam: Start Steam and open your game library.
- Find Your Non-Steam Game: Locate the non-Steam game that you want to customize. It’s probably rocking the default, generic icon right now.
- Right-Click the Game: Right-click on the game’s name in the list.
- Select “Properties”: A menu will pop up. Click on “Properties.”
- Click “Change Icon…”: A new window will open. Click on the “Change Icon…” button. It’s usually near the top of the window.
- Browse for Your Icon: Navigate to the location where you saved your custom .ico file. Select the file and click “Open”.
- Confirm Your Change: Now click on “OK” or “Save” in the “Properties” window.
And that’s it! Your game should now have a shiny new icon. If you don’t see the change right away, restarting Steam will usually fix that. It might take a few seconds to show the new icon in the library.
Changing Icons in Other Steam Views
The above steps change the icon in your library grid view, which is how you normally view your library. However, Steam has other views, like list view and big picture mode. You might also want to change the image that appears on your game page when you select the game. Here’s how you do that:
Changing the Game Logo
The game logo is the wide image that appears at the top of your game page on Steam. This logo is separate from the icon and must be changed differently:
- Go to “Properties”: Right-click on your game, and then go to “Properties” like you did for changing the icon.
- Select “Set Custom Logo”: In the properties window, select the “Set Custom Logo” button.
- Browse for Logo: Browse to the location of your saved logo file, and then click OK. This image should be wider than it is tall.
Changing the Game Banner
The game banner is the larger image that appears in other areas of Steam like Big Picture mode. You can change this in the same properties window:
- Go to “Properties”: Go to properties of the game in your Steam library.
- Select “Set Custom Background”: In the properties window, select the “Set Custom Background” button.
- Browse for Banner: Browse to the location of your saved banner file, and then click OK. This image should be a wide image with a standard aspect ratio.
Troubleshooting Common Problems
Sometimes things might not go as smoothly as planned. Here are a few common issues and how to solve them:
Icon Not Changing
If the icon doesn’t change after following the steps, try these:
- Restart Steam: Sometimes, Steam just needs to refresh to apply the changes. Fully close Steam and then open it back up.
- Check File Format: Make sure that the image file is in the .ico format and not another format.
- Check the File Path: Make sure the location where your icon is saved is correct. If you move the image later, Steam might not be able to find it.
Low-Quality Icon
If the icon looks blurry or low quality, here’s what might be wrong:
- Low Resolution Image: The original image might be too small, or have a low resolution. Try to find a high-resolution source image.
- Incorrect Scaling: Make sure the image you are using is a good size. A very large image will get scaled down and might lose quality in the process.
- Image Compression: When the images are compressed, they might lose their quality, so avoid compressing your images.
Transparent Background Not Working
If your icon has a weird white box around it instead of a transparent background, check these things:
- Check Transparency: Make sure your original image actually has a transparent background. Check in your image editing program.
- Check Converter Settings: If using an online converter, some converters might remove transparency. You should use a converter that keeps transparency.
Keeping Your Icons Organized
Once you start changing icons, you might want to keep a tidy folder where you store all of your custom .ico files. This will make things easier when you want to change an icon or use it for another game later. You can keep this folder in your Documents folder, or anywhere else that is convenient. Also, make sure that your custom image files are saved somewhere safe. If you delete the source file, Steam might revert to its default icon.
Changing your non-Steam game icons is a great way to make your Steam library look exactly how you want it. It adds a little bit of personality and a lot of fun to your gaming experience. Don’t settle for those generic icons – get creative and make your library uniquely yours! By following these steps, you can easily change the look of all your non-Steam games. You can personalize your library and make it a much more enjoyable and organized experience. Happy gaming, and enjoy your awesome new game icons! Remember, even small changes can make a big difference.
HOW TO CHANGE ARTWORK FOR NON STEAM GAMES!!
Final Thoughts
Changing Steam icons for non-Steam games improves your library’s visual appeal. You achieve this by right-clicking the game, selecting “Properties”, then “Change Icon.” Browse to your custom icon file and apply the change.
This simple process allows you to personalize your game collection. Remember the icon file must be a valid file. You have complete control over how your library appears.
Essentially, this is how to change Steam icons for non Steam games. You can now maintain consistent aesthetics. Enjoy a personalized gaming experience.

