To change which monitor a game is on, use the game’s settings menu to select the display, or use Windows display settings to make your preferred monitor the main display before launching the game.
Have you ever launched a game only to find it appearing on the wrong screen? It can be frustrating when you just want to jump in and play. Learning how to change which monitor a game is on is quite simple and can save you a lot of hassle.
Most games allow you to choose your display within their graphics settings. However, sometimes the game doesn’t offer a direct option. There are other ways to do that. The operating system’s display settings offer a way to ensure games launch on the monitor you prefer.

How to Change Which Monitor a Game is On
Okay, so you’ve got more than one monitor hooked up to your computer, and that’s awesome! It means more space for your stuff, and maybe even a cool place to watch videos while you’re gaming. But sometimes, a game decides it wants to hang out on the wrong screen. Maybe it’s showing up on your work monitor instead of your big gaming display, or perhaps you want to move it to a different screen so you can chat with friends on your main one. Whatever the reason, figuring out how to move your game to the correct monitor can feel like a little puzzle. Don’t worry; it’s not as tricky as it seems. This article will guide you through the different ways you can tell your games which screen they should be using, and we’ll cover different scenarios and operating systems.
Understanding Monitor Settings
Before we jump into moving games, it’s a good idea to know a little about how your computer sees your monitors. Your computer assigns each of your displays a number and decides which one is your “main” display. This main display is usually where your desktop icons and taskbar appear. When a game launches, it often defaults to using this main display. However, you can change which monitor is the main one and rearrange your monitors in your system’s settings.
How to Identify Your Monitors
First, let’s learn how to identify your monitors. Often, the computer will show numbers or identifiers on screen when it is trying to identify which screen is which. But, what if you want to figure it out later? Here are some tips:
- Check the Display Settings: Go into your system’s display settings (we’ll show you how in the next section) and usually it will show a diagram of your connected screens with numbers on them. This will help you figure out which monitor is which.
- Physically Look at the Cables: See which port on your computer is plugged into which display, if it is practical to do so. HDMI 1 might be Monitor 1, while HDMI 2 is Monitor 2, for example. But this can vary from system to system, so it isn’t the best option.
- Test by Dragging: You can also test which display is which by clicking and dragging an open window across your screen. Whichever screen the window shows up on is how your computer has identified your monitors.
Accessing Display Settings
The location of your display settings depends on whether you use Windows or macOS.
Windows Display Settings
Here’s how to find the display settings in Windows:
- Right-click on an empty space on your desktop.
- Select “Display settings” from the menu.
- You’ll now see a screen with options to adjust your displays, which will often also show the identifier numbers on the screen images.
macOS Display Settings
Here’s how to access display settings on macOS:
- Click on the Apple menu (the apple icon) in the top-left corner of your screen.
- Select “System Settings” (or “System Preferences” on older macOS versions).
- Click on “Displays.” This will open the settings for your monitors.
Different Ways to Move Games to a Different Monitor
Now that you understand a bit about how your computer sees your monitors, let’s get to the fun part: moving your games! There are several ways to do this.
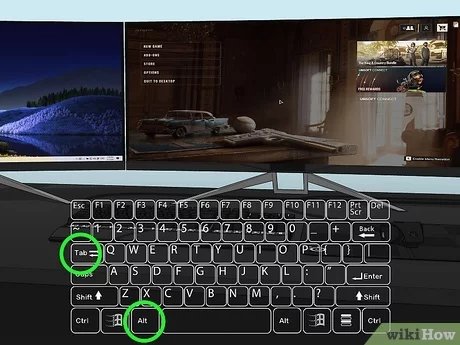
Method 1: Using Windows Key + Shift + Arrow
This is the quickest and easiest way to move a game that’s currently in windowed mode. If your game is full screen this may not work so you might have to go to the game’s graphic settings to change to windowed mode first, then use this method, then go back to full screen.
- Make sure the game is running and is in windowed mode. If the game doesn’t have a full window, you will have to change this in the game options.
- Press the Windows key + Shift key, and then tap either the left or right arrow key.
- Each time you tap the left or right arrow, the window should “hop” to the next monitor.
This method may not work with every game. It is a very reliable and quick method, but some games may have trouble doing this. If this method doesn’t work try some of the options listed below.
Method 2: Using Game Settings
Most games have built-in settings that allow you to select which monitor they display on. This is often the most reliable method, although the steps might differ a little between games. Here’s what you need to do.
Finding the Display Settings in Games
First, find the game’s settings menu. This is normally found in the main menu. Common names for this setting are:
- Options
- Settings
- Graphics
- Video
- Display
Selecting the Monitor
Once you’re in the graphics settings, look for a display option. This setting might look like:
- “Display,” followed by a dropdown.
- “Monitor,” also often followed by a dropdown.
- “Screen,” again, likely followed by a dropdown.
- Or something similar.
In this dropdown, you should see a list of your connected monitors, often identified by their numbers. Select the monitor you want your game to display on, and then save your settings.
Note: Sometimes, you’ll need to restart the game for the changes to take effect, so don’t worry if you don’t see it change right away.
Example Using “XYZ Game” (Replace “XYZ Game” with Your Game’s Name)
Let’s say you’re playing “XYZ Game.” This is what the steps could look like:
- Start XYZ Game.
- Go to the “Main Menu.”
- Click on “Options” or “Settings.”
- Select the “Graphics” or “Video” tab.
- Look for the “Display” or “Monitor” setting.
- Choose your desired monitor from the dropdown menu.
- Click “Apply” or “Save.”
- If prompted, restart the game.
Method 3: Setting the Primary Display
If your game always seems to start on the wrong monitor, you might want to consider changing your primary display (sometimes called your main display). This will make that monitor the default location for all applications. Remember, though, that this will change the locations of your icons and taskbar.
Changing the Primary Display in Windows
- Right-click on the desktop and select “Display settings.”
- Click on the monitor you want to be your primary display in the diagram.
- Scroll down to “Multiple displays” and tick the box for “Make this my main display.”
- Click “Apply” to save your changes.
Changing the Primary Display in macOS
- Click on the Apple menu and go to “System Settings” (or “System Preferences”).
- Click on “Displays.”
- Click the “Arrangement” tab.
- Drag the white menu bar from the monitor you are currently using to the monitor you want to be primary.
Method 4: Borderless Windowed Mode
Some games offer a “Borderless Windowed” or “Fullscreen Windowed” mode. This mode makes the game look like it’s in full-screen, but it’s actually a window without a border. This can often make moving the game to another monitor with the “Windows + Shift + Arrow” method much more seamless and convenient.
How to Switch to Borderless Windowed Mode
You’ll usually find this option in the game’s graphics settings, alongside the option to switch to a normal window, or full screen.
Method 5: Editing Game Configuration Files
For some games, especially older ones, you may have to dive into the game’s configuration files. These are text files that contain settings for the game, and sometimes you can manually tell the game which monitor to use by changing a value in one of these files.
Warning: Modifying game configuration files can sometimes cause problems with the game if you make the wrong changes. Make sure you know what you’re changing and be sure you have a backup of the config before you change it. If you’re not comfortable with it, then try the other options. Don’t change anything if you don’t know what you’re doing.
Finding the Configuration File
The location of configuration files can vary widely from game to game. You’ll have to figure out the location of the files for each game. Common locations of these file include:
- The game’s installation directory (where the .exe file is located).
- The “Documents” folder, often under “My Games” or a folder with the game’s name.
- User’s “Appdata” folder, which is in the user’s main directory.
Editing the Configuration File
Once you’ve found the correct configuration file (usually a file ending in .ini, .cfg, or .txt), open it using a text editor like Notepad (Windows) or TextEdit (macOS). Look for any options related to display, monitor, or screen. This could be something like:
- DisplayDevice=0
- Monitor=1
- Screen=2
- Or something similar.
The numbers usually correlate with your monitors, where 0 might be your first monitor, 1 your second, and so on. Change the number to match your desired monitor. Save the file, and restart your game.
Note: Some games do not have config files that can be changed by the end user, so this option may not be available.
Troubleshooting Common Issues
Sometimes, things don’t go as planned. Here are some common issues and how to handle them:
Game Won’t Switch Monitors
If a game refuses to switch to your preferred monitor, try these steps:
- Restart the game: Often, simply restarting the game can help fix issues.
- Update Graphics Drivers: Make sure your graphics card drivers are up to date, as outdated drivers can cause display problems. You can update them by going to your graphics card manufacturer’s website (Nvidia or AMD) or through your Windows device manager.
- Try a Different Method: If one method isn’t working try one of the others, such as editing the game’s config file.
- Check for Game Updates: Developers often release patches that fix display problems.
Game Only Displays on One Monitor
If your game shows only on one monitor no matter what, try these:
- Primary Display Settings: As described before, verify that the display you want your game to display on is set as the primary display. This is different than actually selecting the display within the game.
- Full Screen Settings: Be sure you’ve tried to change the game from full screen to windowed or borderless window mode. It is much easier to switch monitors when the game is in one of these modes, and not full screen.
- Game Options: Make sure that you have gone to the game’s graphics settings and selected the correct monitor.
Mismatched Resolutions or Scaling
Sometimes, your game might display with the wrong resolution or scaling on your second monitor. To correct that, do the following:
- Resolution Setting: Go into the game settings and check that your resolution is appropriate for your monitor.
- Windows Display Settings: Ensure that your scaling and resolution are correct for your display in the windows or MacOS settings.
If the in game resolution is wrong and can’t be fixed, you may have to adjust the screen resolution within the Windows or Mac Display settings. Ensure you have selected the recommended settings for your device, or the same as your other monitor.
Game is Laggy on the Secondary Monitor
If the game is laggy on the secondary monitor, here are some things to try:
- Check your cables: Ensure that your display cables are connected correctly and not damaged. It may help to try a new cable if you have one.
- Monitor’s capabilities: Make sure your monitor can handle the same refresh rate as your main display. Sometimes the second monitor doesn’t have the same performance, and the game can lag.
- Driver Updates: Make sure your drivers are up to date, especially your GPU drivers.
If none of these steps make the game less laggy, then your computer might be having issues keeping up with the game.
Changing which monitor a game is on doesn’t need to be a struggle. By understanding your monitor settings and the various ways you can control where your game displays, you can easily get your games running on your preferred screen. Whether you use the quick “Windows + Shift + Arrow” method, dig into the game’s settings, or adjust your primary display, you can take control of your multi-monitor setup and enjoy your games the way you want. Remember, it’s all about understanding how your computer sees your monitors and where your settings options are.
How to Open Games on a Certain Monitor (Best Tutorial)
Final Thoughts
To change which monitor a game is on, try using the Windows key + Shift + Left/Right arrow keys. This method quickly moves the active window. Alternatively, adjust the game’s display settings menu, selecting your desired screen.
You can also configure monitor settings via your graphic card’s control panel. The steps may vary depending on the software you use but generally, its easy to navigate. For most games the in-game settings offer a simple way for moving the active display to desired screen.
Therefore, knowing how to change which monitor a game is on is a great skill. Each approach provides a different but effective way to manage your game display.

