
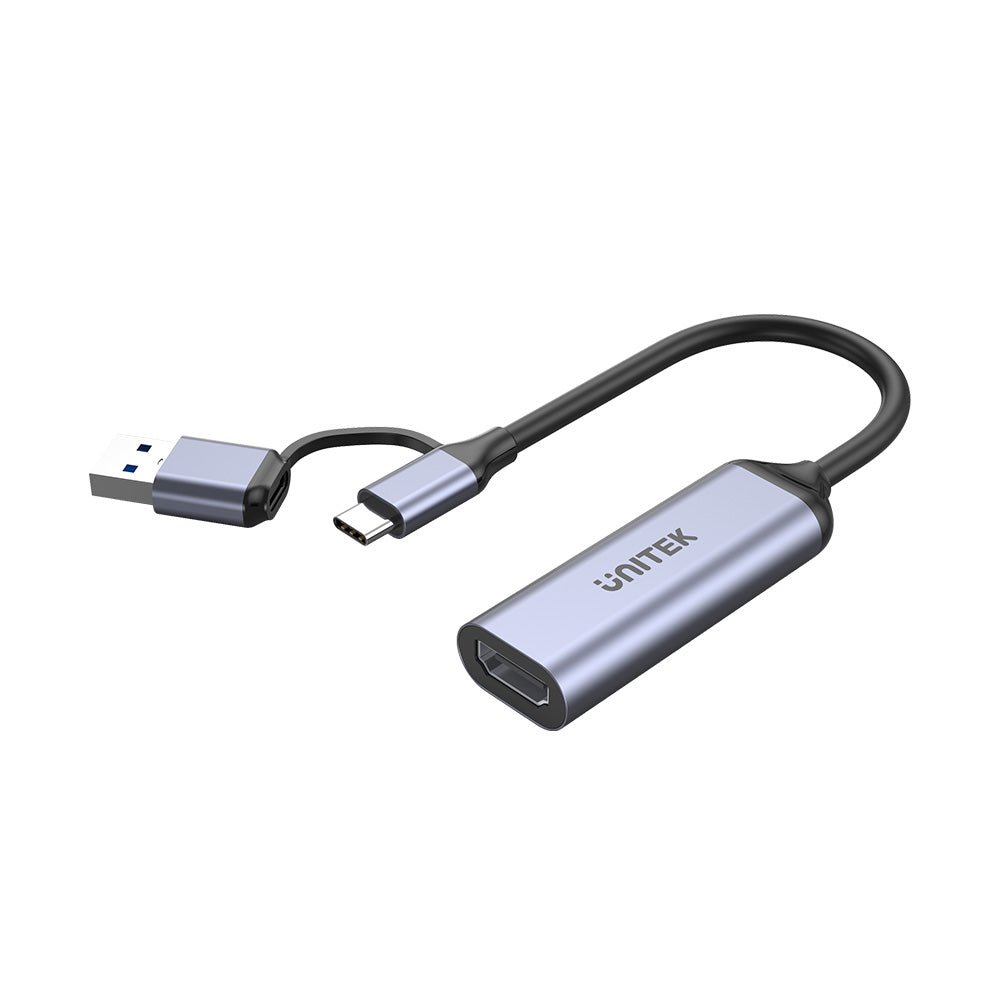
Connecting an HDMI output from your console or PC to a USB Type-C port on your computer requires an HDMI to USB Type-C capture device. This device converts the video signal, allowing you to record or stream your gameplay.
Want to share your epic gaming moments with the world? Many gamers are curious about how to game capture with hdmi to usb type c. It’s becoming a popular way to record and stream due to the convenience and speed of USB Type-C connections.
This method is surprisingly straightforward when you have the right equipment. An HDMI capture device is key, as it converts the video for your computer. You’ll need the device and your gaming setup to get started.

How to Game Capture with HDMI to USB Type-C
So you want to share your awesome gaming skills with the world? Or maybe you just want to record your gameplay to look back on your epic wins (and hilarious fails!). Great news: capturing your game footage is easier than ever, especially if you’re using an HDMI to USB Type-C setup. This method allows you to get that gaming action onto your computer for recording, editing, and streaming. Let’s explore how it works and get you started!
Understanding the Basics
Before we jump into connecting cables, it’s important to understand what we’re actually doing. Imagine your gaming console or PC is like a movie camera, and your monitor or TV is like the big screen where everyone sees the show. Your game capture device is the special tool that takes the video from the “camera” and puts it onto your computer, like a projector sending the image to a recording device.
What is HDMI?
HDMI stands for High-Definition Multimedia Interface. It’s a fancy name for the cable that sends both video and audio signals from your game console, computer, or other devices to your screen. It’s like a super-powered TV cable that can handle really clear pictures and sound.
What is USB Type-C?
USB Type-C is a newer type of USB connection that’s found on many computers, phones, and other devices. It’s small, it’s reversible (no more fumbling to plug it in!), and it can carry lots of information, including video. In our case, it’s the way we get that game footage from the capture device to your computer.
Why Use HDMI to USB Type-C for Game Capture?
Using an HDMI to USB Type-C connection makes game capture convenient and easier. Here’s why:
- Simplicity: The connection is usually plug-and-play. No complicated setups or extra power supplies are required for many devices.
- Portability: Capture devices that use this connection are often smaller and easier to carry around.
- Speed: USB Type-C is fast, allowing for smooth video and audio transmission for a better recording experience.
- Compatibility: Most modern computers and gaming devices support both HDMI and USB Type-C, making them compatible for a variety of setups.
Gathering Your Gear
Before you start recording, you need to collect all the necessary equipment. Here’s a list of the things you need:
- Gaming Source: This is what you’re going to capture. It could be a PlayStation, Xbox, Nintendo Switch, or even another computer.
- HDMI Cable: This cable will connect your game source to the capture device.
- HDMI to USB Type-C Capture Device: This is the most important piece! This little box is what takes the HDMI signal and changes it into a format your computer can understand. It needs to have an HDMI input and a USB Type-C output.
- USB Type-C Cable: This cable will connect the capture device to your computer.
- Computer: You’ll need a computer (laptop or desktop) with a USB Type-C port, and recording software.
- Recording/Streaming Software: You’ll need software to record or stream your captured gameplay. Common options include OBS Studio (free), Streamlabs Desktop (free), and XSplit (paid).
Choosing the Right Capture Device
Choosing the right capture device can seem complicated, but here are the key things to think about:
- Resolution and Frame Rate: Look for devices that support the resolution (like 1080p or 4K) and frame rate (like 60fps) that you want to record or stream at. If you want to record at 1080p at 60fps, make sure your device supports it.
- Pass-Through: This feature allows you to play your game on your monitor or TV while also recording it on your computer, without experiencing any lag.
- Compatibility: Make sure the capture device works with your operating system (Windows, macOS, Linux).
Tip: Read reviews and check forums before purchasing a device to see what other people have to say about it.
Connecting the Setup
Now for the fun part – connecting all the pieces together! Here’s a step-by-step guide:
- Connect Your Game Console/PC to Capture Device: Plug one end of the HDMI cable into the HDMI output of your game console or PC, and the other end into the HDMI input of your capture device.
- Connect the Capture Device to Your Computer: Use the USB Type-C cable to connect the USB Type-C port on the capture device to a USB Type-C port on your computer.
- Connect Your Monitor/TV (If Using Pass-Through): If your capture device has HDMI output (pass-through), use another HDMI cable to connect that port on your device to the HDMI input on your monitor or TV.
- Power Up: Turn on your game source and computer. If your capture device requires external power, connect it according to manufacturer’s instructions.
Your setup should look something like this:
(Imagine an image showing the connections here: Game Console -> HDMI -> Capture Device -> USB Type-C -> Computer; if pass-through is being used: Capture Device -> HDMI -> TV/Monitor).
Setting Up Your Recording Software
Now that all the hardware is connected, it’s time to get your recording software ready. Let’s use OBS Studio as an example since it’s a popular free option.
Setting Up OBS Studio
These steps are general and might vary slightly depending on your specific setup and OBS Studio version.
- Download and Install OBS Studio: Go to the official OBS Studio website and download the correct version for your operating system, then install it.
- Open OBS Studio: Start the application. You’ll see a blank window (or if you’ve used it before, the last configuration).
- Add a Source: In the “Sources” box at the bottom of the screen, click the “+” button to add a new source.
- Choose “Video Capture Device”: Select “Video Capture Device” from the list.
- Name the Device: Give it a name (like “Game Capture”).
- Select Your Capture Device: In the Properties window that pops up, find and select your capture device from the “Device” dropdown menu. It might be named something like “USB Video” or the specific name of your device.
- Adjust Settings: You might need to adjust some settings, such as the resolution and frame rate, to match your game’s output and desired recording settings. If you see a video feed, you’re on the right track.
- Create a Scene: You’ll need a scene to contain all your sources. If one doesn’t already exist, in the “Scenes” box, click on “+” to add a new scene, and name it something appropriate, like “Game Capture” or “Gameplay”.
- Add Other Sources (Optional): You can add other sources to your scene like your webcam feed, game audio, and any overlay graphics you want.
- Configure Audio: In the “Mixer” section, adjust your audio input settings, such as your game audio. Make sure the audio levels are appropriate so they don’t overpower or get drowned out by other audio sources. You may need to select your audio device and adjust the volume accordingly.
- Set Up Recording Settings: Click “Settings” at the bottom right of the OBS Studio window. Then, go to “Output” and then to the “Recording” section. Here, you can choose where you want to save your recordings, what file format you want them to be (MP4 is common), and what quality you want.
- Start Recording: Click “Start Recording” in the main OBS Studio interface when you’re ready. When you’re done, click “Stop Recording”. You will find your recorded footage in the location you specified in the settings.
Basic OBS Settings for Good Recording
Here are some basic guidelines for the best recording quality. Keep in mind that the perfect settings will vary depending on your PC’s processing power and what you’re trying to record:
- Resolution: Choose a resolution that matches your game’s resolution, 1080p is good for many, or 720p if your computer is older.
- Frame Rate: 60 fps is the standard for smooth game recording, 30fps is a lower-resource option, but may not look as good in action.
- Bitrate: Bitrate refers to the amount of data used for your recording. A higher bitrate means better quality, but also a bigger file size. 4000-6000 kbps is good for 720p60, and 8000-12000kbps for 1080p60. It is important to experiment with this based on the game and your recording quality and needs.
- Encoder: Use x264 for CPU encoding (will use your CPU resources) or NVENC (Nvidia cards) or AMD VCE (AMD Cards) if you have these GPU’s respectively. Experiment with this, and check your computer’s performance while recording. If you are experiencing lag, choose a different setting.
Troubleshooting Common Issues
Sometimes things don’t go as planned. Here are a few common problems and how to fix them:
- No Signal: Double check all your cable connections. Try a different HDMI cable, and different USB Type-C ports. Also check that you are using the correct output for your source, some PC’s may have both an integrated and dedicated GPU outputs.
- Black Screen or Video Display Problems: Update the drivers for your capture device. You can usually find these on the manufacturer’s website. Check that your capture software settings match your resolution settings on your source. Try setting it to a generic resolution such as 1080p, 720p, or 480p, before trying higher settings.
- Lag or Stuttering: Reduce your recording settings (resolution, frame rate, bitrate). Also, close unnecessary programs on your computer to free up resources.
- Audio Problems: Ensure that the correct audio input is selected in your recording software settings and that the levels are properly adjusted. It is often worth checking multiple sources and different settings if you are having audio problems.
Don’t be afraid to Google your specific problem, and check the manufacturer’s website for support. There’s a lot of help available online!
Tips for Quality Game Capture
- Clean Audio: Make sure you have a good microphone and avoid background noise for clear audio commentary.
- Good Lighting: If you’re using a webcam, have good lighting in your room so that people can see you clearly.
- Practice: Before recording something important, do some test recordings to get your settings and levels right.
- Editing: Consider editing your recordings with video editing software to remove mistakes or add effects to help improve your content.
- Stay Consistent: Maintain consistency in terms of video and audio quality across your streams or videos.
Capturing your gaming adventures with HDMI to USB Type-C is a straightforward way to start sharing your gaming with the world. By following this guide, you’ll be on your way to recording amazing gameplay in no time. Enjoy the process, experiment with your setup, and have fun!
How To Setup A Capture Card| Cheap 4k Capture Card
Final Thoughts
Connecting an HDMI source to your computer using a USB Type-C capture device is straightforward. You plug your console or other device into the HDMI input of the adapter. Next, connect the USB Type-C end into your computer.
Software then interprets the captured video signal. This method allows for recording or broadcasting gameplay. These steps outline how to game capture with hdmi to usb type c easily.
Using a USB type-C converter creates flexibility and convenience in your video capture process. It gives you portable capturing capability from HDMI sources.

